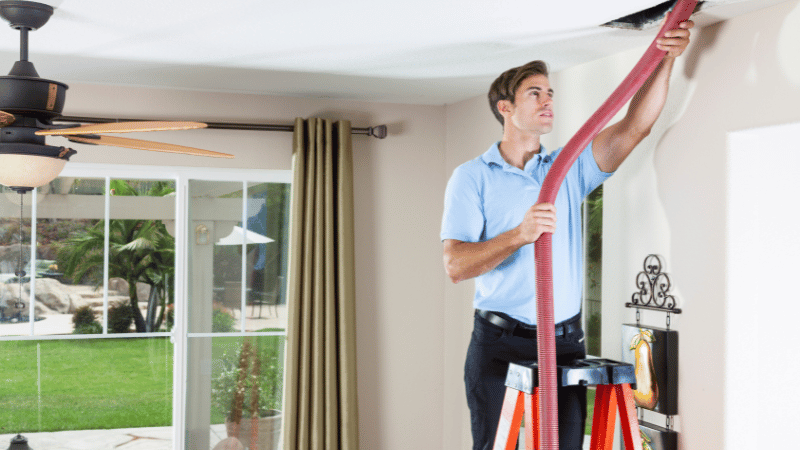
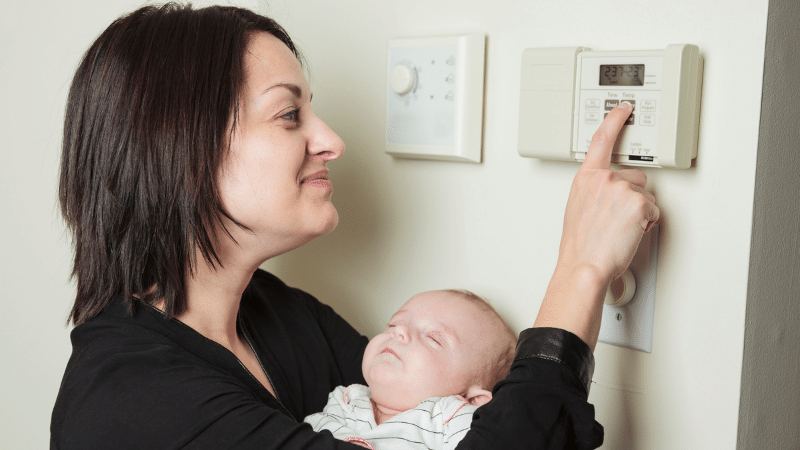
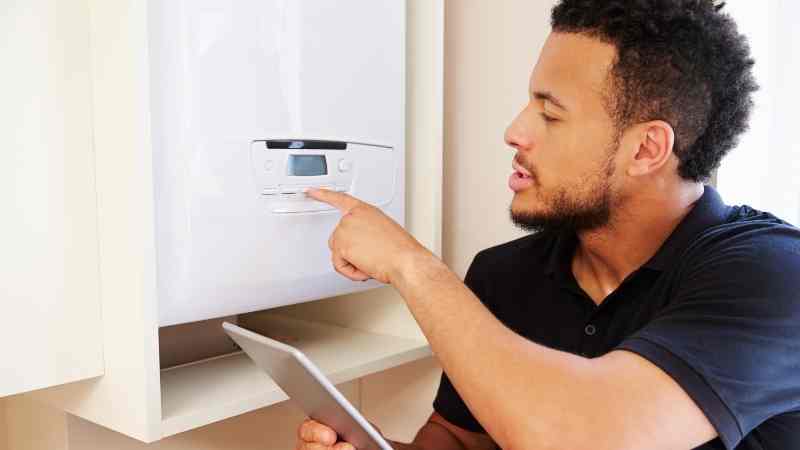
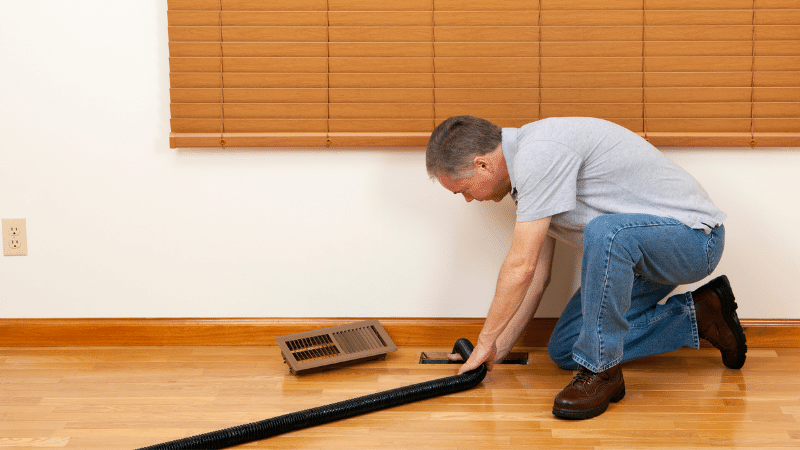
If you’ve recently scheduled an air duct cleaning appointment, or you’re considering it, this info is for you. We’ll give you the lowdown on how to prepare and what you’ll experience when a local air duct cleaning expert arrives at your home.
What is air duct cleaning?
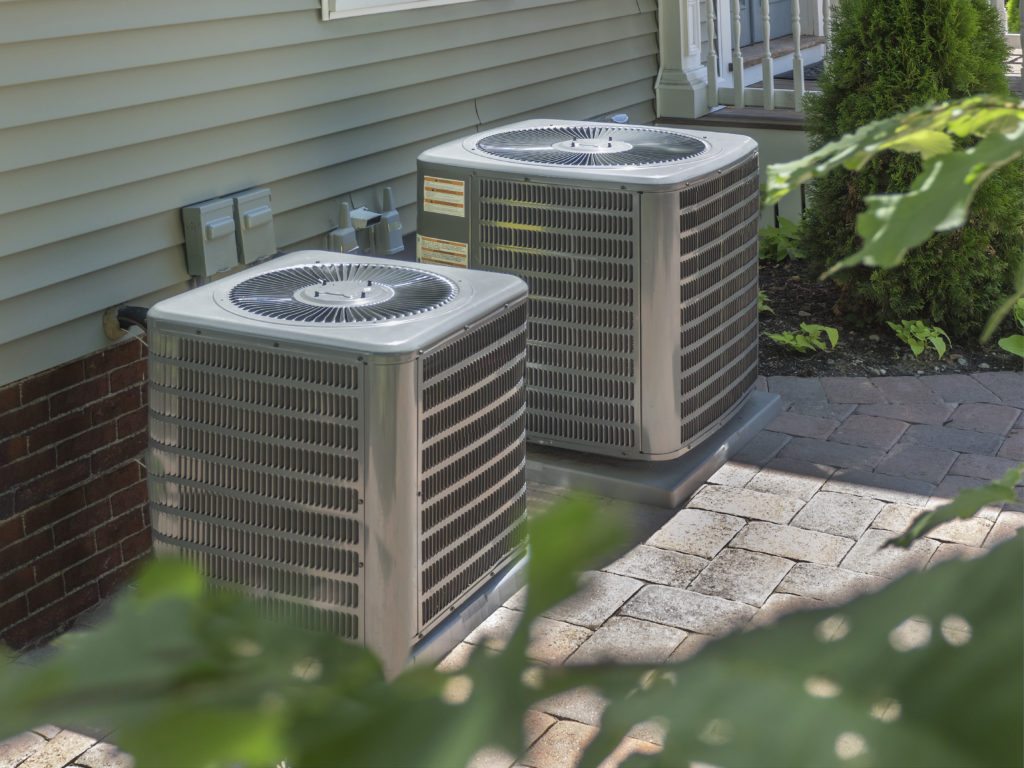
Air duct cleaning is the thorough cleaning of various components of forced air systems that heat and cool your home. Most duct cleaning companies clean the supply and return ducts and registers, diffusers and grilles, system coils, condensate drain pan, fan motor, and the cabinetry that houses the system.
Each service provider tailors their offering, so ask for a detailed list of what’s included before hiring a technician. It’s recommended you have your ducts cleaned as needed. For most homes, that’s once every three to five years.
Mold growth is visible in the ducts or on any part of the heating and cooling system
Your home environment may be causing unusual sickness or allergies for those in your home
Book a local pro for air duct cleaning
Book now
Getting your home ready for air duct cleaning
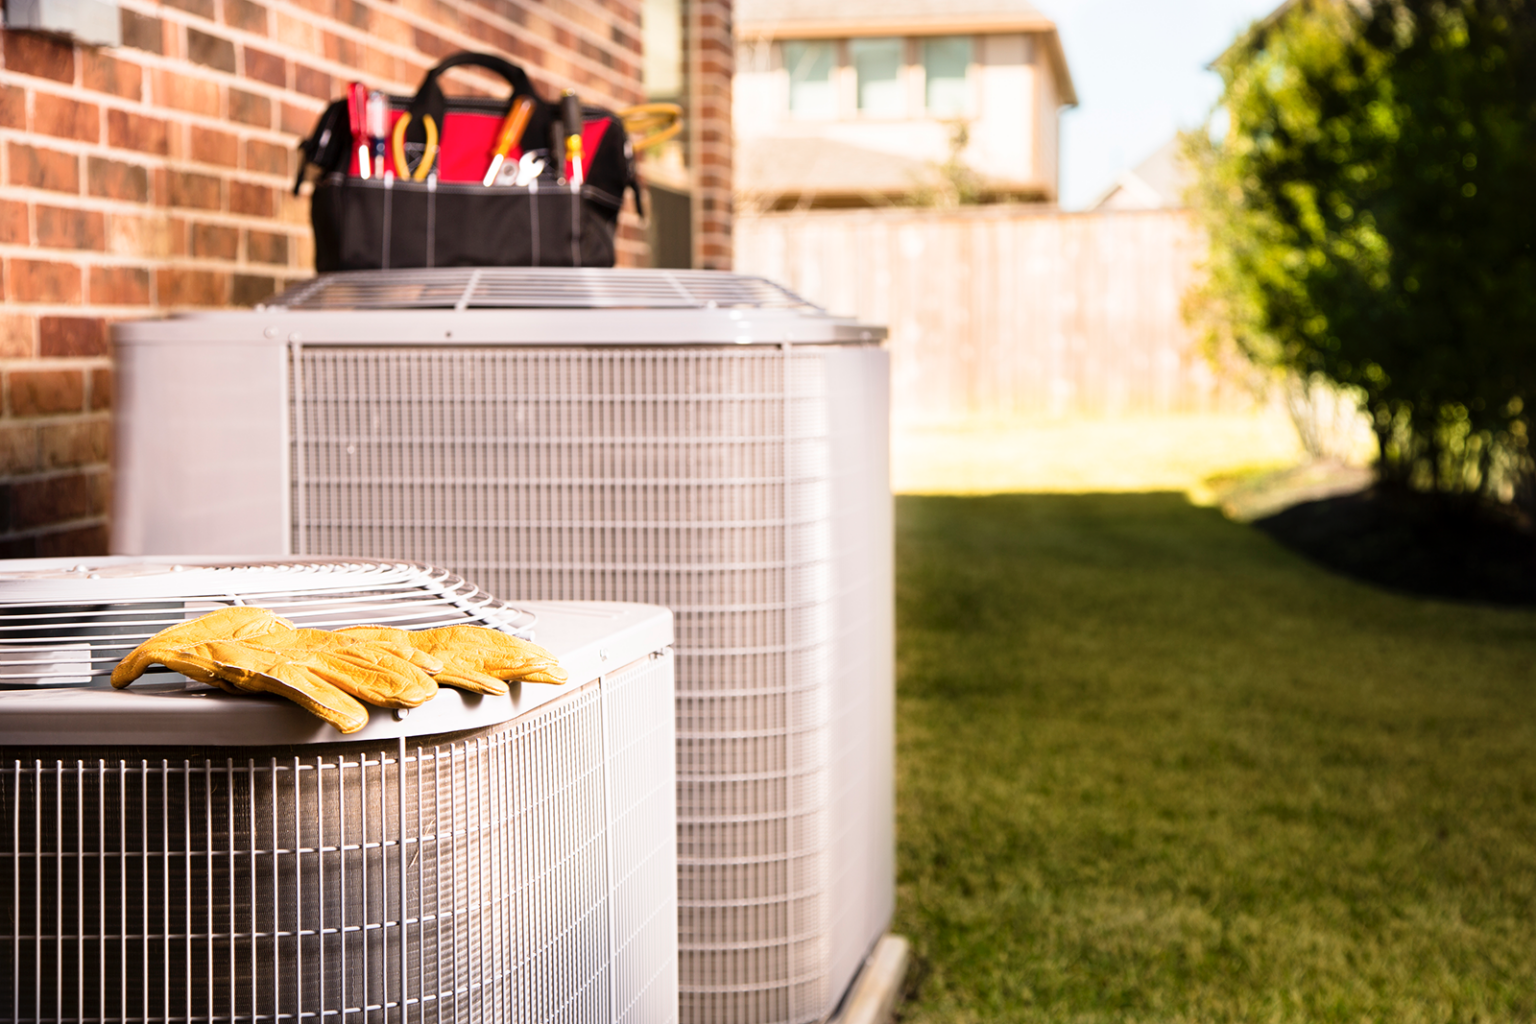
You don’t need to do a major deep clean to prepare for your cleaning technician’s visit, but it is helpful to tidy up so they can easily access your HVAC equipment and vents. Consider these tips.
🛋️ Move furniture and clutter
Your duct cleaning tech will need to access all vents in your home. Make sure they are easy to get to.
🪜 Know where to find your core HVAC system
Duct cleaning involves your air handler and plenums, which are usually next to your furnace. Clear a path to this equipment, whether it’s in your attic, basement, garage, or utility closet.
⏰ Choose a convenient time
Duct cleaners will make some noise and need to visit all rooms of your home. So don’t schedule your appointment during baby’s naptime or your important Zoom meeting.
🐈 Secure pets
Keep pets in their crate or arrange for daycare the day of the appointment. The loud noise might freak them out, and your technician may open the front door frequently.
🏠 Give a home tour
Make sure to show your technician all rooms of your home when they arrive. You don’t want them to miss any vents.
👉 Note areas of concern
If your child’s bed or another sensitive item is directly under an air vent, consider moving it and covering it with a tarp. Tell your technician about areas you’d like them to avoid or pay special attention to.
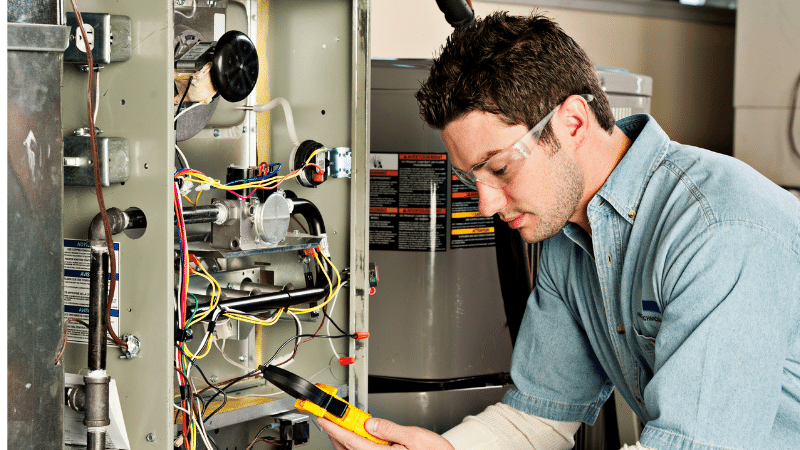
What to expect during duct cleaning
Make sure you’re home to greet your air duct cleaner when they arrive. If you’re comfortable having them work in your home alone, it’s usually fine for you to leave.
If you prefer to stay, you can watch the process from a safe distance or wait in a spot out of the way. Here are a few things that will happen during the cleaning:
❓ They will ask questions
Be ready to show them around your home, point out vents, and direct them to your HVAC equipment. Feel free to ask any questions you have, as well.
👂 There will be noise
Your technician will use a special vacuum for cleaning. You also might hear light banging as they use mechanical brushes in the ductwork.
🪛 They will remove your vent grates
Your cleaner will take all of your vent grates off to access the ductwork. They will also clean the vent grates – they have tools to remove and put them back safely.
🩹 They will fix small leaks
If your duct cleaner locates any visible air leaks in your ducts, they fix them if possible. If the repair is severe, they may need to return, or you may need to hire an HVAC contractor for specialized help.
📋 They will test your system
Before leaving, your technician should test your HVAC system to ensure everything is dust-free and running correctly.
Other things to know before air duct cleaning
How much does air duct cleaning cost?
There are different types of cleaning techniques. Your duct cleaning cost will vary depending on the recommended cleaning method, size of your home, and labor fees set by the service provider. On average, air duct cleaning costs around $500, but pricing generally ranges from $285 to $1,000.
Will my technician spray cleaning products?
Your technician should not spray any chemical cleaning products in your ducts without your prior approval.
According to the Environmental Protection Agency, cleaning sprays are unnecessary in your ductwork unless you have mold issues. Even then, the organization is skeptical about using chemical biocides in ductwork.
If your duct cleaning technician tells you there’s mold in your ducts, ask for them to show it to you. Once you’ve confirmed it’s there, ask about the product they intend to use to clean it. You can decide whether or not you’re comfortable moving forward with the cleaning.
It’s essential to address the root cause of mold growth in your ducts in addition to cleaning it. An HVAC technician can take a look at your system to determine the reason behind the mold growth.
Schedule an appointment with a local HVAC specialist
Yes, please!
How long does an air duct cleaning appointment take?
It depends on the size of your home, but an air duct cleaning appointment usually takes four hours or less. Ask your technician how long they expect to take based on the square footage of your home.
Will my home be dusty after an air duct cleaning?
Air duct cleaning can be messy, but your technician should use drop cloths and plastic guards to keep the dust and debris from entering your home.
You will not have to clean your home after your technician leaves. They should leave your home as it was when they entered (if not a bit cleaner!)
Should I tip my air duct cleaning technician?
It’s not necessary to tip your air duct cleaner. You can show appreciation in other ways, like offering a cold bottled water.
If you’re happy with the job, leaving a positive online review for the company is always nice. You can also share referrals with friends and neighbors looking to have their air ducts cleaned.
Americans are spending more to upgrade their homes now more than ever before. Over the past decade, the home improvement industry has flourished from a $300B industry to more than $624B.
With all the money homeowners put into their upgrades, the 2023 tax season is an ideal time to see which projects offer a return on investment. Energy tax credits for 2023 touch nearly every part of today’s home. Let’s dive into the credits gained from heating and cooling equipment.
What are energy tax credits?
Upgrading your home or property with energy-efficient appliances comes with a number of tax credits. The Inflation Reduction Act notably expanded or extended the available tax credits for taxpayers.
Energy tax credits are benefits from the government when taxpayers make energy-efficient upgrades to their property. These improvements may include installing solar panels, heat pumps, windows, or insulation, among many others. Taxpayers don’t get an immediate discount on purchasing green-energy items, but they may be eligible for a tax credit.
For example, if you purchase a $15,000 energy-efficient HVAC system eligible for the 30% tax credit, you get the $600 maximum credit toward your taxes.
Air source heat pumps tax credit
Energy Star-certified heat pumps that were purchased and installed on a primary residence before December 31, 2022 are eligible for an energy tax credit of 10% of the cost (up to $500) or a specific amount from $50 – $300.
Energy-efficiency requirements apply to split and packaged systems. This credit is effective only if the heat pump began servicing an existing home serving as the primary residence. New construction and rentals do not apply.
For heat pumps purchased and installed between January 1, 2023, and December 31, 2032, the tax credit is 30% of the total project cost, up to $2,000. The equipment must meet the required standards.
Get a quote for a new heat pump
Yes, please!
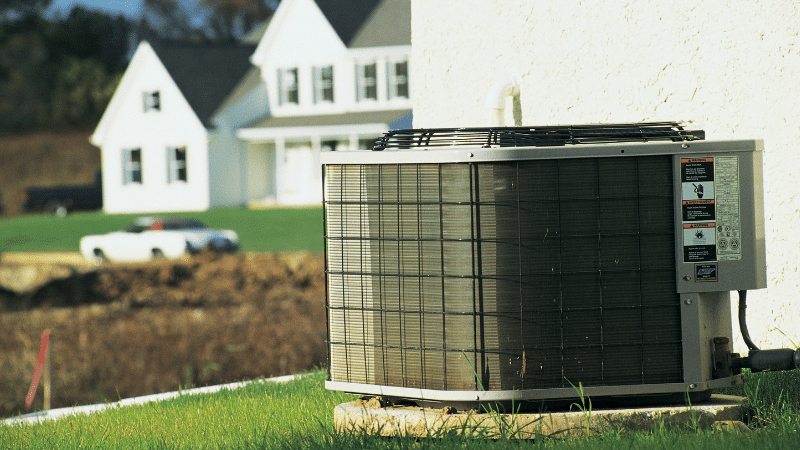
Central air conditioners tax credit
The Non-Business Energy Property Tax Credits may apply to central air conditioning units installed through the end of 2022. The tax credit amount is $300 for qualifying units installed through December 31, 2022. To verify tax credit eligibility, ask your HVAC contractor to provide the Manufacturer’s Certification Statement for the purchased equipment.
For qualifying central air conditioners installed in your primary residence between January 1, 2023, and December 31, 2032, you can claim a tax credit of 30% of the total project with a max benefit of $600. New-construction homes and rentals are not eligible for this home tax credit.
Energy Star defines eligible products as split systems with SEER2 > 16 that are Energy Star certified. All Energy Star-certified packaged systems are eligible.
Oil and gas furnaces tax credits
Oil and gas furnaces that are Energy Star certified and installed into your primary residence on or before December 31, 2022, may qualify for a $150 tax credit. Furnaces for U.S. South only, new-construction homes, or units installed in rental properties do not qualify.
You can claim an energy tax credit for oil and gas furnaces installed between January 1, 2023, and December 31, 2032. Qualifying units are eligible for up to 30% of the project cost, not to exceed $600 max credit.
Learn about furnace options and get a quote from a pro
The overall total limit for an efficiency tax credit in one year is $3,200. The limit includes a maximum credit of $1,200 for any combination of home energy improvements (windows/doors/skylights, insulation, electrical) plus furnaces, boilers, and central air conditioners.
The remaining $2,000 credit is available with any combination of heat pumps, heat pump water heaters, and biomass stoves/boilers. Geothermal heat pump tax credits do not apply toward the limit of $3,200. Energy Star defines the tax credits allowed for geothermal heat pumps.
Is your indoor air feeling dry? An Aprilaire humidifier may provide the moisture boost your home needs.
We explored hundreds of customer reviews on popular Aprilaire whole-home humidifiers. Learn what to expect during Aprilaire humidifier installation and how much the process costs so you can decide if it’s the right indoor air quality investment.
Get a quote for whole-home humidifier installation.
Yes, please!
Does Aprilaire make good humidifiers?
Aprilaire is an industry standout for whole-home air quality. The American manufacturer has an 80-year reputation for innovation.
Aprilaire’s parent company, Research Products Corporation, introduced whole-home humidifier technology to the HVAC industry. The catalog has expanded to include dehumidifiers, air purifiers, thermostats, and other air quality products.
Aprilaire whole-home humidifiers
Aprilaire humidifiers are for whole-home use only. In this context, whole-home means each model connects to a central heating system with ductwork.
The humidifier adds moisture to the air inside the duct system. The heating system’s ductwork and vents distribute the air through your home.
Aprilaire makes one model (the Aprilaire humidifier 300) that humidifies homes with ductless mini splits for heating and cooling.
Are Aprilaire humidifiers right for me?
Aprilaire focuses on whole-home technology. The specialization leads them to create high-quality products with more rigorous testing.
Though Aprilaire has an impressive catalog of whole-home systems, they haven’t expanded to portable applications. Some of their competitors, such as Honeywell, offer whole-home and portable options.
An Aprilaire humidifier may be a good fit if you:
Don’t plan to move soon
Have a central heating or cooling system
Want to add moisture to your whole home
An Aprilaire humidifier isn’t the best option if you:
May move in the future
Use space heaters or portable/window air conditioner for heating and cooling
Want to adjust the humidity in one room, not the whole house
Aprilaire humidifier controls: manual vs. automatic
Aprilaire humidifiers can have manual or automatic control systems. Humidifiers with manual controls have a dial with corresponding humidity levels. The homeowner turns the dial to the desired humidity level, and it stays constant.
An automatic control system pairs with a humidistat. The humidistat is installed outside the home and senses outdoor humidity levels. The humidistat communicates with the humidifier and adjusts the humidity level on its own.
Aprilaire humidifier installation
The average cost to install a whole-home humidifier is $575, though it can range $400-2,500 depending on the home’s size and the unit type.
Aprilaire humidifiers range in cost $130-1,000. Including installation, you’ll pay $200-1,900.
The Aprilaire humidifier installation process is straightforward and should not take a technician much time. Since whole-home humidifiers are usually installed on your return air duct, installation won’t significantly disrupt activities in your home.
We don’t recommend DIY Aprilaire humidifier installation. The process involves cutting into your ductwork, running water lines, and connecting electrical wires; tasks better left to the pros. Additionally, DIY installation may void the warranty.
Schedule an appointment for whole-home humidifier installation.
Book now
Aprilaire humidifier filter replacement
Humidifier filters are also known as water panels. You can purchase Aprilaire humidifier filter replacements online via Amazon or other home improvement retailers.
Aprilaire water filters come in four sizes: 10, 12, 35, or 45. You can find the right size for your model by checking the inside door of the humidifier.
You should conduct an Aprilaire humidifier filter replacement at least once a year. You may need to change the water panel more frequently during the winter if your humidifier is in frequent use or if your home has hard water.
To change your water panel, turn off the water to your home via the outdoor valve. Open the humidifier’s cover and remove the existing filter. Insert a new filter. Close the cover and turn the water back on.
Aprilaire humidifier models
Wondering which Aprilaire humidifier models work best for your home? The company currently sells seven whole-home humidifier options.
Aprilaire humidifier 300
The Aprilaire humidifier 300 is designed for homes with ductless heating and cooling systems like mini splits. It has a capacity of 13 gallons per day to humidify homes up to 2,000 square feet.
Since you don’t install the Aprilaire humidifier 300 within your ductwork, you may be able to DIY installation if you’re savvy when it comes to home improvement. It’s available for sale on Amazon.
Aprilaire humidifier 400
The Aprilaire humidifier 400 has a capacity of 17 gallons per day. This humidifies homes up to 5,000 square feet.
This humidifier is a water-saver model that ensures all water is used and dispersed in the house before adding more water.
The Aprilaire humidifier 400 is used with ducted heating and cooling systems, so it requires professional installation. It’s also available in a 400M model with a manual humidistat.
Aprilaire humidifier 500
The duct-mounted Aprilaire humidifier 500 humidifies homes up to 3,500 square feet with its 12-gallon daily capacity.
Though the humidifier 500 is automatic, Aprilaire also offers a 500M version with a manual humidistat.
Aprilaire humidifier 600
The Aprilaire humidifier 600 has a 17-gallon daily capacity. It’s for homes up to 5,000 square feet.
This model is duct-mounted. The Aprilaire humidifier 600 is automatic, though the 600M version comes with a manual humidistat.
Aprilaire humidifier 700
This fan-powered duct-mounted humidifier relies heavily on your furnace to humidify your home in the cold season. Its 18-gallon daily capacity is for homes up to 5,300 square feet.
The Aprilaire humidifier 800 is a whole-home steam humidifier. It heats water in an internal canister to create steam.
This humidifier is for substantial homes (5,000+ square feet) with a 34.6-gallon capacity.
Aprilaire humidifier 865
The Aprilaire humidifier 865 is a whole-house steam humidifier with a fan pack. It includes a sensor that measures when the humidity drops below the set level and automatically turns the fan on.
This humidifier is designed for homes up to 5,200 square feet with a 34.6-gallon daily capacity. It’s ideal for large homes in dry, desert climates.
How to buy an Aprilaire whole-house humidifier
You can purchase an Aprilaire whole-house humidifier on sites like Amazon or via a local HVAC contractor.
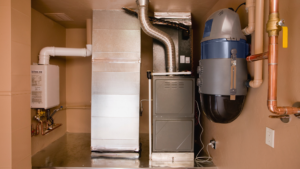
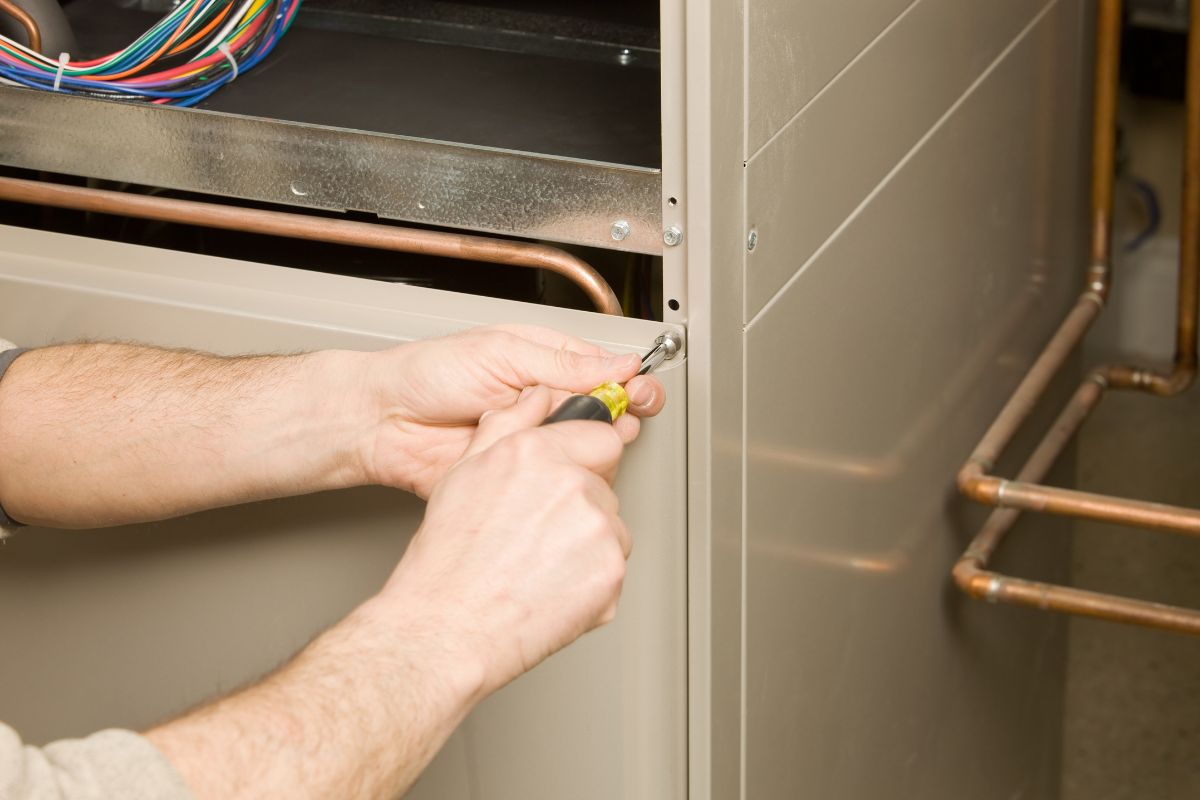
An air handler is a component of your central heating and cooling system that circulates air through your ductwork. Sometimes people refer to the air handler as the “blower,” but the blower motor is a part of the air handler.
This article will answer the question, “What is an air handler?”. We’ll explain what it does and how to determine if yours needs repair or replacement.
If you’re shopping for a new air handler, check out our reviews of the best air handlers.
Let our experts help you choose the best air handler for your home.
Get a quote
What does an air handler do?
An air handler is a piece of your central HVAC system. It attaches to your air conditioner, furnace (or heat pump), and plenums, leading to your ductwork.
Your air handler takes the warmed or cooled air created by your HVAC equipment and blows it into the supply plenum, which connects to your air ducts. Your ductwork distributes the treated air throughout your home.
Your air handler also connects to your return plenum, which takes air from inside your home and brings it into your HVAC system. Depending on the season, the air handler pushes that air to either your air conditioner or furnace, where it’s heated or cooled.
On the outside, an air handler is a large metal box that looks similar to your furnace. It’s typically installed alongside your furnace in your garage, attic, utility closet, or basement.
Parts of an air handler
Your air handler moves treated air through your home using the following components.
Blower motor
The blower motor powers a fan that pushes air into your ducts. It also helps circulate air from your home back into your AC or furnace.
Blower motors come in single-speed, dual-speed, and variable-speed varieties.
Single-speed blower motors can function at only one setting. These are typically less expensive upfront, though they’ll cost you more on utility bills in the long run.
Dual- and variable-speed blower motors can adjust automatically to different speeds. They’ll keep your home more consistently comfortable. They’re a bigger investment, but they’ll save you on utilities over time.
Evaporator coil
Your compressor is part of your outdoor AC unit (the condenser). The compressor pumps refrigerant into the air handler’s evaporator coil.
When the blower motor’s fan moves air over the evaporator coil, it cools the air. As the refrigerant warms in the coil, it gets pushed back to the compressor to cool down again.
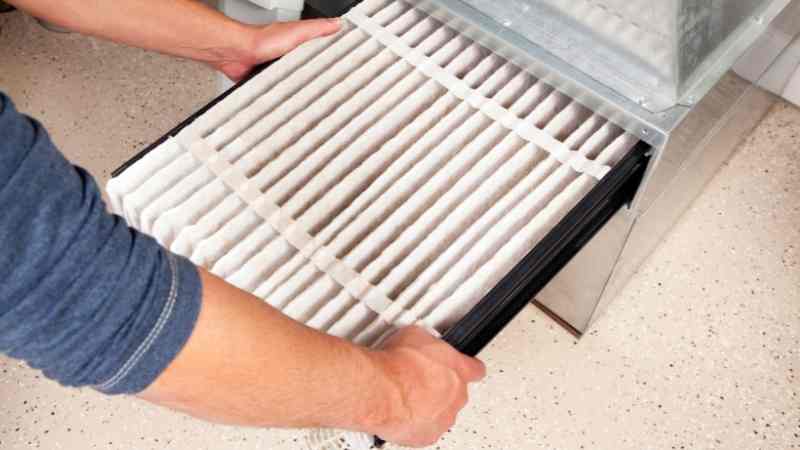
Air filter
Your air handler’s air filter is on the return side of the unit. It filters air entering your HVAC system from your home.
Air filters remove dust, mold, and bacteria from the air. This improves your household air quality and also protects your HVAC system.
Electrical components
Your air handler contains electrical components, such as a contactor and relay board, that help it do its job.
One notable electrical part is its emergency heat strip. The heat strip turns on when cold outdoor conditions make it difficult for your HVAC system to keep up with your heating needs.
Common air handler problems
The average cost for air handler repair is $350. It may help to diagnose the problem yourself and try a few air handler troubleshooting tips before calling a professional to fix your system.
Air handler is not turning on
Your air handler may be clogged due to a dirty air filter. Change your filter, dust the unit, and try again.
If this doesn’t help, reset your air handler at your fuse box.
Blower motor is not working
The blower motor is a hard-working part of your air handler, so it’s often the cause of issues with the system.
Switch your thermostat to “auto,” “on,” and a few degrees higher or lower to see if that will start it working. The problem may be the connection between the air handler and the thermostat if it does.
If you suspect the motor is having trouble, turn it off at your fuse box. Remove the air handler’s cover and dust inside with canned air and a soft cloth.
Air handler is short cycling
Check out our short cycling guide to fix this problem. You’ll likely have to clean out your system or repair your flame sensor.
Air handler is leaking
If you feel air flowing out of the joints around your air handler, fix them immediately. This means treated air from your HVAC system isn’t making it into your home, causing your equipment to work harder than necessary (and raising your utility bills in the process.)
HVAC.com has pages to help troubleshoot specific Goodman, Rheem, and Lennox air handler units.
If our tips don’t do the trick and your air handler isn’t working, call an HVAC contractor for help.
Schedule an appointment for air handler repair with one of our trusted local pros.
Book now
How much does an HVAC air handler cost?
According to the 2023 National Plumbing & HVAC Estimator, installing a new air handler costs between $3,662.90 and $25,820. HomeAdvisor suggests most homeowners pay far less than that at $2,450.
An HVAC air handler’s price depends on its capacity, features, and blower motor style.
How long does an HVAC air handler last?
Air handlers have a useful life of about 10-15 years.
Call us if your air handler keeps breaking down, and you suspect it’s time to replace it. We’ll match you with a licensed local HVAC dealer who can help you find the best new air handler for your home.
Book an appointment with one of our top-rated HVAC pros now.
An HVAC plenum box is a piece of ductwork attached to the air handler. The plenum moves air through the house and your HVAC system.
In your home, the HVAC plenum helps reduce humidity and improve airflow. You likely have two plenum boxes, one on the supply side and one on the return side of your ductwork.
This article will answer the question, “What is a plenum?”. In addition to explaining its function in your HVAC system, we’ll provide tips on plenum repair and things to consider when purchasing a new plenum.
Looking for HVAC repair? Schedule an appointment with a local expert.
Book now
What is an HVAC plenum?
A plenum is a box made of sheet metal. It connects your HVAC system’s air handler to your ductwork.
Your HVAC system creates cool or warm air depending on the season. That air goes from your furnace or air conditioner to the air handler.
On the supply side of the air handler, the plenum takes the newly warmed or cooled air and leads it into your ductwork. This is how the air from your HVAC system is distributed throughout your home.
On the return side of the air handler, the plenum takes air from inside your home and sends it to your air conditioner or furnace to be heated or cooled.
What’s the difference between an air duct and a plenum?
Plenums can be considered part of your ductwork. They serve as the piece that connects your ductwork to your central HVAC system.
Plenums are usually box-shaped and made of sheet metal. Residential air ducts are sometimes also box-shaped and made of sheet metal.
Some homes have cylindrical air ducts made of galvanized steel, aluminum, or wire coil covered in durable plastic. No matter the type of air ducts you have, the plenum is usually always a sheet metal box.
Your air ducts are the vehicle that distributes air from your HVAC system throughout your home. Your plenums are the pieces that join your HVAC equipment and your ductwork, allowing circulation between the two.
Do you need a plenum?
A plenum is a necessary component if you have a central heating and cooling system. In fact, you need two for your system to work correctly and circulate air within your home.
Common HVAC plenum issues
While a broken plenum isn’t a frequent cause of HVAC problems, there are occasions when plenums may malfunction and require repair.
Leaky plenum
Sometimes, your plenums may leak air. This can cause your HVAC equipment to work overtime, as the heated or cooled air never makes it into your home.
If your system cannot achieve the temperature you’ve set on your thermostat, examine your system for a plenum leak. Simply locate your air handler and check to see if you feel air flowing out of the plenums. Energy.gov has good tips on detecting home air leaks.
If you find an air leak, the repair is DIYable. Use silicone caulk and aluminum tape to seal the plenum at its joints.
Dirty plenum
Over time, your plenums may experience a build-up of dust or dirt. This may cause them to operate inefficiently, diminishing airflow in your home.
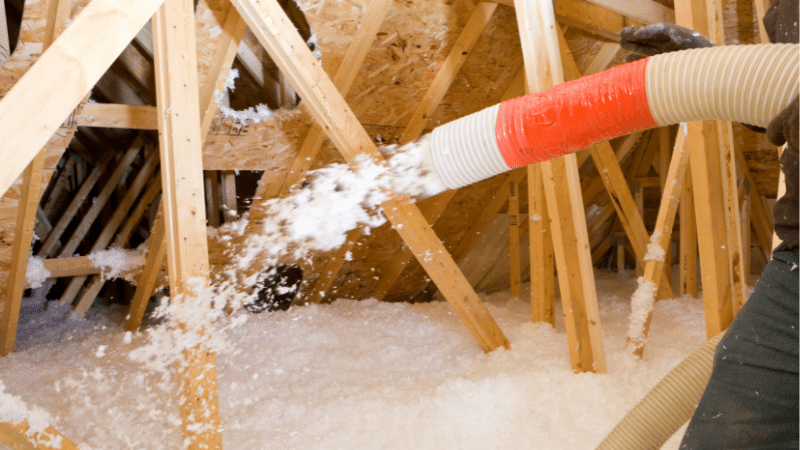
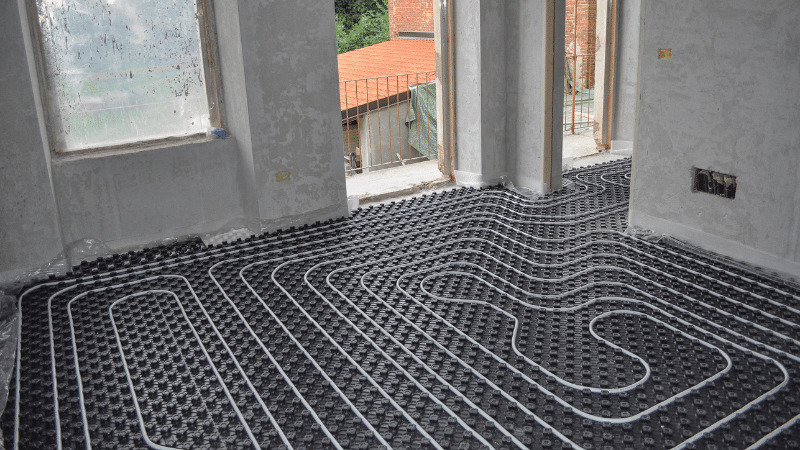
Though DIY duct cleaning is important and useful, it won’t reach your plenums. We recommend supplementing your DIY cleans with professional air duct cleaning every 3-5 years.
Poorly sized plenum
An incorrectly sized plenum will negatively impact your whole HVAC system. If the plenum is too small, it will inhibit airflow. If it’s too big, it may cause your system to work harder than necessary, increasing your utility bills.
Contact a licensed HVAC technician if you suspect one of your plenums is the wrong size. They’ll be able to test it and suggest an appropriate replacement.
Since your plenums are such a vital piece of your home comfort equipment, we don’t recommend attempting repairs on your own – always seek the help of a professional.
Incorrectly installed plenum
If your plenums weren’t installed properly, you may be experiencing air circulation issues and a frequently malfunctioning HVAC system. The installer might have connected the plenum inefficiently, cut duct holes poorly, or made attachments at awkward angles that halt airflow.
If you think this is the case with your plenums, consult with an HVAC professional. They’ll be able to identify the exact issues and remedy them, improving the overall performance of your heating and cooling equipment.
Schedule plenum repair.
Book now
HVAC plenum repair or replacement
We don’t recommend attempting a plenum repair or replacement on your own. This piece should be specially fit to your HVAC system and installed securely by an expert.
When hiring an HVAC contractor, you can expect to pay $100-200 for a new plenum, assuming your system requires one of standard size and material. Pros typically charge $50-150 per hour. This job should take a few hours at most.
Purchasing a new plenum
We don’t recommend buying your plenum from sites like Amazon or a home improvement store before installation. Let your HVAC contractor take care of securing the materials for you.
Most plenums are made of sheet metal and can be custom-sized by your technician to fit your space and HVAC system perfectly. They’ll likely need to cut holes to fit and connect your ductwork.
Brand names don’t matter when it comes to plenums. They generally don’t have special features or any differentiating bells and whistles.
HVAC plenums: the bottom line
Plenums ensure air cycles through your home and your heating and cooling equipment. One plenum is as good as the next as long as it’s effectively connecting your HVAC system and ductwork.
Contact one of our top-rated local HVAC professionals if you suspect your plenum needs cleaning, repair, or replacement.
Let us find the best HVAC contractor for your job.
If your furnace abruptly stops working when it’s below freezing outside, you may have a frozen condensate drain. In most cases, you can fix this yourself.
Keep reading for directions on how to repair a frozen condensate drain. If you’re not up for DIY, no worries! Click the box below, and we’ll connect you with a vetted local dealer who can help you.
Fix my condensate drain!
Book now
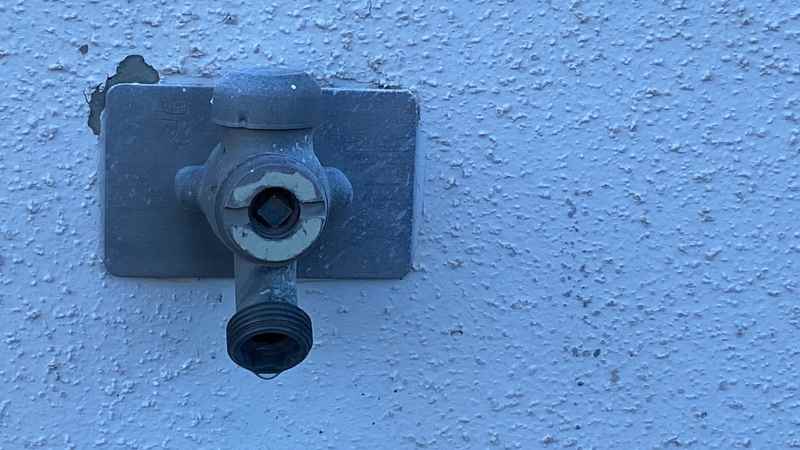
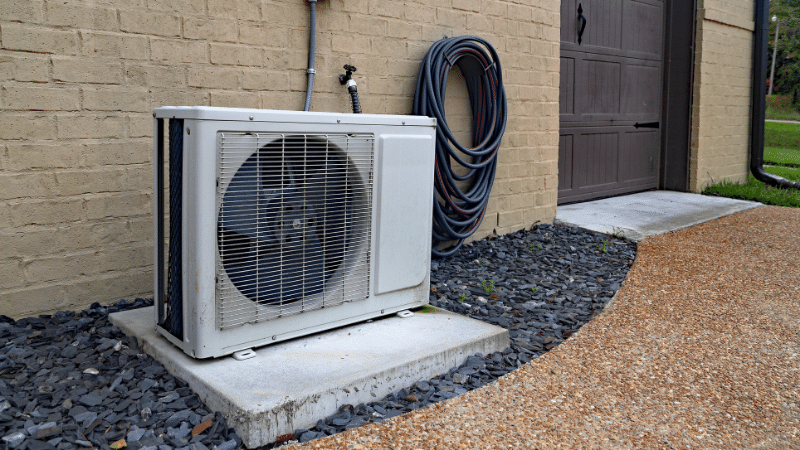
Locating your HVAC condensate drain
Your condensate line drains condensation created by your HVAC system out of your home. It is usually a white PVC pipe on an exterior wall from inside to outside your house. Sometimes, it’s near your condenser.
If the water inside the pipe freezes, your furnace can no longer properly drain condensation. As a safety measure, it will shut itself off until you clear the drain.
Fixing your frozen condensate drain
Once you’ve located your frozen condensate drain, there are a few ways to defrost it. Make sure to turn your furnace off at the fuse box first.
💧 Use a hot water bottle
Heat water on your stove or run hot water from your tap. Fill a stainless steel water bottle or thermos with the water. Affix it to your condensate drain line with a bungee cord or other fastener. Keep it there until the water inside the drain melts and your furnace works again.
🫖 Pour hot water
Fill a vessel like a kettle with hot water. Take the vessel outside and slowly pour the hot water over the condensate drain until the ice melts. You might need to do this several times before the line defrosts completely.
💨 Heat with a hair dryer
Connect your hair dryer to an extension cord. Choose its highest heat setting and point it at the drain, warming it until the ice melts. This may take 20+ minutes. Make sure it’s not raining, snowing, or otherwise wet outside if you choose this method.
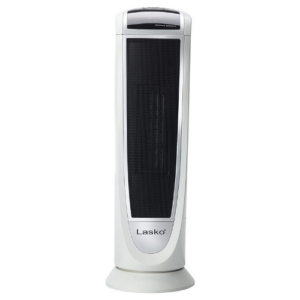
🔥 Bring your space heater outside
Connect your space heater to an extension cord or use a battery-powered heater. Place it near the condensate drain to warm it and melt the ice inside. Do not leave the heater unattended. Do not choose this method if it is unsafe to use electrical appliances outdoors.
Be careful not to burn yourself or damage your HVAC equipment. Never use electrical appliances in rainy or snowy conditions.
Do not use boiling water on your frozen condensate drain. It may crack your pipe.
Once your drain line is ice-free, turn the furnace back on at the fuse box. It should work as expected.
If the weather remains cold, your condensate drain may freeze again. Simply repeat the process and consider hiring an HVAC technician who can take measures to prevent the condensate line from freezing in the future.
How to prevent condensate line from freezing
The most straightforward way to keep your condensate line from freezing repeatedly is to insulate the pipe. You can try to do this yourself with an insulated wrap.
If that doesn’t solve the problem, call an HVAC contractor. There may be more factors at play, such as the slope of the pipe or a clog unrelated to the cold weather.
If your condensate drain line is especially long, it might help to shorten the pipe, leaving less opportunity for freezing. For example, if your drain pipe leads under the house, through your crawl space, and out to the yard, you may benefit from shortening it.
A licensed furnace contractor can conduct this repair for you, cutting the condensate line and redirecting it to drain elsewhere.
Click below to connect with an HVAC technician who can examine your condensate drain line and recommend a course of action to prevent freezing.
Book an appointment for HVAC repair now.
Yes, please!
Furnace troubleshooting
If your furnace isn’t working and defrosting your condensate drain line doesn’t help, check out our furnace troubleshooting tips. Performing these simple tasks may fix your issue and save you the expense of a professional repair.
If troubleshooting doesn’t solve your problem, it may be time to call in an expert. HVAC.com can connect you with a top-rated local furnace contractor to diagnose and perform a repair. Click below to schedule an appointment.
Schedule an appointment with a furnace repair expert.
Does your furnace keep shutting off unexpectedly or running in shorter cycles? If so, you might have a problem with your furnace limit switch.
Also known as a high-limit switch, this small (but critical) component helps keep your home safe by automatically shutting off the system when your furnace gets too hot. In this guide, we’ll explain how your furnace high limit switch works, how it impacts your home, and solutions for when it malfunctions.
Need your limit switch repaired? We can help. Book an appointment with a local HVAC pro.
Yes, please!
What is a furnace limit switch?
A furnace limit switch is a device within your furnace that detects when the internal temperature is too high and turns the unit off as a safety measure. You may also hear it referred to as a fan limit switch or a limit switch.
When your furnace is working correctly, you shouldn’t have to worry about your furnace limit switch. But when it starts to trip or malfunction, you may need to know about this part and how to fix it.
What does a limit switch do?
Let’s get into a more technical explanation of what your furnace limit switch does in the context of the entire heating system. When you turn up the heat on your thermostat, the burners will activate and begin heating up air inside the plenum.
When the unit is at an appropriate temperature, the limit switch in the furnace allows for burner operation and the furnace will continue to send out heat. If the temperature gets too high within the furnace, the switch will open, causing the furnace to stop operating. The burners will shut down and the fan will continue to operate, cooling down the internal components of the furnace.
When the furnace’s internal temperature decreases, the limit switch will close, allowing the furnace to start back up for normal operation.
How a limit switch impacts your safety and comfort
Since your furnace uses gas to heat your home, it must have safety features in place to prevent it from overheating or breaking. If those safety components fail, necessary parts of the furnace, like the heat exchanger, can break more easily.
Fortunately, your switch acts as a safety device to control these variables and keep your family safe. It does this by shutting off power to the gas valve when the furnace exceeds the manufacturer’s temperature limit. If a gas furnace warms your home, install a carbon monoxide alarm to detect the odorless gas in case of a leak.
What does a furnace limit switch look like?
A furnace limit switch has two components. The first is a small button-shaped mounting plate that’s fastened outside of the furnace plenum. It attaches to a long temperature probe that extends through the furnace housing.
Where is the limit switch on a furnace?
In most cases, the limit switch will be located inside the cover panel of your furnace. (You might need a screwdriver to remove this panel, depending on the model of your system.) On older furnaces, however, it may be set up on the outside of your furnace.
Limit switch tripping
Because the limit switch is designed to detect and shut down issues within your furnace, there are several reasons that it might trip. For example, if your furnace keeps shutting off soon after you fire up your thermostat, it could be indicative of issues such as:
Airflow problems inside your furnace (including dirty air filters), which cause overheating
Dirty temperature sensor on your furnace limit switch
Defective high limit switch
In order to avoid these issues, it’s important to keep up with the recommended maintenance schedule from your furnace manufacturer. For example, many manufacturers advise you to change your furnace filter every three months.
When necessary, you should also clean the temperature sensor on your limit switch to keep it in good working condition and prevent tripping. If your switch continues tripping after you’ve replaced your filter and cleaned the sensor probe, you may have a defective limit switch (more on that below).
When your switch repeatedly trips, it may enter a “lockout mode,” where the furnace will completely shut down. This can only be reversed by servicing and resetting the furnace, which should be done by a professional.
How do I know if my limit switch is bad?
As we’ve covered, your limit switch can signal other issues with your furnace that aren’t necessarily related to the switch itself. So how do you know if it’s your switch that’s the problem? Here are some warning signs.
Furnace blowers don’t shut off
Air coming out of your system is cool
System repeatedly turns on and off (called “short cycling”)
Schedule furnace repair with a top-rated local technician.
Book now
How do you reset a furnace limit switch?
If your furnace shuts down several times in a row, it may enter a hard lockout mode that will require you to reset your switch or the entire furnace system. This happens as a safety mechanism to prevent your furnace from cracking and leaking carbon monoxide into your home.
You may be able to reset the system yourself, depending on the age and model of your furnace. If you have a newer model, you should be able to turn off the power for about 30 seconds and then turn it back on.
If you can’t reset it yourself or if it repeatedly goes into hard shutdown, it’s a good idea to contact a specialist and have them perform a safety check. A faulty furnace can have life-threatening consequences for your family, so it’s essential to confirm that everything is operating correctly.
Can I replace a furnace limit switch myself?
Yes, it’s possible to replace a furnace limit switch yourself. To do it, you’ll first need to use a multimeter to test the switch. If it’s faulty, you’ll also need a new switch that matches your old one. Here’s how to test the furnace limit switch and replace it if necessary.
Shut off the power and gas to your furnace.
Locate the limit switch and remove it from your furnace.
Place the multimeter probes on the switch terminals and check for continuity.
If there’s no continuity, replace the switch with a new model.
Before trying to complete any work yourself, keep in mind that furnaces can be dangerous. Not only do they emit hot air, but they also contain flammable gas and run on high-voltage electricity. For those reasons, you shouldn’t try to complete any complicated repairs on your fan limit switch or your furnace unless you know what you’re doing. If not, call in an HVAC specialist for help.
Don’t want to deal with DIY? Schedule a repair appointment.
Book now
Furnace limit switch repair and replacement costs
If you’re the DIY type, you’ll save quite a bit of money by replacing your furnace limit switch yourself (assuming you already have a multimeter at home). You can find new switches for less than $20 at your local hardware store. However, if replacing the switch doesn’t solve your issue, you should contact an HVAC expert.
The cost of professionally repairing your furnace will vary depending on the specific issue. Generally speaking, you should expect to pay between $100 and $1,000 per furnace repair visit, with an average of $270 per repair.
When to hire furnace repair specialist
If you’re still having problems with your furnace after replacing the switch, changing the air filter, and cleaning the temperature sensor, it may be time to replace the entire furnace. You can use the HVAC.com cost calculator to estimate the price of replacing your furnace and connect with trusted providers in your area.
During the winter months, home maintenance needs differ from when it’s warm outside. Roof ventilation is a concern to many homeowners, especially those concerned with energy and heat conservation. Should covering your roof vents be on your winter home maintenance to-do list? Read on to find out.
Should I cover my roof vents in the winter?
Roof ventilation is important year-round. During the winter, your home’s roof vents allow moisture to leave the attic space, preventing the growth of mold and mildew that can occur even during this typically dry period. You should absolutely leave your roof vents open during the winter – do not cover them!
During the winter, roof ventilation works to keep temperatures even. Closing your vents makes the attic space too warm and dry – dangerous conditions for mold as well as pests. Keeping your roof vents open keeps the roof at an even temperature to prevent damaging ice dams, where water backs up underneath your shingles, freezing and causing damage to your roofing components and structure as well as your gutters.
When the attic becomes too warm due to closed vents, snow and ice on the roof readily melts. This causes free-flowing water to run between shingles and down to the gutters. Hitting uneven roof temperatures caused by blocked vents leads to the refreezing that is troubling.
Want to get a system check-up just to be safe?
Yes, please!
It’s ok for your attic to be cold in the winter because the roof vents are open. An attic with good air sealing will not cause your home to become colder or expend additional energy for heating. If heating energy is making its way into your attic, the way to solve this problem is by upping attic insulation rather than closing roof vents.
Clearing roof vents in winter
Heavy winter storms lead to snow and ice accumulation which may affect your roof ventilation’s ability to allow free-flowing air to move through the attic. Ice buildup also weighs on the roof structure, which is dangerous when it becomes heavy. It may be necessary to clear your roof vents after heavy winter precipitation.
To do so safely, it is best to enlist the help of a snow removal contractor. You should not attempt to climb upon an unsafe roof covered with snow and ice. A licensed, insured contractor will use the proper tools to alleviate snow and ice accumulation while protecting roof vents from damage.
Caring for roof ventilation
Make sure your roof vents perform properly during the winter by performing some easy maintenance in the fall.
Clean under-eave to remove debris
Clean attic fan to remove debris
Clear sticks, leaves, and other materials away from exhaust vents on the roof
These steps will allow air to come and go from your attic, maintaining proper roof ventilation throughout the winter. Mold in an attic becomes a dangerous and costly problem – prevent moisture accumulations with simple maintenance for your roof vents.
Find roof ventilation help on HVAC.com
HVAC contractors have the roof ventilation solutions your home needs to maintain proper attic temperatures and airflow throughout the winter. Get the help you need by finding a licensed, local HVAC company.
Schedule an appointment with a local HVAC technician.
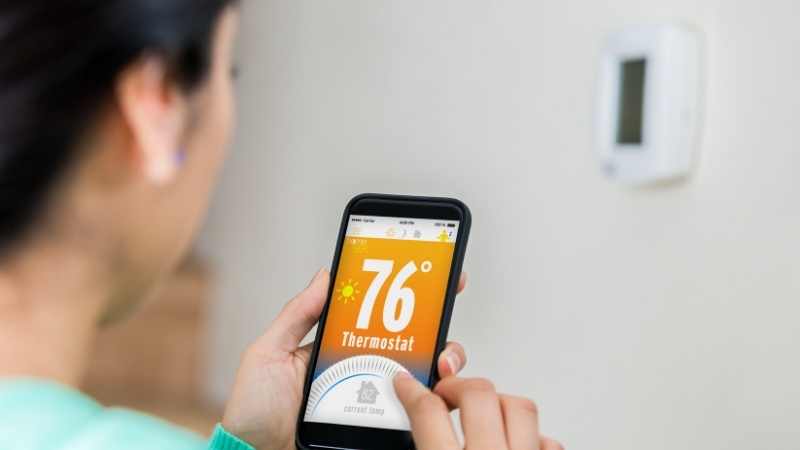
Searching for the ideal thermostat setting in the winter can lead to comfort battles within your home. Colder weather can bring with it the notion that you need to plan for high energy bills to keep your family warm, but using the recommended thermostat settings can prevent temperature wars and crippling energy costs.
Our tips will help you take steps to lower costs and stay warm without layers of clothing. Read on to discover the best temperature for your heater in the winter.
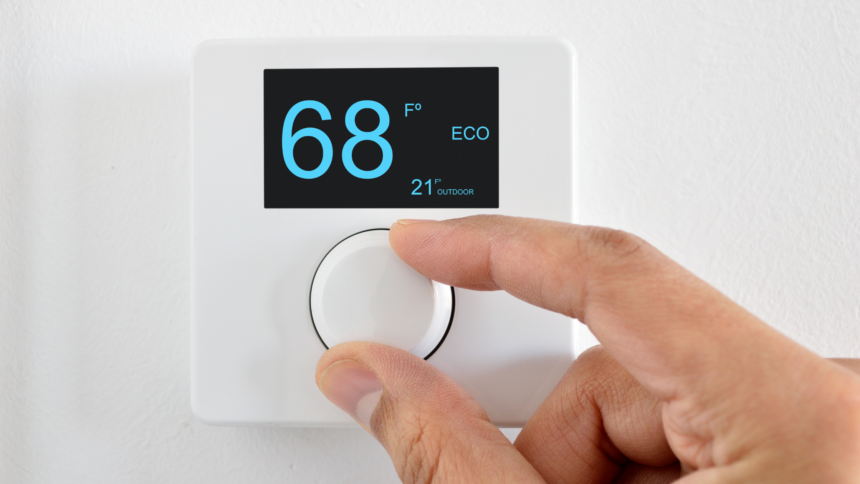
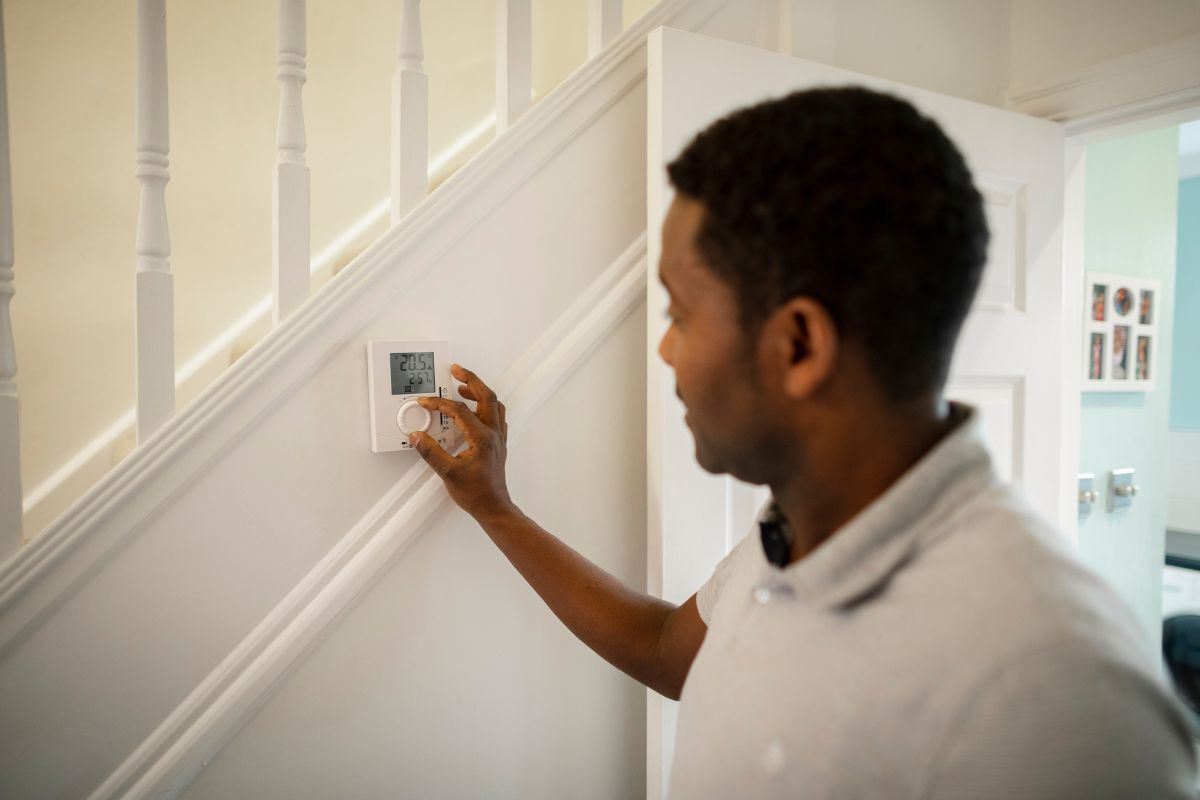
What temperature should I set my thermostat in the winter?
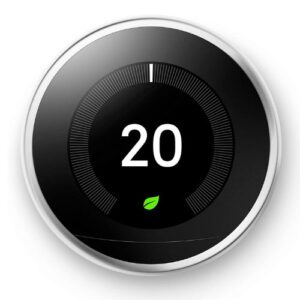
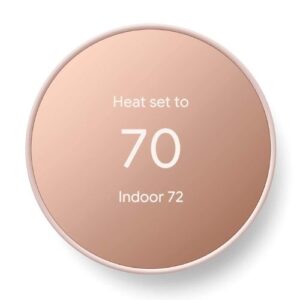
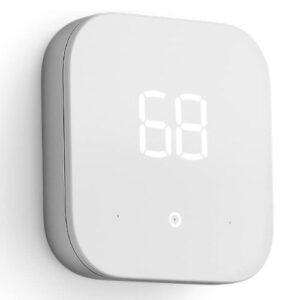
The best average house temperature in winter is 68 degrees while you’re at home. This temperature gives you a nice balance between comfort and energy efficiency.
While you’re away or sleeping, we recommend lowering your thermostat to around 60 degrees for additional cost savings. According to Energy Star, you can save up to 10% a year in heating costs by lowering thermostat temperatures seven to ten degrees for eight hours a day.
Before you head out for the day or crawl into bed, adjusting your thermostat by a few degrees can support big savings.
Winter thermostat setting
If the very thought of adjusting your thermostat to 68 degrees in winter weather runs a chill down your spine, we have a few ideas. We understand everyone’s temperature preference is different, so start with a gradual decrease.
Gradually lower the temperature
When the first cold snap hits, it can be tempting to crank up the heat regardless of the impact to your energy bill. Go slow. Start with an increase of one to two degrees to see how your body adjusts.
You may be surprised at your comfort level when the thermostat is set between 68 and 70 degrees, even as the weather cools. As you get used to the indoor temperature, begin to scale back the thermostat setting by one degree until you reach 68.
Other ways to keep cozy on a budget
If you’re prepared to make a few adjustments to keep your energy costs in check over the winter months, use these budget-friendly ways to stay warm.
Seal any cracks around windows or door jambs.
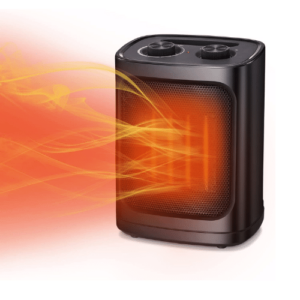
Buy a space heater for additional warmth in a specific room. Space heaters can range from $20 to $150 depending on power and size.
Add a humidifier to the room. Adding humidity will make a lower temperature setting feel more comfortable.
Dress warmly so you can adjust your style to the temperature of each room.
Stock up on extra blankets for your couch and beds as an added layer of comfort.
If you’re following the get-warm recommendations and have 68 degrees as your heat setting for winter, but can’t get comfortable, turn to your thermostat.
Thermostat broken? Schedule repair now.
Yes, please!
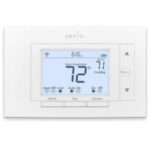
Where is your thermostat located?
The location of your thermostat impacts how effectively it can maintain a cozy temperature throughout your home. Even if you know what temperature to keep your house in winter, using our recommended thermostat settings won’t be as beneficial if your thermostat is located in a room that sees very little foot traffic.
The best place for your thermostat is at the center of your home where people are most likely to gather. This thermostat location helps the device gauge and adjust the temperature in relation to a room where you’re actually spending time.
5 areas to avoid placing your thermostat:
Direct sunlight
Above air vents
Kitchens
Hallways
Adjacent to doors or windows
If your thermostat is placed in one of these areas, consider a few energy-saving adjustments. Shade your thermostat from direct sun and the conditioned air coming from your vents. Seal any gaps in your doors and windows that can bring unwanted cold air into the room.
Taking small actions to ensure the thermostat is reading the indoor temperature properly means your heating system will only run when necessary.
Upgrade your thermostat
Even if you don’t find the high-tech features of a smart thermostat necessary, there’s a major advantage. Installing a device that saves your settings means you’re not constantly asking what temperature to keep your house in winter months.
The cost to have a smart thermostat professionally installed will run you between $112 and $255. That covers the cost of the unit and thermostat installation. On average, homeowners pay $175.
A programmable or smart thermostat will allow you to input your temperature schedule. When you’re home, choose 68 degrees. Program the thermostat to lower the temperature while you’re away and asleep to 65 degrees or cooler.
Remember, for max efficiency and savings with any thermostat—basic or smart—avoid adjusting the temperature too often. Try to stick to at least eight-hour intervals for maximum efficiency.
Consult with an HVAC expert about installing a new thermostat.
Yes, please!
Programmable vs. smart thermostats
Programmable thermostats automatically control the temperature in your home. No matter what type of heating and cooling system you have, you can use a programmable thermostat to automatically adjust the temperature at various times throughout the day. Depending on the model, you can also connect your thermostat to your phone for control anywhere, anytime.
Smart thermostats, while a pricier option, take the guesswork out of maintaining your home’s temperature as they learn your schedule and automatically adjust the thermostat for max efficiency. You can program them remotely with your phone and receive real-time performance alerts to track your energy savings.
Even with the most capable thermostat, routine maintenance on your heating and cooling system is key to reliability. There are a few preventative measures you can take yourself, but scheduling a fall inspection will help prevent the need for an emergency HVAC technician.
Heating system maintenance
If your heating system isn’t well-maintained, the culprit behind your outrageous energy bills could be the very unit producing the heat. To get optimal efficiency from your heating system:
Keep chairs, tables, and other obstacles away from air vents to ensure warm air can circulate throughout your home.
Trim shrubbery around your outdoor cooling and heating unit so it has space to operate as smoothly as possible.
Schedule preventative home heating maintenance every year before the temperature starts to drop. Preventative maintenance can catch small problems before they grow into expensive repairs.
While we recommend 68 degrees as the average house temperature in winter, choose the setting that’s best for your family. If you opt for a higher indoor temperature, choose one of the money and energy-saving options listed above for supplemental heating.
Your home should be your place of comfort and safety. Choosing the ideal winter thermostat setting means creating a routine that works for your entire family.
Furnaces are often considered the best heating source for regions with harsh winter weather. While natural gas has long been the most popular fuel choice to heat homes in the U.S., electricity is gaining ground as a close second.
Electric furnaces are becoming popular in many regions because they do not use non-renewable energy and are cleaner to run. Choosing the right kind of electric furnace for your home can save you money and keep you more comfortable.
Schedule a free home heating consultation with an HVAC expert 👩🔧
Yes, please!
What is an electric furnace and how does it work?
An electric furnace is a type of heater that uses electric heat coils and a blower fan to evenly distribute heat throughout your home. The components work differently than that of a gas furnace. Use this guide to help you determine what type of furnace you have.
An electric forced air furnace works in the same way as a hairdryer. The heat exchanger sucks air into the system and the electric heating chamber warms it up. The blower fan pushes out the hot air through the ductwork into your house.
Parts of an electric furnace
An electric wall furnace has several components that come together to make the equipment function smoothly. These include:
Heater coils: The most important component of an electric furnace, heater coils are made of nickel chromium, and produce heat when fed with electricity.
Thermostat: Regulates the heat and turns the heating elements on or off as demanded by the user.
Blower: A motorized fan inside the furnace blowing cool air over the heat chamber, forcing the air into the ducts to produce hot air.
Filters: Prevent dust and debris from entering the furnace or circulating with the heat.
Plenum: This is a small air chamber inside the furnace that helps distribute air through the home.
Transformer: This component brings down the input voltage to the standard used by the furnace.
Return air ducts: This sucks the cool air from the room into the furnace, helping the blower force it towards the heat chamber.
Sequencer: When a furnace has multiple heating elements, a sequencer controls each of them, turning them on or off as needed.
How much does an electric furnace cost?
Home Advisor reveals that the average furnace replacement cost falls between $2,640 and $6,396, with the average cost landing at $4,512 for equipment and installation.
A standard electric furnace can be priced anywhere between $700 and $3,000, while the installation cost can fall between $1,000 and $2,000. Making the switch from a gas furnace to an electric model comes with a few benefits, but it will likely create a higher monthly energy bill.
Another complication when switching from gas to electric heat is getting power to the new furnace. An electric furnace requires 240 volts of power, carrying 60 to 80 amps. A gas furnace only requires 115 volts at 5 to 10 amps. This means a gas furnace will typically use a regular wall outlet for power. The electric furnace, however, will require more electricity. You’ll also want an electrician to inspect whether your home’s main electrical system can support an electric furnace, especially if you own an older home.
One benefit of an electric vs. gas furnace is that an electric furnace does not require ventilation, so the upfront costs are lower than that of a gas or oil furnace because there is no need for a flue pipe. An electric furnace can last up to 15 years, while the higher-end models can last over 20 years.
Shopping for a new furnace?
Get a quote
Gas vs. electric furnace operational cost
When it comes to the gas vs. electric furnace debate, one of the most significant considerations is the cost. Compared to the cost of running a gas furnace, the cost of using an electric furnace is several times more expensive.
The average price a residential customer in the United States pays for electricity is 13.31 cents per kilowatt-hour (kWh). Homes in America use an average of 877 kWh of electricity per month, creating an estimated monthly energy cost of $117. If you live in a region where temperatures are naturally cooler and winters are more extreme, you can plan to pay more each month.
The cost to operate a gas furnace, however, is typically far less. Natural gas suppliers sell gas in therms or Ccf units. One therm equals 100,000 BTU (British Thermal Unit) and Ccf refers to the volume of 100 cubic feet. Companies may differ in how they price gas, as natural gas can be priced in units of dollars per therm, dollars per MMBtu (One Million British Thermal Unit), or dollars per cubic foot. The average monthly gas bill for American homeowners is $72.10, but could be more for those in colder climates.
How to choose the right electric furnace
Investing in an electric furnace means considering a number of elements to ensure you select the right heating unit for your home. When choosing the best electric furnace, be aware of these factors:
Energy efficiency: Electricity is more expensive than gas or oil, so you will ideally want an electric furnace that is energy efficient. Every furnace comes with an efficiency rating, and higher rating means the appliance uses less electricity to produce more heat.
Climate: If your geographic location experiences only mild winters, you could afford to run the electric furnace full time without risking skyrocketing bills. However, if you live in a region that battles freezing, sub-zero temperatures, then you should look for furnaces with stronger heating capacity and stricter efficiency standards. Refer to the Energy Star website to find out how to pick the right electric furnace for your climate.
Brand: Not all brands of electric furnaces have developed the same reputation. Before you buy the unit, make sure to read customer reviews to learn more about homeowners’ experiences with each brand. Browse the top furnace brands to determine why buyers like each one.
Size: The dimensions of your house must be taken into account before choosing an electric furnace. An improperly-sized furnace will fail to provide adequate heating. All states are classified into zones that determine the type of climate and the energy they require for heating. To ensure the system you purchase can adequately warm your home, have an HVAC professional visit your home and recommend the proper size unit.
Zone heating: If some rooms in your house are better insulated than others, you could consider zone heating, which essentially means you can control the amount of heat each room gets. This is achieved by installing zone dampers in the furnace’s ductwork and then the control panel of the unit regulates temperature for each room by using directions from the thermostat.
Best electric furnace brands
Do not confuse brands with manufacturers. Even though there are over 20 electric furnace brands, there are only three or four manufacturers that own these brands. Some are older and better-known, while others may be regional and smaller-scale. Keeping an open mind when surveying the market is the best way to find the most suitable brand for your needs.
Goodman: Some of the most affordable furnaces are made by Goodman, serving those who want the best value for their money.
Trane: One of the most recognized brands in the HVAC industry, Trane is a more considered purchase but is backed with one of the comprehensive warranties.
American Standard: For homeowners who value high standards, long-lasting quality, and quality equipment, American Standard furnaces are a good choice.
Carrier: Electric furnaces by Carrier offer an impressive energy-efficiency and value for homeowners.
Lennox: One of the longest-standing companies known for quieter HVAC systems available for a wide range of prices.
Daikin: One of the oldest HVAC companies, Daikin is not only known for value but also for excellent customer service.
Let one of our experts help you choose the best furnace for your home.
Book now
When picking an electric furnace model, do not forget to read customer reviews from homeowners who live in a similar climate as you. This will give you insight into the unit’s functionality in your specific climate. Customer reviews will also tell you about the experience they had with the company, after-sales support, and resolution of complaints.
Electric furnaces could be an eco-friendly alternative to gas or oil furnaces if you do not mind the higher cost of electricity. Choosing the right furnace type for your house and getting professional installation are some of the starting steps to ensure your furnace lasts for years to come.
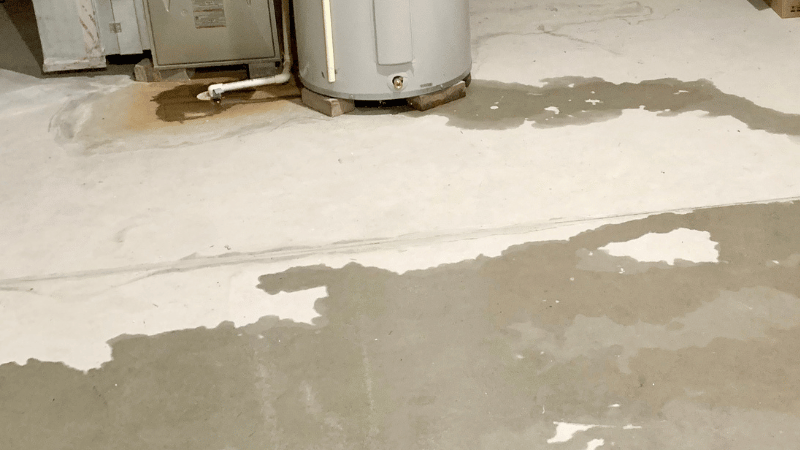
Stepping into a puddle of water near your furnace is often the most obvious symptom of a leaking unit. There are several possible reasons behind your furnace leaking water, a few you may address yourself and others that will require a technician to remedy the problem.
To better troubleshoot why your furnace is leaking water, you need to know the type of unit you have in your home. We’ll walk through the two primary types of furnaces and how to tell which you own.
Once you’ve narrowed the field, we’ll dive into the possible causes of a leaking furnace, highlighting the fixes you can try at home and noting when it’s best to call in an HVAC specialist.
Not up for a DIY fix? Schedule an appointment for furnace repair.
Book now
What to do about a leaking furnace
Even if you eventually call in a furnace repair company, understanding why your furnace is leaking water empowers you to choose the best solution and ask questions to understand how the repair will be made.
Below are our recommended steps to take after discovering a furnace leak but before you contact a repair company:
Determine the type of furnace in your home.
Consider the most likely leak sources based on your ownership of either a high-efficiency condensing furnace, or a conventional furnace.
Establish whether the furnace leaks when the air conditioner is on.
Inspect the unit to find the source of the leak.
Consider the ease and your comfortability in performing small DIY tests.
Call a repair technician if the leak persists.
Our guide is meant to walk you through possible causes and solutions but certainly doesn’t replace the expertise of a reliable industry technician. Avoid further damage by calling on a local company if water leaking from furnace components is one of multiple issues you’re experiencing with your unit.
What kind of furnace do I have?
A high-efficiency condensing furnace and a conventional furnace have a lot in common. However, there are three main differentiators to help you determine the type of furnace in your home.
Furnace exhaust pipe
The furnace exhaust pipe material is the biggest indicator of the type of unit you have. The exhaust pipe, often referred to as the flue pipe, is responsible for venting the exhaust from your furnace out of your home. If the pipe is polyvinyl chloride (PVC), meaning it looks like white plastic, then you likely have a high-efficiency furnace. A metal pipe suggests you have a conventional standard efficiency furnace.
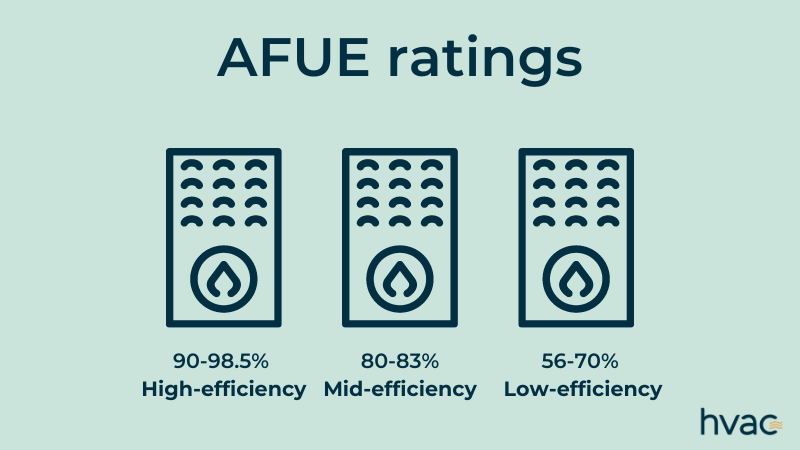
Furnace AFUE rating
Another way to determine the furnace type is to locate the Annual Fuel Utilization Efficiency (AFUE) rating. The rating should be printed on a yellow EnergyGuide label on the unit. Conventional standard efficiency furnaces have an 80% efficiency rating, meaning they convert 80% of the energy created to heat your home. The other 20% is lost through the chimney, air leaks, and other openings. High-efficiency furnaces have an AFUE rating of 90% or above. Your AFUE rating should help you determine the furnace type.
Age of home
Most newer homes have a high-efficiency furnace. If you’ve recently moved into a new-construction home or a home where the heating and cooling systems were replaced, you likely enjoy the benefits of a high-efficiency model. Older homes that have not been updated often have a conventional standard efficiency furnace.
High efficiency condensing furnace is leaking water
Now that you’ve successfully determined you’re dealing with a high-efficiency unit, let’s discuss the most common reasons for why your furnace is leaking water.
Condensation is created when the two heat exchangers inside the furnace absorb so much heat that the gas that’s typically expelled from your unit through the exhaust pipe turns to liquid. That water is usually carried out of your home by the condensate drain.
If the condensate drain or line becomes clogged, the water has no choice but to leak from the furnace. Clearing the line may be as simple as pouring an equal ratio mixture of hot water and white vinegar through the line.
Flush the line several times with the mixture if needed. This condensate line cleaning method typically removes small clogs. To avoid a clogged furnace condensate drain or line, have the furnace inspected and cleaned at least once a year.
Even if the condensate drain and line are clear, a problem with your condensate pump can create a furnace leak. The pump is responsible for pushing the condensation (water) out of the unit and into the pipe.
The average lifespan of a condensate pump is 3 to 5 years. If your pump has aged past that timeline, it may not perform optimally. The pump will cost about $50, and to have it professionally replaced can range between $100 to $200.
Conventional furnace is leaking water
Water leaking from a conventional furnace is typically a symptom of either a malfunction with the built-in humidifier or an ill-fitted exhaust pipe. The humidifier empties excess water through the furnace drain line. If the drain line is clogged, the water will build up, leaking from the humidifier into the furnace. It will appear that water is leaking from furnace components when the humidifier is the challenged part.
Inspect the furnace humidifier water lines for cracks or pinhole leaks. Double-check the fit of the lines to the humidifier. Ill-fitted lines can easily create leaks.
If the humidifier appears to work correctly, inspect the exhaust pipe. If the pipe is loose or improperly fitted to the furnace, water that’s meant to be expelled will leak from the unit.
Be cautious as you’re examining the pipe. Do not touch it. A conventional furnace exhaust pipe can become dangerously hot. To avoid the possibility of injury, contact a furnace expert to repair or replace the pipe.
Get a quote for furnace repair.
Book now
Furnace leaking water when AC is on
If the puddle of water around your furnace only seems to grow when the air conditioner is on, the problem is likely with your AC, not the furnace. When the AC runs, it’s not just cooling your home, it’s also dehumidifying the air.
The air conditioner must release the moisture it has pulled from the air, and typically does so through the unit’s condensate drain line. If that drain line becomes clogged or forms a leak or there’s a leak in the drain pan, the water will accumulate on the ground.
In many cases, the AC drain line is located near or even on top of the furnace. So, it’s very easy to question, “why is my furnace leaking water?” when, in fact, it’s the AC drain line.
If, however, your AC hasn’t operated lately, the drain line isn’t the source of your leak. Call in an HVAC professional to help you determine the next best step.
Repair or replace leaking furnace?
Many of the challenges that cause a furnace to leak can be repaired for a much smaller investment than replacing the entire unit. The average furnace repair cost, according to Home Advisor, is around $300. The cost to replace a furnace is $4500 on average.
While the difference between the two investments in large, it may be time to replace the entire system if:
The furnace is 16+ years old.
You’ve recently made several repairs or upgrades to your furnace.
Energy bills continue to increase.
Unit continuously makes strange noises
Don’t ignore the warning signs of a failing furnace. It’s better to replace an aged unit while it’s still operable rather than wait until the winter months and have to battle dropping indoor temperatures while you wait for an available company.
Tips to hire furnace repair company
When it’s time to repair or replace your furnace, do your company-review homework. Read online reviews about previous customer experiences.
Ask for a quote in writing. It’s best to get at least three companies to estimate your furnace repair or replacement cost. This way, you can immediately eliminate any estimate that stands in stark contrast to the others.
Also, be sure to request a copy of the company’s warranty on parts and labor. Most furnaces last 16 to 20 years, but it’s nice to know you have access to professional assistance when needed.
If a leaking furnace isn’t the problem you face, explore our furnace troubleshooting guide to help identify why your unit isn’t performing properly.
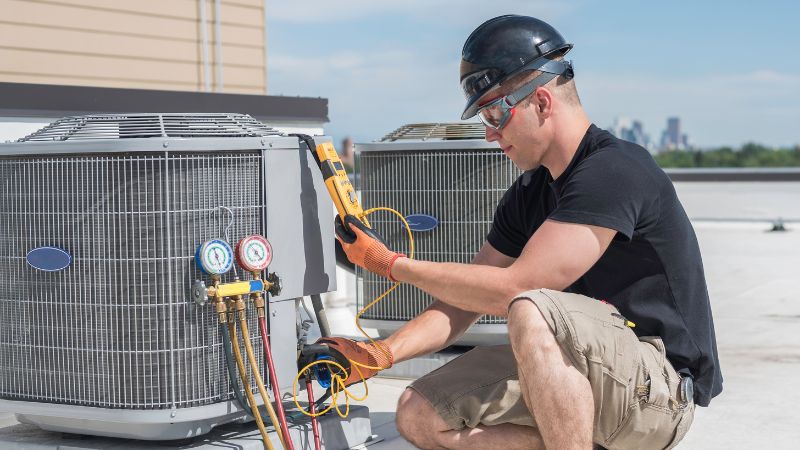
Heat pumps use refrigerant to transfer heat between the inside of your home and the outdoors. When refrigerant lines are damaged, refrigerant can leak out of the system. The heat pump will need to be recharged to restore the proper amount of refrigerant necessary for optimal performance.
Only a certified HVAC technician should charge a heat pump or HVAC system. The tech will use one of two methods: superheat or subcooling. In most cases, subcooling is the preferred method, but the solution will depend on the indoor metering device type.
To prevent the home from becoming cold, the auxiliary heating system will run while the heat pump is taken offline for repair.
Schedule an HVAC technician to charge your heat pump.
Book now
Signs a heat pump is low on refrigerant
There are three primary warning signs your heat pump may need to be recharged. Look for these symptoms of a heat pump that’s low on refrigerant:
A leaking heat pump. The refrigerant in your unit should last as long as the system itself. That is, unless it experiences a leak. If you notice liquid escaping from the system, typically around connector points, you’re likely low on refrigerant.
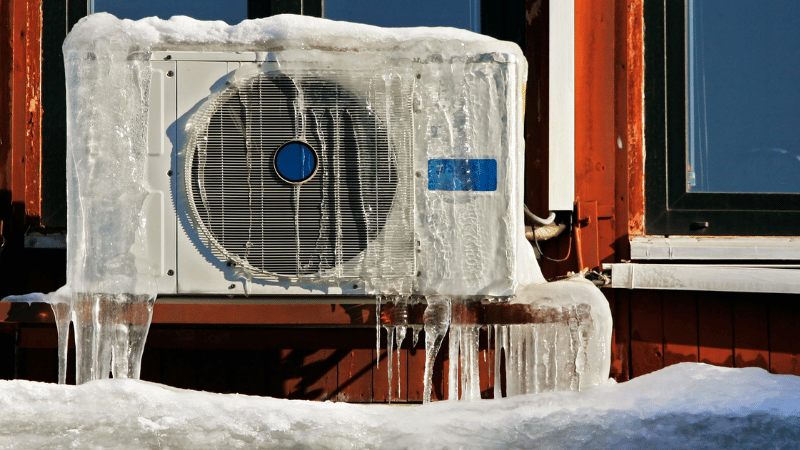
Unit is frozen. If the heat pump evaporator coil is frozen over, it’s time to call an HVAC pro. Note that this can also occur in the summer, signaling the need for a charge.
Poor performance. Does your home feel colder (or warmer) than it should? A unit that continuously runs but can’t maintain your desired temperature signals the need for a refrigerant charge.
When the technician arrives, request that they check the airflow of your unit before charging the refrigerant. If the airflow is off, the unit will not operate properly even with the correct charge.
When to add refrigerant to heat pump
With regular maintenance, your heat pump should operate efficiently for 10 to 20 years. The refrigerant in your unit should not need to be charged or “topped off” unless a leak is detected.
Heat pump maintenance should be performed twice a year: in the spring and fall. Technicians will spot small issues before they turn into major system challenges. Between professional inspections, you can use these simple homeowner heat pump maintenance tips to keep the unit running at its best:
Clear away snow and ice build up. The heat pump needs access to outdoor air. Anything that restricts that air flow will cause the heat pump to work harder than necessary.
Clear leaves, sticks, and other foilage from the outdoor unit. Plant shrubs at least 18 inches away from the heat pump.
Clean or changeyour filters once a month, or as needed.
Keep the thermostat set above 65 degrees during the heating season.
Keep the thermostat set at or below 70 degrees during the cooling season.
Book an appointment with a local HVAC tech for a heat pump tuneup.
Yes, please!
DIY or call a pro for heat pump charge?
Inspecting and charging the refrigerant in a heat pump is not a DIY job. Any time coolant in an HVAC system needs to be charged, a certified HVAC technician must complete the work.
Follow a routine heat pump maintenance schedule and have a professional inspect the unit twice yearly. The upkeep on your unit will pay off with a warm home in the winter and a cool space during the summer. If you’ve noticed the symptoms of a leaking heat pump, click below to connect with a trusted HVAC technician.
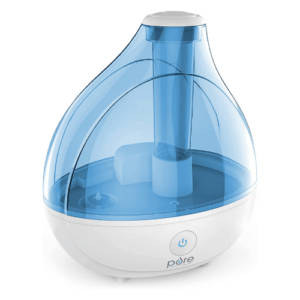
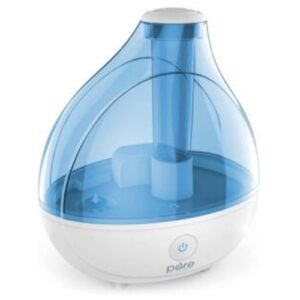
A whole-house humidifier (which can also be thought of as a “central humidifier”) is connected to the home’s hot air ducts and cold air return. It can either work with or independent of the heating/cooling system.
When the humidifier is switched on, water accumulates inside of a collection tray. The air passing through the heating/cooling ducts will then travel through the collection tray, pick up moisture, cycle through the furnace, and then finally returns to the duct system where the moisture-laden air is distributed into your home.
Installing a whole-house humidifier can save you energy and money, as a higher humidity level lets you set your thermostat lower to cut back on your electric bill. Whole-house humidifiers may also help keep you healthy by lowering your chances of catching colds, the flu, respiratory illnesses, and even reducing your chances of catching infections. In order to achieve these benefits, consider the three main types of whole-house humidifiers that you can install; bypass, fan-powered, and steam.
Get a quote for a whole-house humidifier.
Book now
Bypass humidifiers
Bypass humidifiers add moisture to warm air via a furnace. These types of humidifiers take warm air from the home’s heating ducts and pass it through a water tray. This allows the air to collect moisture which is then delivered back into the house.
You can have a bypass humidifier installed on the supply or return plenum of your central air system. Bypass humidifiers typically need to drain their water supply, however. So if you don’t have a floor drain, you can always have a drainless bypass humidifier installed. These reuse their water supply, meaning that they use less water.
Fan-powered humidifiers
The only real difference between a fan-powered humidifier and a bypass humidifier is that the former uses a fan to push air through the water tray for increased water evaporation. Fan-powered humidifiers are able to produce up to a gallon more of humidity per day compared to bypass humidifiers. They’re also more energy-efficient, as the internal fan uses the same amount of electricity as a 25-watt light bulb. Because this is a powered flow-through system, it doesn’t require a bypass duct which allows it to be installed in smaller spaces. A power whole-house humidifier is great for homes built on slabs or with HVAC systems in a closet.
Steam humidifiers
Steam humidifiers work by electrically boiling water to create humidity in the form of steam. The steam is then picked up and pushed throughout the ventilation system. Steam humidifiers are the fastest and most efficient way to increase and maintain a good level of humidity in your home. Steam whole-house humidifiers also provide the purest and most natural form of humidity that you can have within your home. Steam humidifiers are able to run moisture regardless of the condition of your heating/cooling system.
Shopping for a whole-house humidifier?
Get a quote
FAQs: whole-house humidifiers
How much does a whole-house humidifier cost?
The cost of a whole-house humidifier will typically range from $300 to $1,100. These are just general prices, though, as the kind of humidifier will ultimately determine how much the installation will cost.
How do I install a whole-house humidifier?
Installing a whole-house humidifier involves the following steps:
1. Turn off your furnace.
2. Follow the manufacturer’s instructions to mark and cut the hole for the humidifier in the main stack of your furnace.
3. Attach the humidifier mounting plate.
4. Use the manufacturer’s instructions to mark and cut the hole for the humidistat on the cold air plenum.
5. Attach the humidistat mounting plate and unit.
6. Connect the humidistat to the furnace controls.
7. Following the instructions of the manufacturer, connect the humidistat to the humidifier.
8. Depending on your local codes, either install a saddle valve on your hot water line and run it to the humidifier. If these are not allowed, shut off the water and water line before installing a T-fitting.
Certain types of whole-home humidifiers should not be installed DIY. It is generally recommended for steam humidifiers that you hire an expert to install your humidifier, as improper installation can result in serious damage to your HVAC system or home.
Where do you put a whole-house humidifier?
To install a whole-house humidifier, you would place it on the main stack of a forced-air system where it draws water from your home. Some are installed in the return-air duct and others employ a bypass duct.
A modern garage can be used for so much more than housing the family sedan. Whether you’re creating a workshop or home theater, adding one of the best garage heaters can keep the space comfortable.
Garage heaters range in size and style, but some are more powerful and efficient than others. This review talks you through the best garage heaters for your square footage, safety tips, and more.
A garage heater is a device that warms your room by creating hot air. If you use your garage for anything other than storing your cars, you’d likely benefit from a heater.
The average two-car garage is 360 square feet. If you want to expand your living space or need a getaway for your hobbies, the garage offers the real estate you need.
Unfortunately, garages aren’t typically well insulated. They can get uncomfortably cold and drafty in the winter months.
With a garage heater, you’ll be able to use the room through the winter. The warmth makes the room feel less like a repurposed garage and more like any other space in your home.
Best garage heaters review
Thankfully, you don’t have to drain your funds for a quality garage heater. We’ve rounded up a diverse range of portable and stationary models.
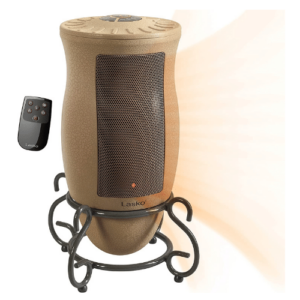
You’ll find a range of heat sources and heating methods, so there’s a bit of something for everyone. We highlight a value option below, but all of our picks come in under $500. All prices are valid at the time of publication.
Best electric heater
Comfort Zone CZ230ER | $298.92
The Comfort Zone CZ230ER is the best garage heater if you need all the floor space possible. This unit blows heat through your whole garage.
The heater weighs 25 pounds and comes with variable mounting, so it hangs up and away from the ground. This is perfect if your space is used as a game room or children are around because it prevents accidental tip-overs.
The CZ230ER must be hardwired and maxes out at 7500 Watts. You can comfortably heat a two-car garage in a colder climate and an even bigger space in milder regions.
The included remote control helps you change the digital thermostat, fan settings, and more to your liking. We especially like the safety feature on this unit. A built-in sensor detects overheating and automatically shuts the heater off to prevent damage.
The louvers provide targeted warmth and the 12-hour timer allows you to automatize your comfort. Have the installation completed by a professional electrician to ensure all the wiring is completed safely.
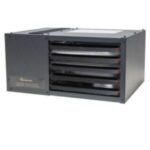
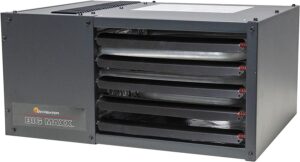
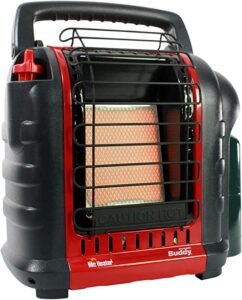
A big garage needs big heat, and this powerhouse delivers. The Mr. Heater Big Maxx is perfect for lower ceilings since you only need an inch of clearing to mount it.
The 50,000-BTU Big Maxx is a natural gas-fueled, forced air heater that allows for vertical or horizontal venting. This much power can comfortably heat a three-car garage or up to 1250 square feet.
The fan and electric ignition spark require a standard 115V AC supply. Plus, the unit comes with a natural gas to liquid propane conversion kit, so you can customize your heat source.
The unit comes with a three-year factory warranty on all parts and burners and a 10-year warranty on any defects in the heat exchanger.
One downside is that the required venting kit, thermostat, and heat exchanger are sold separately. Still, the heater makes our list because it’s easy to install and provides consistent heat.
Who said your heater has to stay in the garage? The Mr. Heater Big Buddy can heat 450 square feet of almost any space, so it’s perfect for indoor-outdoor use.
Hook up two one-pound cylinders of propane for a quick blast of heat. The Big Buddy guzzles propane quickly on the high setting, but the 18,000-BTU output is impressive power for a portable model.
You’ll get up to 11 hours of heat when used on low and roughly 2.8 hours of use on high. Hose attachments are sold separately, so you can attach a bigger propane tank when needed.
Unlike other portable models, the Mr. Heater Big Buddy has an automatic low oxygen shut-off system (ODS) and accidental tip-over safety shut-off. These are two of the most desirable safety features of a garage heater.
The single-control start knob and three heat settings make this unit one of the easiest to use.
Lasko doesn’t cut corners on the safety of the design. The cool-touch ceramic exterior won’t get hot, so you can touch the controls without worrying about burns.
This model gets props for being more customizable than most value options. Choose from two heating options: 900 or 1500-Watts with an optional 8-hour timer.
Use the multi-function remote control to keep your space at your desired temperature. The digital thermostat will monitor the room and produce the heat needed to maintain the setting.
At just seven pounds, this unit is easy to move from your garage to inside your home. One drawback is that this unit makes more noise than other options, particularly on the high setting.
Still, this Lasko model has more bells and whistles than most value heaters. We think it’s a perfect fit for one-car garages and spaces up to 150 square feet.
The Dr. Infrared Heater DR-998 isn’t exactly a beauty, but its standout features and value earned it a spot on our list. It’s an infrared heater, minus the worst parts of infrared heaters.
Most infrared heaters have a glaring con: they emit heat from a single surface, so the heat stays concentrated in one spot. This electric model has an oscillating fan, so you’ll get 360 degrees of warm air throughout your whole garage.
The built-in humidifier pumps cool mist back into the room, adding much-needed moisture to dry winter air.
We love that the DR-998 can be used year-round. The fan-only mode gives a stream of cool air when summer returns.
Plus, you can easily plug the DR-998 into any three-pronged outlet. You can roll it between rooms on its caster wheels, and the anti-tip-over setting keeps kids and pets from knocking it over.
The DR-998 is a humidifier, fan, and heater rolled into one. With a sub-$150 price tag, we are impressed.
The number of BTUs needed to heat a garage depends on two factors: the size of your garage and the climate where you live. The U.S. falls under eight climate zones, with Zone 8 being the coldest.
First, find out which zone you call home. The colder the climate you’re in, the higher-BTU heater you’ll need to get the job done.
You’ll also need to find the area, or square footage, of your garage. Measure one long side and one short side of your garage, then multiply the two numbers. For example, a 15-foot long and 20-foot wide garage spans 300 square feet.
Here’s a general guideline for gas-powered heaters, depending on your climate zone. This chart doesn’t apply to electric heaters.
Climate zone
Optimal BTU/sq. ft.
Zone 1
30-35
Zone 2
35-40
Zone 3
40-45
Zone 4
45-50
Zone 5
50-55
Zone 6
55-60
Zone 7 or 8
60+
How many Watts to heat a garage?
Electric heaters need about 10 square feet of space per Watt of energy they use. For example, a 5000-Watt electric heater can effectively heat up to 500 square feet.
Types of garage heaters
Garage heaters aren’t one-size-fits-all solutions. The many differences in build, heating power, and fuel sources mean you’ll want to choose a garage heater based on your unique needs.
Stationary garage heaters
As the name suggests, these heaters sit in a permanent spot in your home. You’ll need a pro to hardwire the heater into your ceiling or wall.
One perk of going with a stationary model is powerhouse heating. Portable heaters can’t touch the energy outputs on stationary models, so this option is great for two-car garages and larger.
Stationary heaters are pricier than portable models, and you’ll be hard-pressed to find a quality model for under $500.
Installing a stationary garage heater isn’t DIY-friendly. In fact, trying to hardwire one yourself may violate your local electrical code. Hire a licensed electrician for the job.
Portable garage heaters
Portable models can be carried or wheeled from room to room. If you’re planning to move soon or want to use the heater in other spaces, portable is perfect.
Portable models are generally better at creating focused heat. If you spend most of your time in one section of your garage, you may want to opt for a portable model.
Another reason to go with portable is the affordability. Portable garage heaters cost hundreds less than stationary models, and they’re way easier to install. Still, you won’t get the powerful blasts of heat that a stationary model offers.
Gas garage heaters
Gas-powered garage heaters come in both stationary and portable models. They are less environmentally friendly than electric, but they’re better at heating your space.
Most gas heaters run on propane, but some use natural gas. Propane is about twice as energy-efficient as natural gas. So, between the two, we recommend propane as long as you have proper ventilation.
You’ll need to connect a natural gas heater to your home’s natural gas line. Have an HVAC pro complete the job. Most propane-fueled models run on cylinders or tanks.
The heat output of gas heaters is measured in British Thermal Units (BTU). Models for smaller garages start around 12,000 BTU, but multi-car garages or extremely cold climates will benefit from 20,000 BTU or more.
If you live somewhere with frequent power outages, go for gas. Electric models will stop working when the power goes out, but gas heaters will keep on chugging.
Still, gas heaters need proper ventilation to work safely. Follow all manufacturer recommendations when it comes to ventilation to avoid harmful fumes.
Electric garage heaters
Despite the powerful and less expensive heat that comes from a gas-powered heater, electric models are quite popular.
Portable electric heaters plug into an outlet, but stationary models have to be hardwired into your ceiling or wall. Electric garage heaters have two major advantages: you never have to refill the fuel tank, and, when installed properly, there are fewer safety risks.
If your home has power, your electric heater provides warmth. You don’t have to store extra fuel or worry about finding a fuel provider.
Plus, an electric heater eliminates the risk of harmful gas fumes. Ventilation isn’t needed, so there’s one less installation concern with this type of heater.
A major drawback? The heating power from electricity is arguably less than that of a gas-powered heater. For extremely cold climates, a gas-powered unit is likely the better option.
Consult with a local HVAC expert about other garage heating options.
Book now
Things to consider with garage heaters
Garage heaters are easy to use, but your safety is a top priority. Decide which unit is best for your space and rely on a certified HVAC professional for installation, if needed.
Safety tips and features
🛟 Many garage heaters come with built-in safety features. Look out for anti-overheating settings, which keep your unit from overworking and catching fire.
❌ Most models also have an anti-tip-over setting, which locks your heater in an upright position. For infrared and portable styles, this feature is a must-have.
🪟 If you’re using a gas-powered heater, make sure your space is properly vented. Keep a small window or door open so there’s a constant airflow in your garage.
🔥 Keep your heater away from flammable items. Never set anything on top of or near the heater.
🐶 Most models on the market have a grill or barrier covering the heat. Still, it’s important to keep pets, children, and other objects away from the heat source.
Heater size
If your heater is too small for the room, the temperature will never increase to your desired comfort level. Plus, your machine runs the risk of overheating, which is a major safety concern.
If your heater is too big for your room, you’ll end up wasting energy and resources. Double-check the energy output on your heater, and make sure your garage falls within its maximum square footage.
Forced air vs. convection vs. radiant heaters
Both stationary and portable heaters use different methods to heat your space. Some create concentrated heat, while others use fans to disperse the air through the room.
💨 Forced-air heaters use ductwork, or vents, to send warm air into your room. The air is forced, or blown, through your garage with a fan.
🔥 Convection heaters use an internal flame to warm the air, then the air rises naturally. It spreads through your room without the need for a fan, which makes it different from forced air.
🏠 Radiant heaters emit, or radiate, heat off a single hot object. You’ll feel intense heat if you’re standing directly in front of a radiant heater, but it quickly dissipates as you move farther away.
Forced-air heaters are best for big garages. We’d also recommend them if you entertain big crowds or you want an even spread of heat throughout your garage. If you’re in the market for a stationary model, it’ll probably be forced-air.
If your garage is small or medium, a convection heater will get the job done. Most convection heaters are portable, but there are some stationary models available.
If you spend most of your time in one section of your garage, go for an infrared model. We wouldn’t recommend most infrared models for full-garage heating, since they don’t have a fan to blow out the hot air.
Best garage heaters
Garages can be reinvented as entertainment spots, workshops, and more. A garage heater helps warm your space, so it feels more like any other room in your house.
Garage heaters are energy efficient and easy to use. They make your space feel more inviting and cozy, so your family and friends can gather and bond.
Have you ever noticed the phrase “aux heat” on your thermostat? This heat pump thermostat setting means auxiliary heat is being used.
What does auxiliary heat mean? Your heat pump will defer to “aux heat” on its own when the temperature is too cold outside for the unit to warm your home to the desired temperature. While you don’t want this setting to be on all the time, it doesn’t necessarily mean you need to call an HVAC expert and shell out a bunch of money.
Schedule an appointment with a heating expert to check my heat pump.
Book now
Before we jump into what auxiliary heat means, let’s talk heat pump basics. Understanding your unit will help you recognize when aux heat and emergency heat are necessary and when they may indicate a system malfunction.
What is a heat pump?
A heat pump warms your home by pulling in heat from the outdoors, but it can also cool your home by expelling heat from your living space to the outside. Heat pumps don’t create heat or cold air by themselves. They transfer the warmth or coolness from one place to another.
This type of system uses electricity and refrigerant to create a comfortable temperature within your home. To transfer heat from one place to another, the refrigerant flows back and forth from the indoor unit (your air handler) to the heat pump condenser (your outdoor unit).
In mild climates, heat pumps are an energy-efficient way to heat and cool your home. A backup heating source is needed, however, for moments when the temperature suddenly drops. When those freezing temperatures occur, auxiliary heat makes its seasonal debut.
What is auxiliary heat?
Auxiliary heat is a secondary heating function your thermostat automatically switches to when it’s too cold outside for your heat pump to extract warmth from the air. This type of heating is often triggered when the outdoor temperature drops to near or below-freezing temperatures.
Auxiliary heat will also turn on when your heat pump goes into defrost mode. It does this to prevent blowing cold air into your home while the outdoor condenser is thawing.
How does auxiliary heat work?
Your auxiliary heat turns on when your heat pump needs assistance reaching your set indoor temperature. The heat pump will automatically energize its auxiliary heat strip to help warm your home.
Your thermostat plays a big part in determining when auxiliary heat is activated. When the temperature inside your home drops three or more degrees below your set limit, your thermostat will kickstart the auxiliary heat.
This type of heating is also activated if your heat pump becomes covered in ice or snow. Ice can form when there is a problem with your heat strips, which work to keep your equipment defrosted. Another trigger could be low refrigerant levels or a malfunction in your outdoor motor fans.
An indicator on your thermostat should alert you when your heating has switched to auxiliary heat. This can be in the form of a small aux light or a digital reading that says “aux heat” on your display.
Not sure if your heater is working properly? Schedule an appointment with a local HVAC tech.
Book now
What to do if auxiliary heat turns on?
Here are a few tips and tricks for dealing with auxiliary heat. If you can avoid using this type of heating for your home long-term, your energy bill and wallet will thank you.
Auxiliary heat should be a temporary setting and automatically turn off once your home warms up. Check back in 30 minutes or so to see if it has turned off on its own.
Only turn your heat up two degrees at a time. Auxiliary heat can be triggered if your home is three degrees lower than your set temperature.
Do not turn on emergency heat unless it’s actually an emergency. Give auxiliary heat time to work its magic. Emergency heat requires a lot more energy and is more expensive.
Make sure your aux heat indicator turns off when the outside temperature reaches 40 degrees or higher. If it remains on, you may have a malfunction in your heat pump and need to call an HVAC service provider.
Auxiliary heat vs. emergency heat
Auxiliary heat will kick on automatically when the outside temperature takes a sudden dip and your heat pump can’t keep up with warming your space. Emergency heat must be manually turned on.
The heat pump is your home’s primary heating source, but when the weather gets too cold, a secondary heating source is needed. Emergency heat is used to give the heat pump a break and avoid system damage (plus, it will warm your home in sub-freezing temperatures).
The emergency heat setting on your heat pump should be used sparingly, typically when the thermostat temperature continues to drop after the heat pump has run for a long time. Weather this cold means your heat pump is rendered useless. There simply isn’t enough heat in the outdoor air for your unit to absorb and carry into your home.
When the emergency heat is turned on, the radiant heat strips in your system are ignited. You’ll stay warm, but emergency heat mode will cause a noticeable spike in your electricity bill. Run this function only when the temperature inside your home takes an extreme drop and turn it off when the temperature is within 3 degrees of your desired setting.
If the temperature outside is 40 degrees or above, but your home won’t stay warm if not in emergency heat mode, call your local HVAC expert. Your system may be frozen or need repair. It’s best to have it checked before temperatures take another dive.
Auxiliary heat will automatically turn off when your home or environment has warmed up enough for your heat pump to function normally. Remember, your emergency heat is not automatic and will require you to physically turn it on and off.
Both auxiliary and emergency heat should be temporary settings. They use a lot of energy and will increase your electricity bill.
Signs your heat pump may need repairs
It’s important to perform regular maintenance checks to ensure your heat pump is working properly, especially as the colder months roll in. There are a few DIY fixes that can save you some money, but most repairs should be handled by a professional heat pump repair technician.
You can find more information about common heat pump malfunctions and steps to solve these issues here.
Heat pump will not turn on
Make sure your heat pump is receiving power and check that your thermostat is set to heat. If everything is set correctly, your heat pump start capacitor may be broken or there could be an issue with your reversing valve.
Heat pump not heating home
See if your unit is blocked by snow, ice, or fallen shrubbery. Your air filter may also need to be cleaned or changed if it is clogged and unable to efficiently let air through.
If your unit and filter are free of debris, the problem could be low refrigerant levels. For your safety, refilling and recharging the refrigerant should be done by an EPA-certified HVAC professional.
Heat pump is constantly running
A continuously running unit will hike up your electricity bill and shorten the lifespan of your heat pump. Check your thermostat settings and clean your air filter. If that doesn’t solve the problem, your compressor contactor may be broken.
Connect me with a local heat pump repair person.
Yes, please!
Best thermostat setting in winter
The best temperature to set your thermostat to in the winter is 68 degrees while you’re at home. When you’re away, we recommend lowering your thermostat by seven to 10 degrees.
This fluctuating temperature provides both comfort and cost savings for your electricity bill. According to Energy Star, you can save up to 10% a year in heating costs by lowering your temperature to around 60 degrees during the night or when you’re away.
To maintain your cost savings and keep your aux heat from turning on as you warm up your living space, we recommend increasing your thermostat by two-degree intervals. This will help avoid tripping your thermostat’s failsafe feature and starting your auxiliary heat cycle.
How to better insulate your home
Keep your home at a steady temperature and your heat pump from putting in extra work by properly sealing your living space from the chilly air. Energy.gov has some great recommendations for sealing air leaks to keep you comfortable all year round.
Here are a few of our favorites:
Caulk and weatherstrip doors and windows that may leak air.
Ensure where your plumbing, ducting, and electrical wiring comes through the walls, floors, and ceilings is properly sealed.
Inspect dirty spots in your insulation for air leaks and mold. You can use a low-expansion spray foam or install house flashing where you find issues.
Replace single-pane windows with more efficient double-pane windows.
If you have a fireplace, make sure the flue damper is tightly closed when it is not in use.
Seal air leaks around fireplaces, chimneys, furnaces, and water heaters with fire-resistant materials like sheet metal, sheetrock, or furnace cement caulk.
Stress less about auxiliary heat
It’s likely at some point throughout the winter you’ll see “aux heat” on your thermostat. Now you know there’s no need for immediate panic. In all likelihood, your heating system is working just as it should and needs a little extra power to get your home back to where you’re most comfortable.
Keep an eye on your thermostat year-round for any warning signs of larger issues with your HVAC system. Remember to perform regular checks and maintenance, and everything should continue to run smoothly.
A flame sensor is one of the most important safety features of your furnace. This component is responsible for ensuring that your furnace doesn’t create a dangerous gas leak or explosion.
By understanding why the furnace flame sensor is crucial to the unit’s operation, you’ll be better prepared to recognize when a flame sensor is bad. Our guide will walk you through cleaning the sensor and furnace flame sensor replacement.
Suspect your flame sensor needs a repair? Connect with a local HVAC pro now.
Yes, please!
What is a flame sensor?
The flame sensor is a safety component of a furnace located on the interior of the burner assembly. It monitors and verifies whether a flame is burning inside the unit.
If the sensor does not detect an active flame, then it will shut the furnace off to avoid a potential gas leak. The furnace flame sensor helps prevent explosions that could occur if gas were allowed to continue to flow into the home as well as carbon monoxide poisoning of those inside the home.
The Centers for Disease Control and Prevention report that at least 430 people die in the U.S. from accidental carbon monoxide poisoning each year and some 50,000 visit the emergency room because of the gas. While home furnaces are responsible for only a small percentage of these cases, it’s a worthwhile reminder to install a carbon monoxide detector on each level of your home.
Flame sensor vs. thermocouple
A flame sensor and thermocouple are often referred to as the same or interchangeable parts, but that’s not the case. While they both serve as a safety feature on the furnace, you would need to know which you have in order to replace or repair the component.
A thermocouple is often found on older model gas furnaces with a standing pilot. It has a small flame that burns continuously, keeping the top of the thermocouple at a high temperature. If the flame goes out and the tip of the thermocouple cools, it will automatically shut off the furnace’s gas valve.
Flame sensors are used in modern furnaces that operate via an electronic ignition rather than a standing pilot light. These models use electronic igniters to light the gas. As mentioned above, the flame sensors ensure the burners are operating properly and have ignited the gas. If the sensor detects that the burner has failed, it will turn off the gas.
Furnace flame sensor location
When trying to determine how to find a flame sensor, you’ll want to remove the furnace access cover to begin. Depending on the model of your furnace, you may have to remove screws or bolts to release the access cover.
The sensor is located just outside the burner assembly and looks like a small rod with porcelain surrounding the end that connects to the burner. Some furnace flame sensors are straight while others bend at a 45-degree or 90-degree angle. The sensor leads into the fire chamber where the flame burns.
Signs of a bad flame sensor
As with any other component in your heating and cooling system, the flame sensor can go bad. If your furnace stops working properly, look for warning signs that your flame sensor has failed:
Furnace burners turn on but go out after a few seconds
Soot and other debris is covering the end of the sensor (cleaning the flame sensor may fix this issue rather than a flame sensor replacement)
Tip of flame sensor is black
Porcelain/sensor casing is cracked
If a flame sensor replacement is necessary, it’s a low-cost fix that you can likely handle yourself if you feel comfortable working with the unit. Most furnace flame sensors cost less than $20, but if you opt to have a professional HVAC technician make the repair, you can expect to pay between $75 and $250.
Need help replacing your flame sensor? Book an appointment with a local expert now.
Yes, please!
Flame sensor lifespan
If you’ve just replaced the sensor or had a new furnace installed, you can expect the flame sensor to last for about five years. The average lifespan of a furnace is 15 to 30 years, so you can anticipate a flame sensor replacement once or twice over the course of your homeownership.
To extend the lifespan of the sensor, seasonal furnace maintenance and cleaning the flame sensor is necessary. Even if the furnace seems to be operating smoothly, cleaning the sensor each year can prevent you from calling for emergency heating services in the middle of winter.
Furnace flame sensor cleaning
Before you begin the flame sensor cleaning process, turn the gas and electricity off to the unit. The valve handle on the gas pipe will allow you to stop the gas flow and turning off the furnace breaker at your electrical box will ensure all power is shut down.
If the furnace has been running, wait at least 30 minutes before attempting these steps:
Locate the flame sensor (refer to the furnace flame sensor location portion above)
Remove the furnace access cover, which may involve releasing screws or bolts
Unfasten/unscrew the flame sensor from the burner assembly
Disconnect the wiring that leads to the sensor and control box
Loosen the screws and remove the flame sensor
Use an emery cloth to gently remove soot and other debris from the sensor
Reattach the sensor
Reconnect the wiring to the sensor and control box
Secure the flame sensor to the burner assembly
Reattach the furnace cover access
Test the furnace to see if cleaning the flame sensor was the solution you needed. If the unit turns on and off properly, a flame sensor replacement may not be necessary.
Hire a pro to clean your flame sensor.
Book now
Replace furnace flame sensor
During the sensor cleaning process, if you discover the tip of the sensor is black or the component is misshapen or broken in any way, replace rather than repair the part. Follow the flame sensor cleaning steps, but install the new sensor instead of cleaning the old one.
Your furnace will only operate with a certain type of flame sensor. Ensure the component you purchase is compatible with your unit. Check the owner’s manual for guidance on the type of sensor you need.
If working with a furnace or handling the gas line is not within your DIY comfort level, take the safe route and call an HVAC expert. A furnace specialist will test the flame sensor and replace it if needed.
To avoid being caught in a situation where furnace service is needed immediately, schedule routine inspections. Seasonal maintenance can support your unit in working properly when you need it most and expanding the lifespan of the furnace. Explore our top furnace brands if it’s time to replace your unit.
White dust is usually caused by mineral content in the water that goes into a humidifier. When the mist lands on furniture or other surfaces and dries, it can sometimes leave behind dried mineral deposits, or “white dust.”
For most people, the white dust is nothing to be concerned about; however, it could be problematic for some people with allergies, asthma, or other lung/sinus health conditions.
What is white dust?
Only two types humidifiers produce white dust, ultrasonic and impeller portable humidifiers. The white dust they disperse is nothing more than a natural by-product of the minerals present in the water you fill your humidifier with.
Ultrasonic and impeller humidifiers produce humidity through a steaming process, so when the water in the humidifier is heated, the water turns to vapor which is then is sprayed out of the humidifier in a mist form. Within this mist are dissolved minerals from the water itself. The minerals land on furniture, tables, counter-tops, etc., creating the white dust you see.
Is white dust harmful?
The dust produced is not harmful in any way. It can be cleaned off just as any other household dust would be, no special treatment needed. The hardness of your water will decide how heavy or light this layer of white dust will be (hard water is rich in minerals so the harder your water is the more dust you can expect to find).
How to get rid of white dust
Use distilled water to fill your humidifier tank
Using distilled instead of tap water to fill your humidifier will cut down on dust significantly. Distilled water has a very low mineral count and therefore will not produce white dust that hard tap water will.
Purchase a demineralization cartridge
A demineralization cartridge is specifically designed to trap the minerals before they become airborne into your home. (this will reduce or completely eliminate white dust).
Purchase an evaporative humidifier
If your water is really hard and the dust is too much to handle, it may be a good idea to invest in a portable warm or cool mist evaporative humidifier. These humidifiers do not operate in the same fashion as ultrasonic and, therefore will not disperse a layer of white dust. The only difference to keep a watch out for is the noise level, as they are a bit noisier than ultrasonic models.
Talk to an HVAC expert about improving the humidity levels in your home.
Yes, please!
{“mainEntity”:[{“@type”:”Question”,”name”:”What is white dust?”,”acceptedAnswer”:{“@type”:”Answer”,”text”:”White dust is usually caused by mineral content in the water that goes into a humidifier. When the mist lands on furniture or other surfaces and dries, it can sometimes leave behind the dried mineral deposits, or “white dust”.”}},{“@type”:”Question”,”name”:”Is white dust harmful?”,”acceptedAnswer”:{“@type”:”Answer”,”text”:”The dust produced is not harmful in anyway and nothing to be concerned about. It can be cleaned off just as any other household dust would be, no special treatment needed.”}},{“@type”:”Question”,”name”:”How to get rid of white dust?”,”acceptedAnswer”:{“@type”:”Answer”,”text”:”Use Distilled Water To Fill Your Humidifier Tank, Purchase a Demineralization Cartridge, Purchase a Warm or Cool Mist Humidifier.”}}],”@context”:”http://schema.org”,”@type”:”FAQPage”}
Creating a space with the ideal indoor humidity level means your family is more comfortable and you’re protecting your home. Most people find a relative humidity level between 30 and 50% is most comfortable.
Ideal humidity for home
Between 30 – 50% humidity
Seasonal changes and the climate where you live will play a role in your home’s humidity level, but the ideal atmosphere is below 50% humidity.
As the moisture level in the air increases, you may begin to feel hot and sticky. An increase in moisture can also affect certain health conditions, like asthma, making it difficult to breathe.
When the air is dry, meaning the humidity level is too low, you may experience dry skin, an irritated throat, or itchy eyes. A lack of moisture can also cause your wood floors or furniture to crack. A simple tool can help you avoid the home and health challenges that arise from too much or too little humidity.
Need help with indoor humidity? Book an appointment with a local HVAC technician.
Yes, please!
Measure indoor humidity
If you want to measure your home’s humidity you’ll need a hygrometer. A hygrometer is used to measure the humidity level in your house. This small tool can be placed in a living space that’s a good distance away from a bathroom or kitchen where moisture is created. You’ll also want to avoid doors and windows to ensure the reading isn’t skewed by rain, sunlight, or other weather conditions.
A digital hygrometer is easy to find and will monitor your home’s moisture level so you can be proactive about creating a relaxing environment. We like this ThermoPro digital hygrometer because it’s easy to read and reports your home’s indoor temperature and humidity level. Plus, the comfort indicator will let you know if you’re approaching a temperature or humidity level outside your desired settings.
FAQs on humidity levels
What is the recommended humidity level inside a home?
The Consumer Product Safety Commission recommends a humidity level between 30-50% for comfortability, and the Environmental Protection Agency makes the same recommendation. This means that the air contains 30-50% of the maximum possible moisture that it otherwise could. Keeping it in this range helps prevent the growth of harmful mold and mildew.
What causes high humidity levels?
The top causes of humidity in the home are showering, boiling water, and drying clothes inside. If you often have high humidity in your home that is not caused by any of these, you might need to have your home’s ventilation and insulation inspected.
Connect me with an HVAC expert to check my home’s humidity.
Yes, please!
What is relative humidity?
Relative humidity refers to the amount of water in the air compared to the amount the air can hold at a given temperature. If the relative humidity is 50%, the air is only holding about half the amount of moisture it’s capable of holding at that temperature.
How do I increase the humidity in my home?
One of the most effective ways to increase the humidity level in the house is with a whole-house humidifier or a portable humidifier, depending on your needs. If you live in a dry climate, like many states in the Southwest Region of the U.S., a whole-house humidifier is a good investment to consider.
How do I decrease the humidity in my home?
To lower your home’s humidity level, you need to reduce the amount of moisture in the air. A dehumidifier is likely the best way to accomplish this task if you regularly battle high indoor humidity. You’ll also want to change the filter in your HVAC system as recommended (usually every 60-90 days) and have the unit inspected each year for needed maintenance.
Ideal indoor humidity levels by outdoor temperature
The ideal humidity level for your home may change as the seasons transition and outdoor temperatures fluctuate. The chart below offers a good place to start if you’re trying to create a comfortable atmosphere.
Outdoor temperature
Optimal indoor humidity level
Higher than 50°F
Max. 45%
25°F to 50°F
Max. 40%
0°F to 25°F
30% – 40%
-20°F to 0°F
20% – 30%
Below -20°F
15% – 20%
Maintaining ideal relative humidity levels in the home
The best tools to keep relative humidity at ideal levels in your home year-round are whole-home humidifiers and dehumidifiers. These systems are integrated into your home’s heating and cooling system and automatically adjust their performance based on the humidity level in your home. Utilize a humidifier in winter months when air is naturally drier, and a dehumidifier in the summer when air naturally carries more moisture.
Learn more about installing a whole-home humidifier.
Get a quote
Portable humidifiers can help add moisture to a room, alleviating dry skin and preventing damage to wood floors or furniture. Our top-rated humidifier for a large room is the Levoit LV600HH Hybrid Ultrasonic Humidifier. You’ll get 60 hours of operation time from this unit when it’s set to the lowest mist setting. The Levoit humidifier modifies the humidity level in rooms up to 753 square feet, but if you have a smaller space, check out our list of best portable humidifiers.
If your home often feels hot and sticky, a dehumidifier may help. The FRIGIDAIRE Energy Star 50-pint Dehumidifier removes up to 50 pints of water from the air in your home each day. The automatic shut-off and full tank alert will let you know when the 2-gallon capacity bucket needs emptying. Pair this device with a digital hygrometer to monitor and maintain a comfortable environment in your home.
Top humidifiers and dehumidifiers
Levoit LV600HH Hybrid Ultrasonic Humidifier
Sleep mode option that turns off light display and triggers sensors for detecting the optimal level of humidity
Spiral air duct technology that turns water into fine mist without fogging the room or wetting the floor
2-year buyer’s assurance and lifetime support from Levoit
It’s fairly easy to identify when the humidity in your home is uncomfortably high. The air feels heavy and sticky, you may find it difficult to sleep peacefully, or an odor of dampness or mildew can form. Unaddressed high humidity levels in your home may result in:
Visible condensation on windows and walls that can produce a feeling of mugginess throughout the home.
Increased energy bills as you turn down the temperature on the thermostat for relief from the humidity.
Excess moisture promotes the growth and spread of mold, mildew, fungi, bacteria, and viruses. These contaminants diminish indoor air quality, causing illness, and can also cause damage to your home.
When indoor humidity levels are too high, asthma and allergy sufferers may experience worse or more frequent symptoms.
High humidity indoors causes the home to feel muggy. You may notice visible condensation on windows and walls. Mugginess can leave you feeling hot and uncomfortable.
Problems caused by low indoor humidity
Dry indoor air can be just as bothersome to your comfort and health as high humidity. Too little moisture may result in:
Worsening of asthma and allergy symptoms. Cold and flu viruses may spread more quickly, and you may be more prone to sinus infections. You may suffer from dry skin, chapped lips, and dry air passageways.
Increased energy bills as you crank up the heat to stay warm after the dry air pulls moisture from your skin.
Cracks and damage to flooring, trim, and even framing around windows and doors. Wood, building materials, and furniture are robbed of their moisture when the air is dry.
Cost to fix indoor humidity level
The cost to regulate the humidity level in your home will vary depending on your situation. For example, if you have a whole-home humidifier that needs to be repaired, you’ll pay $234 on average for the fix.
For a quality portable humidifier or dehumidifier, you’ll pay between $30 and $250, depending on your needs. If, however, you prefer to have a whole-home humidifier system installed, your investment will run $550 on average.
Sort out your home’s humidity issues. Schedule an appointment with a local HVAC pro now.
Got Goodman furnace problems? Check out these DIY Goodman furnace troubleshooting tips. They may save you the trouble and expense of calling a repair technician.
Goodman furnace isn’t turning on
If your Goodman furnace isn’t turning on, check your circuit breaker or fuse box first. You may need to reset the circuit or repair a blown fuse.
If that doesn’t fix the issue, try resetting the furnace. You can remove the front access panel to find and press the reset button. Refer to the owner’s manual if you need instructions on how to do this.
If these Goodman furnace troubleshooting tips don’t get your furnace running, consider calling an electrician before contacting an HVAC tech.
Skip the DIY. Schedule a furnace repair appointment.
Book now
Goodman furnace isn’t blowing hot air
First, check your thermostat if your Goodman furnace isn’t blowing hot air. It should be set to “auto” and “heat.” If it’s set to “on,” your fan will blow air constantly, even when it’s not actively heating.
Next, check your air filter. You should change your furnace air filter regularly. Check out our instructions on how to do this yourself. You can pick up a new furnace filter for less than $20. They’re also available at stores like Walmart and Lowe’s.
Open the access panel and give your burner a look. If it’s dusty or dirty, you can clean it by blowing canned air or wiping it with a damp, soft cloth. Always make sure you turn the furnace off before handling any internal parts.
Finally, look at your flame sensor. If it’s dirty, it can be removed and cleaned with steel wool that has no detergents. However, our HVAC experts also recommend using a dollar bill for cleaning. It’s durable enough to be effective but less likely to break or damage the sensor. If the sensor is cracked or damaged, you’ll need an HVAC technician to repair the part.
Furnace cycles typically last about 15 minutes. If your Goodman furnace is cycling irregularly, first check your air filter. If it’s full of dust or other contaminants, change it out for a new furnace filter.
Next, make sure the vents in your home are open. At least 75% of the vents should have open grates for your furnace to function properly. Check that they aren’t blocked by furniture, laundry piles, Amazon boxes, etc.
If that doesn’t solve the problem, check your furnace ventilation. Most furnaces have an exhaust flue leading out to the roof or an external wall of the home. Make sure it’s not blocked or clogged by things like a snow pile or bird’s nest.
Next, open the access panel to check your burner. If it’s dirty, you can clean it with canned air or a soft rag (always turn the furnace off first).
The flame sensor may also be dirty. If so, remove and scrub it with detergent-free steel wool. If it’s visibly broken, you’ll need a pro to replace the part.
Goodman furnace won’t turn off
If your Goodman furnace won’t turn off, the first thing to check is your thermostat. Ensure it’s set to “heat” and “auto” (not “on”). The temperature should be set around 72℉. If the temperature is set too high, it could cause this problem.
Your home may be allowing hot air from the furnace to escape. Check for drafts around windows and doors. The Environmental Protection Agency has some good tips for air sealing. Consider investing in draft stoppers and weatherstrip to keep hot air in.
Other causes of a constantly running furnace may be a faulty limit switch, a broken power control board, or a malfunctioning thermostat. These aren’t DIY issues. You’ll need to call in a pro.
In over your head? Get a furnace repair pro out to fix your system.
Schedule now
Goodman furnace codes
Sometimes, your furnace may give you a clue about what’s wrong. Below is a list of common Goodman furnace codes and what they mean for you.
You can usually see the error light on your Goodman furnace through a small opening in the front cabinet. Write down the error code and share it with your furnace repair person. If you power off the furnace, the code will reset and may not be visible when the technician arrives.
Light status
What it means
DIY or not?
Solid on
No connection to thermostat
Check thermostat settings. Check power to thermostat. If that doesn’t help, call a pro.
Blinking on and off
Furnace ignition failure
Turn furnace off and back on. If that doesn’t help, call a pro.
Rapid blinking
Power supply polarity reversed
Call a technician. This isn’t a DIY fix.
2 blinks
Blower or pressure switch failure
Check if there’s been a short or blown fuse. If that doesn’t help, call a pro.
3 blinks
Pressure switch open
Call a technician. This isn’t a DIY fix.
4 blinks
Primary limit switch open
Replace air filter. Open vents. Ensure exhaust flue isn’t blocked. Check power supply. If that doesn’t help, call a pro.
5 blinks
Flame present but no call for heat
There could be a gas leak. Turn the furnace off immediately and call a technician.
6 blinks
Reversed polarity
Call a technician. This isn’t a DIY fix.
7 blinks
Low flame
Call a technician. This isn’t a DIY fix.
8 blinks
Igniter circuit failure
Call a technician. This isn’t a DIY fix.
9 blinks
High state pressure switch open
Check for loose electrical connection at the switch. An electrician can help you do this. Inspect pressure hose for crimping. If that doesn’t help, call a pro.
Goodman furnace owner’s manual
We’ve provided links below to the owner’s manuals for Goodman’s current line of furnaces. These may provide more Goodman furnace troubleshooting ideas. They may also help you identify parts while you’re troubleshooting.
If you don’t see your model listed below, you can find product information here.
If the Goodman furnace troubleshooting tips above don’t work, give a professional HVAC technician a call. You can also reach out for help if you’re uncomfortable trying to troubleshoot on your own.
Click below to schedule an appointment with a local furnace repair pro who can get your Goodman furnace working.
Heat pumps and gas furnaces are two popular options for heating a home. Each system comes with pros and cons, but they work in very different ways. Check out these eight myths about heat pumps vs. gas furnaces to gather the facts so you can decide which heating system is the best option for you.
Schedule a free in-home consultation with a home heating contractor.
Yes, please!
Myths of a heat pump vs. gas furnace
Our goal is to deliver the facts on whether you should install a heat pump vs. gas furnace. Here are the top eight myths, and the truth behind them, of installing a heat pump vs. gas furnace so you can make the best investment for your home.
3alexd / Getty Images
Myth #1 – A gas furnace is always the best way to heat a home
A gas furnace is not always the best way to heat a home. If you do not have gas lines leading to your home, then a gas furnace cannot be installed. They can also produce extremely hot heat, which means that the temperature in your home can quickly reach the setting on your thermostat. This can leave cold spots around your home and contribute to dry skin.
Gas furnaces may provide overpowering heat when the temperatures outside are between 40 and 60 degrees. A gas furnace also produces CO, which can be a threat if the unite isn’t installed properly and inspected annually.
Heat pumps can actually be a better choice in certain regions, like the south, where winters are milder. In areas that don’t experience temperatures below freezing, a heat pump consumes less energy and can be more efficient than a furnace.
Myth #2 – A heat pump is the same as an air conditioner
An air conditioner’s refrigeration system absorbs heat from inside the home to the refrigerant, which carries the absorbed heat to the outside through the outdoor unit. A heat pump works the same way as an air conditioner in cooling mode, but the two differ when heating.
The heat pump’s refrigeration system absorbs heat from outside the home and delivers the absorbed heat through your indoor coil. This process creates an energy-efficient way to keep your home warm in mild temperatures.
Myth #3 – Heat pumps don’t heat your home as well as gas furnaces
A heat pump is an effective way to heat homes in climates that experience mild winter temperatures, like the Southeast. Heat pumps aren’t designed to warm a home when temperatures fall below freezing. For this reason, homes in the Northeast, and other cold climates, should rely on gas furnace heat when deciding between the two.
Let one of our heating experts help you choose the best system for your home.
Yes, please!
Myth #4 – Gas furnaces are always more efficient than heat pumps
Natural gas is cheaper than electricity in most regions, which makes a furnace more cost-effective than an electric heat pump in areas that experience freezing temperatures. Gas furnaces are not always more efficient than heat pumps, however.
For states that experience cooler temperatures (40-60 degrees) but not extreme cold (below 40 degrees), a heat pump can be more efficient and cost-effective.
Myth #5 – A gas furnace is cheaper than a heat pump
The upfront cost for installing a heat pump is usually cheaper than the cost to install a furnace. However, the monthly energy bill is where you’ll see the real savings. It’s less expensive to heat a home with natural gas in a colder region, but you’ll want to rely on a heat pump in a warmer region. Also, if you don’t have natural gas lines running to your home, installation can be extremely expensive.
Myth #6 – There is only one type of heat pump
There are three types of heat pumps: air-to-air, ductless mini-split, and geothermal. The air-to-air heat pump is the most common type of heat pump and works by moving the heat outside your home through the air handler unit inside your home and across the indoor coil.
A ductless, mini-split heat pump is similar to a window air conditioner. It is a smaller air-source unit with an outdoor compressor/condenser and an indoor air-handling unit.
Lastly, a geothermal heat pump uses the warmth stored in the earth (which is roughly 50 to 60 degrees) to heat your home. It uses this warmth to heat the air before it blows it into your home. The best heat pump for you will depend on your type of home and your heating needs.
Myth #7 – Carbon monoxide is a risk with both gas furnaces and heat pumps
Gas furnaces do produce carbon monoxide, which can be harmful if leaked into your home. As long as the gas furnace is installed correctly and regularly inspected, the furnace is safe. Heat pumps, however,do not use combustion to create heat as gas furnaces do, so they do not create CO. Heat pumps do need to be inspected seasonally for optimal performance.
Myth #8 – Gas furnaces produce more heat
Technically, gas furnaces produce more heat than heat pumps. Extremely hot air is not always a good thing, though. The extremely hot air that gas furnaces produce isn’t necessary in regions that have mild winter temperatures. Utilizing a system that produces higher temperatures than you need wastes energy and money.
Talk with a local heating expert for more information on heat pumps and furnaces.
Yes, please!
Frequently asked questions
Does a heat pump cost more than a gas furnace?
Not necessarily. If you live in a region where electricity is cheaper than gas, then a heat pump can be a more cost-effective and efficient way to heat your home.
How do I know if I have a heat pump vs. gas furnace?
The easiest way to determine if you have a heat pump is to set the thermostat to heat. Go to the unit outside of your home. If the unit is running while the heat is running inside, then you have a heat pump.
Why choose a heat pump over a gas furnace?
Most of the reasons you would choose a heat pump vs. gas furnace come down to where you live. If you live in the South, where winter temperatures may only reach 40 to 60 degrees, then a heat pump is the best fit for your home. If you live in an area where electricity costs less than gas, then a heat pump is also the better option.
Does your home feel chillier than normal, even with your thickest sweater on? Check your thermostat. If the temperature is significantly lower than it should be, it may be time to turn on your emergency heat.
What does the emergency heat setting do? Emergency heat is ideal for when the outside temperature is too cold for your heat pump to keep your home warm. If the heat pump freezes over or becomes damaged, then you should switch to emergency heat and call an HVAC service provider.
Schedule an appointment with a local heating expert.
Yes, please!
What is a heat pump?
A heat pump warms your home as it pulls in heat from the outdoors, but it can also cool your home by expelling heat outside. Heat pumps use electricity and refrigerant to create a comfortable home temperature. Refrigerant transfers heat from one place to another by flowing back and forth from an indoor unit (air handler) to a heat pump compressor (outdoor unit).
If you live in an area with milder temperatures, heat pumps are great for saving money and energy. However, you should always have a backup heating source for when temperatures drop too low and emergency heat becomes a necessity.
What is emergency heat on your thermostat?
When the weather gets too cold, your heat pump isn’t able to pull enough warmth from the outdoor air to heat your home to the desired temperature. A secondary heating source, like emergency heat, can be used to keep you warm.
The heat pump emergency heat setting is used when your heat pump needs a break to avoid system damage. Plus, it works well at warming your home in below-freezing temperatures.
The “em heat” setting on your thermostat indicates your emergency heat has been activated. Emergency heat mode will continue to run until you manually turn it off.
How does emergency heat work?
When emergency heat is turned on, your compressor and heat pump shut down entirely, and your system’s backup heating system turns on. This brings in heat without damaging your outdoor heat pump system.
In most cases, emergency heat is electric, but it can also run on natural gas or oil. When you manually set the emergency heat on your thermostat, your system bypasses the heat pump and directly accesses either the electric heat strip or the gas or oil furnace. With electric systems, your air handler turns into an electric furnace.
If the temperature outside climbs to 40 degrees or above and your home still won’t stay warm without using emergency heat, call an HVAC service provider. Your heat pump may have frozen over or need repairs.
Schedule an appointment to repair your heat pump now.
Yes, please!
When to use emergency heat
Emergency heat should only be used in emergency situations, like your heat pump breaking down or icing over.
For example, if a snow-heavy branch snaps and crashes into your heat pump, use emergency heat while you wait for repairs. If your heat pump shorts out during an ice storm, go ahead and turn on your emergency heat. Then call for an HVAC service provider to restore your equipment and get back to a normal heating cycle.
Emergency heat should not be used for long periods of time. Emergency heat can be taxing on your heating system. By removing the heat pump from the equation, your system is solely relying on your secondary heating response. This puts a lot of strain on your backup heating element.
For all-electric systems, emergency heat should keep you warm until your heat pump can be fixed or thaws. Once your system has been mended, turn off your emergency heat to stop the increased heating rate on your electricity bill. Gas and oil furnace second-stage systems can last longer in emergency heat mode without putting too much of a strain on your home heating system.
Em heat vs. aux heat
You see both functions on your thermostat, but what’s the difference between “aux heat” and “em heat”? The answer lies in the weather and your heat pump’s condition.
Auxiliary heating is an automated function that turns on when the outdoor temperature takes a quick dip. Aux heat kicks in when the heat pump is working but there’s a difference (typically 2 – 3 degrees) between your thermostat setting and the actual indoor temperature. This supplemental heating typically only runs for up to a couple of hours. When auxiliary heat is activated, your heat pump energizes a heat strip within its system for an added heating boost. If your heat pump freezes, the auxiliary heat also becomes ineffective.
Emergency heat requires a manual switch and may need to run for hours or days, depending on your repair schedule. This secondary heating source does not work with your heat pump. As the name suggests, this function should be used in an emergency situation, and your heat pump should be shut off.
You’ll stay warm, but the emergency heat mode can dramatically elevate your electricity bill. This type of heating uses a lot of energy and power, which means spending more money than you normally would if your heat pump was working properly.
Home Inspection Insider provides a cost breakdown comparing the use of a heat pump to combat cold weather versus emergency heat. As you can see, emergency heat dramatically increases your electric bill.
Normal heat pump at 30 degrees for 1 week
Emergency heat at 10 degrees for 1 week
Watts per hour
3,000 watts
3,000 watts + 15,000 watts
Hours use per day
12 hours
24 hours + 12 hours
Number of days
7 days
7 days
Total kWH
252 kWH
252 kWH + 1260 kWH
Cost per kWH
$0.13
$0.13
Total cost per week
$32.76
$196.56
How to tell your heat pump needs repair
Regular maintenance checks on your HVAC system are important to maintaining a comfortable home. If your heat pump suddenly breaks, you may be stuck running emergency heat for a few days as you wait on an HVAC service person.
There are a few DIY fixes that can save you money upfront, but keeping to a regular maintenance schedule will ultimately save you from future frustration. For safety, most repairs should be completed by a professional heat pump repair technician.
Scroll through the list below to see if your heat pump problem is identified. If not, explore our common heat pump problems guide for more solutions.
Your heat pump runs without warming
A continuously running heat pump is normal as long as it is keeping your home warm. If the unit runs continuously but is unable to keep up with the desired temperature, call an HVAC professional.
Re-check the settings on your thermostat. Does the heat pump’s air filter need to be cleaned or replaced? If not, your compressor contactor may be broken.
Your heat pump doesn’t turn on
Verify your heat pump is receiving power. Is your thermostat set to heat or did it get accidentally changed to another setting? If neither of those suggestions helps, your heat pump capacitor may be broken.
Your heat pump doesn’t heat the home
If you’ve recently had a winter storm, make sure your unit isn’t blocked by snow, ice, or fallen shrubbery. It could also be time to change or clean your air filter.
If your filter and heat pump are free of debris, the issue could be with your reversing valve or low refrigerant levels. Do not attempt to refill or recharge your refrigerant on your own. This should be done by an EPA-certified HVAC professional for your safety.
Book a consultation with a heat pump technician.
Yes, please!
Your heating emergency won’t last forever
It can be stressful when the outside temperatures begin to plummet and your heating system isn’t effectively warming your home. When needed, emergency heat is available and ready to be activated.
If your auxiliary heat hasn’t automatically turned on to warm your home, switch your thermostat to the “em heat” setting. Your home should heat up soon, and you should make a call to your local HVAC expert to inspect the heat pump. Your emergency heat should keep you and your family warm until they can arrive to fix any issues.
Emergency heat FAQs
How do you turn off emergency heat?
Turning off emergency heat is not recommended. If you turn it off, your heating system won’t work once outdoor temperatures drop below a certain temperature, usually 30 degrees Fahrenheit. You would need to cut power to the whole system and use a different heating source, like a wood stove or pellet stove.
Why did my emergency heat setting kick on?
Your emergency heat setting automatically turns on when outside temperatures drop below a certain temperature, usually 30 degrees Fahrenheit. If you need to manually turn it on, you should call an HVAC professional to get your heat pump fixed.
{“mainEntity”:[{“@type”:”Question”,”name”:”How do you turn off emergency heat?”,”acceptedAnswer”:{“@type”:”Answer”,”text”:”Turning off emergency heat is not recommended. If you turn it off, your heating system won’t work once outdoor temperatures drop below a certain temperature, usually 30 degrees Fahrenheit. You would need to cut power to the whole system and use a different heating source, like a wood stove or pellet stove.”}},{“@type”:”Question”,”name”:”Why did my emergency heat setting kick on?”,”acceptedAnswer”:{“@type”:”Answer”,”text”:”Your emergency heat setting automatically turns on when outside temperatures drop below a certain temperature, usually 30 degrees Fahrenheit. If you need to manually turn it on, you should call an HVAC professional to get your heat pump fixed.”}}],”@context”:”http://schema.org”,”@type”:”FAQPage”}
When it comes to whole-home heating, boiler vs. furnace is one of your options. Both distribute warmth to keep your home comfortable.
Boilers and furnaces use different methods to heat your home. In this piece, you’ll learn how they work and the pros and cons of each.
Get a home heating quote.
Book now
What is the difference between boiler and furnace?
Boilers are a type of radiant heater. They use either gas, oil, or coal to warm water in a vessel. The water or steam (depending on your model) is then distributed to radiators throughout the home for heating.
There are several radiator styles:
Baseboard radiators
Large steam radiators
Radiant floor systems
Alternatively, furnaces warm air and circulate it through ductwork in a home. Furnaces burn fuel to create heat. They use an air handler to push warm air into the home.
Warm air disperses through the home’s air ducts. It blows out through vents in each room, warming the space.
Furnaces can use different types of fuel, like boilers, including electricity, gas, and oil.
Boiler vs. furnace cost
According to the 2023 National Plumbing and HVAC Estimator, the cost of residential boilers ranges $4,378-17,240. HomeAdvisor says the average new boiler costs $5,810.
The National Plumbing and HVAC Estimator states new residential furnaces range $1,010-5,764. HomeAdvisor says the average new furnace costs $4,690.
The average lifespan of a boiler is 20 years. The average lifespan of a furnace is 15-30 years. How long each lasts depends on how you use the appliance and how well it’s maintained.
In addition to budgeting for the appliance itself, you’ll need to pay for installation. It’s easier for HVAC technicians to install a furnace than a boiler.
A furnace takes a few hours, but boiler installation can take multiple days. Therefore, boiler installation is significantly more expensive.
Boilers require less maintenance. A furnace should have an annual tuneup to keep it running effectively. This involves a small expense.
Talk to an expert about furnace and boiler installation.
Yes, please!
Boiler vs. furnace fuel type
In most cases, electric appliances are the least expensive. Oil appliances cost the most upfront, with gas appliances in the middle.
The cost of running a heating appliance depends on the fuel it burns, as well. Generally, gas is the least expensive heating fuel, followed by electricity and oil.
In 2022-2023, all heating fuel prices are up. Gas prices, especially, are spiking, up more than 34 percent this winter.
Boiler vs. furnace efficiency
Boilers are usually more fuel-efficient than furnaces. In turn, your monthly power bill will probably be less with a boiler.
Boilers and furnaces are both rated for Annual Fuel Utilization Efficiency (AFUE). AFUE measures the fuel efficiency of your heating appliance.
A heating appliance with an AFUE of 90% wastes 10% of its fuel and uses 90% to heat your home.
The higher the AFUE rating, the more efficient your boiler or furnace. When shopping for a boiler or furnace, you can directly compare their efficiency by looking for the AFUE rating.
According to Energy.gov, a high-efficiency heating system has an AFUE of 90-98.5 percent.
Which is better? Boiler vs. furnace
In the United States, boilers aren’t currently popular for home heating. Most homes with boilers are older and exist in the northeastern region.
Adapting your home for a boiler can be costly and inefficient unless you have an existing radiant heating system.
However, boilers can be beneficial in certain situations.
Boiler pros and cons
✅ Pros
❌ Cons
Heats more evenly and gradually
Noisy when water is heating up
Lasts longer than a furnace
Costs more than a furnace
Doesn’t blow dust
Complicated installation
Low-maintenance
Requires existing radiant heating elements
Runs more efficiently than a furnace
Pipes may freeze in extreme weather
Furnace pros and cons
Most homes today are built with ductwork; so a furnace is a logical choice for heating them. But if you’re starting from scratch, consider these potential benefits and drawbacks.
✅ Pros
❌ Cons
Less expensive than a boiler
Blows dust, impacting air quality
Easier to install than a boiler
Requires regular maintenance
Space-saving compared to a boiler
Less efficient than a boiler
No water pipes or leaks to worry about
Shorter lifespan than a boiler
The bottom line: furnace vs. boiler
Though boilers have some compelling benefits, we don’t recommend installing one unless your home already has a radiant heating system. We find radiant heating installations expensive and cumbersome, even if you’re building a new home.
Heating via ductwork with a furnace is preferable in most scenarios. We recommend an electric furnace if your home has appropriate hookups. As the utility grid becomes more sustainable and we move towards decarbonization, electric appliances will be the most efficient option.
Oh, the weather outside is frightful, but the central heating system is so delightful!
With winter weather on its way, it’s essential to keep your heating system in top shape. We’ll provide tips on how to prep your HVAC for winter storms.
Do you have to remove snow from your HVAC unit?
If you’re worried about snow in your AC unit, don’t be. Manufacturers build air conditioning and heat pump condensers to withstand some snow.
We recommend clearing snow around the condenser if you rely on a heat pump to heat your home. Once it’s safe, dust snow off the top of the unit. Shovel at least 18 inches around the condenser on all sides to ensure proper airflow.
Some homeowners use snow legs to protect their heat pump in the winter. These risers should boost the unit above the typical average snowfall for your area.
We suggest a professional install snow legs on your heat pump before a winter storm. They can also protect your system if your area is prone to flooding.
Schedule an appointment for HVAC snow legs installation.
Book now
How to protect your AC from snow
If you have a cooling-only AC system, snow in your outdoor unit is not a concern. Since you likely won’t use your AC in snowy conditions, leave it and let the snow and ice melt naturally.
Once the cooling season is over, turn your AC off for the winter. Locate the switch it’s attached to (usually on an external wall of your home), lift the protective cover, and turn it off. Switch your thermostat to “heat” and “auto.”
We do not recommend covering your AC condenser with a tarp or fabric cover for the winter, as they can create mold issues. A mesh-style cover may help to keep leaves out if your trees still have them.
If there’s excessive snow on top of it, you may wish to clean some off to prevent the condenser’s external covering from warping or bending.
If your outdoor condenser is exclusively for air conditioning, you don’t need to do anything to protect it from ice. Do not use your air conditioner when the temperature is below 60℉.
Heat pumps that heat and cool a home may enter defrost mode in icy conditions. This is a self-preserving function wherein the heat pump uses its warming power to melt the ice on its components to continue heating your home.
When a heat pump goes into defrost mode, it may stop providing heat to the house for a short time. You may choose to turn on its emergency heat setting at this time to keep warm. We suggest only doing so in an emergency, as it will burden your system and spike your utility bills.
If you use a window AC and can’t remove it from your window in the winter, consider protecting it with a water-resistant cover.
Consult with a heating expert this winter.
Book an appointment
Heating your home in a power outage
You can take some preventative measures to keep your home comfortable when you anticipate losing power in a winter storm.
🌡️ Turn your thermostat up a few degrees, so your house will stay warm throughout the power outage.
🔥 Choose one room as a designated “warm room.” Gather your family in there with blankets and mattresses for sleeping.
🪟 Keep your warm room insulated by closing the window coverings and sealing cracks in the door.
🔋 Consider purchasing a battery-powered heater to have on hand in case of a power outage.
Winterizing your HVAC
Even when your area doesn’t get severe snow storms, you may need to protect your HVAC equipment from other weather events, including tornadoes, hurricanes, heavy rain, and flooding.
🔩 Check that the bolts securing your condenser to the ground are tight and secure.
🌧️ Consider elevating your condenser if your yard is prone to flooding.
💨 Store outdoor furniture and other backyard items so they won’t blow into the condenser and damage it.
⚡ Protect your system from power surges or lightning strikes with a professionally installed condenser surge protector.
How to prep your HVAC for winter storms
Follow these simple tips, and your outdoor heating and cooling equipment should stay safe through all kinds of winter weather:
❄️ Clear snow from on top of and around your outdoor HVAC equipment when it’s safe to do so.
☀️ Don’t use your air conditioner when it’s less than 60℉.
⛄ Allow your heat pump to de-ice itself with defrost mode. Only use its “emergency heat” setting in a true emergency.
☂️ If you can’t bring window units inside, consider covering them.
Need help preparing your HVAC system for winter storms? Click below to connect with one of our local technicians.
Book an appointment with a top-rated heating contractor near you.
One way to ease the symptoms of dry winter air is with a bedroom humidifier. If your skin and sinuses could use moisturizing relief, add a humidifier to your space.
Let us help you choose the right one. We’ve reviewed the top products on the market to determine the best bedroom humidifier for every need.
When choosing a bedroom humidifier, there are a few things to keep in mind. First, do you want a cool mist or warm mist humidifier?
In general, we recommend a cool mist humidifier. Especially if you are using it in a child or baby’s room. However, warm mist humidifiers do have some benefits.
Warm mist humidifiers
✅ Pros
❌ Cons
Quieter than cool mist
Hot steam is a safety hazard for kids and pets
Warms cold winter air
Not as energy-efficient as cool mist
Don’t release germs or bacteria in the air
May cause nasal passages to swell
Less expensive than cool mist
Don’t usually help cold symptoms
Cool mist humidifiers
Cool mist humidifiers are preferable for most common uses, including keeping skin hydrated and easing cold symptoms.
✅ Pros
❌ Cons
Safe for use with kids and pets
Can release bacteria and germs
Comfortable for year-round use
Noisier than warm mist
Helps with coughs and stuffy noises
Doesn’t help warm the room in the winter
More energy-efficient than warm mist
More expensive than warm mist
Once you determine what type of mist you prefer, you’ll need to pick between an ultrasonic or evaporative bedroom humidifier.
Evaporative bedroom humidifiers
Evaporative humidifiers take air from the room and pass it through a moistened wick or filter to add moisture. Then the humidifier blows the hydrated air back into the room.
✅ Pros
❌ Cons
Less expensive than ultrasonic
Noisier than ultrasonic
Release fewer minerals and bacteria into the air
Use more energy than evaporative
Include a filter
Usually larger than ultrasonic
Usually less attractive than ultrasonic
Ultrasonic bedroom humidifiers
Ultrasonic humidifiers are the most common style. They have a metal container that vibrates at high speed to create ultra-fine water droplets. The humidifier then blows the droplets into the room.
For use in the bedroom, we recommend a portable humidifier. Portable humidifiers can sit on your nightstand, so they’re nearby for easy control when you’re in bed.
Additionally, portable humidifiers can be easily moved from room to room when different family members need them. Standing humidifiers are more difficult to move and clean.
In our experience, standing humidifiers typically take up more space. There aren’t significant advantages to using them, though they may be better for humidifying larger spaces.
Humidifier output
The output capacity of a humidifier should correspond with the size of the space in which it’s operating.
The average bedroom size is 132 square feet. We recommend using a 2-gallon or smaller humidifier for rooms this size.
Best bedroom humidifiers
Best humidifier for bedrooms with smart technology
The Levoit Ultrasonic Smart Top-Fill Humidifier is top on our list because of its durability and unique features. We’re big fans of the Levoit brand and the quality of its products.
We appreciate that you can fill this humidifier from the top, so there’s no need to flip the reservoir and splash water in your bedroom. It’s lightweight and made of BPA-free plastic.
You can control this Levoit humidifier via app, which offers an array of smart features. You can set a schedule, turn the unit on and off remotely, and even check the humidity needs for any plants in your bedroom via the VeSync app.
This system includes an aroma oil tray if essential oils are your thing. It also features a nightlight perfect for children’s bedrooms.
Our Comfort Experts use the Pure Enrichment MistAire humidifier in their homes. Despite regular heavy use, this system has outlasted any humidifier we’ve tried.
We appreciate this humidifier’s quiet operation and ambient night light. We also like that it runs for 25 hours before needing a refill.
This Pure Enrichment humidifier comes with a five-year warranty, an AC power adapter, and a cleaning brush. Its mist novel rotates 360 degrees so that you can adjust moisture away from linens and electronics.
At under $40, you can’t beat the price of this reliable portable humidifier.
The Pure Enrichment HUME Max is a sleek humidifier with three mist settings to help you customize your bedroom comfort. With a top-fill design and water window, refilling and cleaning are mess-free.
Thanks to a 3.7-liter tank, you don’t need to refill the HUME Max often. Its large tank makes it ideal for a big bedroom or living space.
One thing that makes the HUME Max different is its white noise capabilities. This calming feature can help improve your sleep.
This humidifier has a simple control panel, timer settings, and a night light to keep your bedroom comfortable.
With simple controls and a top-fill design, everything about this humidifier is easy. It runs quietly and has an optional nightlight, making it a great choice for a baby’s room.
If you use essential oils, the Crane Top-fill Ultrasonic humidifier has a built-in aroma diffuser.
To eliminate the white dust that comes with most ultrasonic humidifiers, Crane offers a replaceable filter. This can significantly help in places with hard water.
Use a white vinegar solution to disinfect safely. Unplug the humidifier before cleaning.
🔎 Check the humidity level
Using a humidity meter, ensure the humidity in your room is 30-50%. Exceeding that can trigger respiratory issues, encourage mold growth, and breed bacteria.
🛏️ Do not allow items around the humidifier to become wet
If linens or carpet feel damp, turn down the output. This can ruin furniture and other household items.
The bottom line on bedroom humidifiers
We recommend an ultrasonic cool mist humidifier for use in the bedroom unless you have needs that require a different style. A portable humidifier with a less than 2-gallon capacity is best for small spaces like a bedroom.
Clean your humidifier and change the water regularly to keep it working efficiently all winter long.
As temperatures drop and Americans turn on the heat, many are wondering, “Why is my heat bill so high?” The U.S. Energy Information Administration (EIA) predicts heating bills in winter 2022-2023 will be about 11-25% more expensive than last year.
This jump in heating costs is due to several factors, including:
Below normal winter temperatures in some regions
Higher than normal summer temperatures
Inflation
The war in Ukraine
Rising demand for electricity
Get a furnace tuneup and save on energy costs.
Yes, please!
How much are heat bills increasing in 2023?
In an interview with Washington, D.C.’s CBS television station, Mark Wolfe, executive director of the National Energy Assistance Directors Association, explained, “The average family is spending about $200 to $300 more to heat their home this winter, on top of $200 more last year. Overall, families are spending about $400 to $500 more to heat their home than they did a few years ago.”
No matter what heating fuel you use, you’ll likely see an increase in your heat bill this winter. Electricity prices are up 7%, oil prices are up 12.8%, and gas prices are up 34.3%. Data from the EIA suggests the average monthly bill for each this winter will be $221, $353, and $159, respectively.
Why is my heat bill so high?
Several national and global issues contribute to high heating costs in the U.S. this winter. This includes gas, electric, and oil prices to varying degrees.
Across the board, the National Weather Service predicts a colder-than-typical winter in areas across the northern U.S. resulting from La Niña weather patterns. This will increase the demand for heating fuel.
Inflation is also causing all consumer goods prices to grow.
Why is my gas bill so high in the winter?
The core issue contributing to high gas prices is the war in Ukraine. Russia cut off supplies of natural gas to Western Europe. So, the U.S. has been exporting 20% of its natural gas supply to that region. With less supply and more demand, prices naturally go up.
Additionally, summer heatwaves caused consumers to use their air conditioners more than usual, depleting even more of the U.S. gas supply.
Why is my electric bill suddenly so high?
The unbalanced supply and demand for gas is impacting electricity prices as well. This, plus inflation, causes wholesale power prices to rise for utilities. In turn, they must charge customers more.
Why is my home heating bill for oil so high?
Heating oil is currently at the highest price ever. Prices usually surge in the winter when demand is high. The overall increase in wholesale power prices plays a role, as well.
Your heating bill for oil is also heavily influenced by regional conditions. The number of local providers and extreme weather events can cause the price of oil to fluctuate.
Schedule furnace maintenance to ensure your system is running efficiently.
Book an appointment
Assistance for high heat bills in 2022
The federal government recognizes that many American families may strain to pay their home heat bills this winter. The Biden-Harris Administration is providing extra funding for the Low Income Home Energy Assistance Program (LIHEAP) to lessen the burden.
This year, LIHEAP includes its regular congressional appropriations, $100 million from the Bipartisan Infrastructure Law, and additional emergency funding from Congress.
How to get help with high heat bills
LIHEAP funds are issued at the state level. Each state has different requirements for eligibility. For more information on your state’s programs, visit this page.
Your local utility company may also have programs to help with high heat bills this winter, including deferred payment plans. Call them directly to inquire.
How to lower your home heat bill
Though you don’t have control over the big-picture issues impacting utility costs, there are some things you can do in your home to help lower your heat bill.
Your heater can’t run efficiently with a dirty air filter. Change your filter quarterly.
📅 Schedule furnace maintenance
A preventative furnace tuneup ensures your HVAC system runs smoothly all winter.
🧹 Clean your air ducts
Dust and debris in your ductwork make your heater work harder than necessary.
🚪 Seal off rooms you’re not using
Close the doors to unoccupied rooms. Consider using a space heater in the room you’re using.
☀️ Let the light in
Open window coverings so the sun can naturally warm your home. Close them once the sun goes down to insulate.
Your heat bill in 2023
If you’re still thinking, “Why is my heat bill so high?” consider scheduling a consultation with a local HVAC expert. A heating specialist can survey your home and ensure your heater is working properly.
Click below to connect with one of our technicians.
As temperatures begin to dip, relying on energy-efficient space heaters instead of cranking up the thermostat will keep you warm and help save on your monthly energy costs. Our reviews will help you find the unit that offers the warmth you need.
From ceramic to gas-filled, we’re introducing the different types of space heaters and connecting you with top brands in each. Whether you’re trying to heat a large family room or need added warmth to your office, our space heater reviews will help you make the best choice.
Space heaters are devices that offer supplemental heating to a small- to medium-size space. These devices are usually electric or powered with a fuel, like gas or oil. Space heaters come in many shapes and sizes and can help keep your energy costs low.
Deciding which space heater to choose can be a tough decision, so we’ve done the research for you.
Types of energy-efficient space heaters
Before deciding which kind of space heater is best for you, it’s important to consider the different types of heaters on the market. Each heater is designed to offer maximum warmth with minimal energy wasted. Read on to find your best heater.
Gas and oil-filled heater
Oil-filled heaters are a very popular option and most models look similar to old-school radiators. They have a set of columns that house the oil used for heating. Since the oil isn’t used as a form of fuel, you won’t ever need to replace or refill it.
Oil-filled heaters work by converting energy to heat through the use of the oil inside. The heat is absorbed by the oil as it circulates through the columns and fins. Heat is then transferred from the oil to the metal fins of the heater where the heat begins to radiate throughout the room.
One of the cons of gas and oil-filled heaters is that it can take 20 to 30 minutes to feel the heat being produced. However, once the oil is warm, the unit is able to maintain heat for a long period of time. Many gas and oil-filled heater models have adjustable thermostats, programmable timers, and heat silently to allow for an easy heating experience.
Electric infrared heater
Electric infrared heaters are highly energy-efficient and work by converting electricity to radiant heat to warm the surrounding objects in the room. Electric infrared heaters warm spaces by converting energy to radiant heat.
Similar to how the sun warms us when we’re outdoors, radiant heat warms people and objects in a room, not the air in between. Since none of the warmth is wasted on heating empty space, an electric infrared heater is one of the most energy-efficient models.
Talk with an HVAC pro about heating your home.
Yes, please!
Ceramic heater
As the name suggests, ceramic heaters utilize a heating element made of ceramic. That component heats the air that is pulled into the heater and the warmer air is redistributed throughout the room.
Ceramic heaters are typically encased in plastic and are very lightweight and portable. There are two types of ceramic heaters: those that operate with a fan and those without a fan.
Convective ceramic heaters
Convective ceramic heaters use a fan to distribute warm air into a room. The heaters are powered with electricity that heats aluminum parts within the unit that then transfer heat to the ceramic heating element. The unit takes cool air from the base of the heater and pushes it over the heating element. The air is warmed and redistributed throughout the space by a fan inside the heater.
Radiant ceramic heaters
Radiant ceramic heaters use energy to heat the ceramic plate and then radiate heat directly to objects in the room. This kind of ceramic heater does not use a fan. While radiant ceramic heaters won’t heat up a room as fast as a convective ceramic heater, these units do provide more long-lasting heat.
Convection heater
Convection heaters work by pulling cool air into the device to be warmed by the heating element. The heated air rises while the cold air stays closer to the ground where the heater can pull in the cool air and begin the process again. This continued cycle of air allows the heater to produce a constant flow of warmth. These heaters come in a variety of shapes and sizes and can be wall-mounted or portable. Most units are relatively quiet and evenly distribute heated air throughout the space.
Energy-efficient space heater reviews
Now that you know the types of space heaters that are on the market, check out these top energy-efficient space heaters. Whether you’re heating a garage, bedroom, or any other part of your home, you’re sure to find a heater that saves energy while making your home comfortable.
Best space heater for small rooms
Pelonis Oil Filled Heater
With three heating modes to choose from, the Pelonis offers low, high, and eco settings to provide heating for every situation. In eco mode, the heater will toggle between the 1,500-watt high setting and the 900-watt low setting to maintain the temperature that is set on the LED display.
Designed for smaller rooms up to 164 square feet, this unit is ideal for an office or large bathroom. Plus, it runs silently and provides full-room heat with only 10 minutes of warm-up time. The Pelonis prioritizes portability and safety with a carrying handle, wheels, tip-over protection, and a 10-hour auto shut-off function. It also comes with a 1-year warranty.
Equipped with a built-in eco-mode, the Dr. Infrared Heater prioritizes energy conservation while still optimizing heating. Set a timer for up to 12 hours of heating time and control from a distance with the included remote.
We especially like that you can heat up to 1,000 square feet with this device. With an operational noise level of just 39 decibels, the Dr. Infrared Heater can quietly heat a large room and keep your family safe. This model is designed with overheat and tip-over protection and is backed by a 3-year warranty.
The Lasko space heater is a design-friendly option that’s also eco-conscious, functional, and looks great in your living room. This ceramic heater features an adjustable timer that can be programmed from 1 to 7 hours of heating time to eliminate unnecessary energy consumption.
The unit has built-in safety features including a cool-touch exterior and overheat protection. Despite its small 3-pound size, this heater can warm a room up to 250 square feet with the optional widespread oscillation feature. This heater arrives fully assembled and is ready for immediate use. The device comes with a 3-year warranty.
Best energy-efficient space heater for large rooms
De’Longhi Convection Panel Heater
Built to provide full-room warmth with energy-efficient heating, the De’Longhi Convection Panel Heater offers an eco-friendly mode and programmable timer to maximize heat and keep energy costs down. One of our favorite things about this unit is that it can heat rooms up to 300 square feet, making it a great pick for your mid-sized living room or kitchen area.
The device can stand on its own or be mounted to the wall as a space-saving benefit. The sleek look of the unit offers a design-friendly option that would suit your heating needs and can be controlled from across the room with the included remote control.
The unit also offers an adjustable thermostat, timer, and multiple heating displays. With a tip over alarm buzzer, overheat protection, and an antifreeze setting, this heater prioritizes safety while still being eco-friendly. The device features a 3-year warranty.
The Atomi Smart Wifi Heater offers a smart home-enabled heating experience. Compatible with smartphones, Alexa, and Google Home, the heater can be voice-activated or controlled by a large touch-screen panel.
The device can heat spaces up to 750 square feet with its three operation modes. Choose from the high, low, or eco setting to create the atmosphere you desire. Plus, you’ll benefit from a number of safety features, including a wobble-free base, a 360-degree tip-over safety switch, cool-touch housing, built-in overheat protection, as well as instant notifications to your phone if your heater tips over or turns on.
One of the biggest benefits of electric heaters is that they provide heat directly to the space that needs it the most. Especially with portable heaters, you’re able to warm the parts of your home that may not get as much heat from your furnace or central heating unit.
Another benefit of electric heat is the large variety of heaters available. Electric heaters come in many different sizes and styles so you can choose the right model for any home heating situation.
Whether you’re looking to heat your craft room or your kitchen, these heating options provide a wide range of heating uses with eco-friendliness in mind. Save on your energy bill without sacrificing quality heating.
Talk with an expert about energy-efficient home heating options.
Create a more energy-efficient home with blown-in insulation. It’s a simple, affordable option that keeps your home warm during the winter and cool in the summer.
Compare the cost difference between installing blown-in insulation yourself and relying on a pro. Cost data is courtesy of HomeAdvisor, Home Comfort Insulation, and The Home Depot.
Shopping for energy-efficient HVAC equipment?
Get a quote
What is blown-in insulation?
Blown-in, or loose-fill, is a dense variety of insulation. This thick insulation makes your home more comfortable. There are three types of blown-in insulation:
Fiberglass blown-in insulation is made small spun fibers of glass. The fibers bind together to create batts, which look like cotton candy. This is a good insulator for crawl spaces, attic floors, and other spaces.
Cellulose blown-in insulation is mostly made of recycled material, like newspaper. The crumbly material is covered in a fire-retardant chemical that makes the paper soft and helps it insulate well.
Rock wool, or mineral wool, insulation is made from volcanic rock. The rock is melted and spun into a thick material similar to fiberglass. Mineral wool is largely unaffected by moisture, is naturally fire retardant, and acts as a pest deterrent.
Some varieties are fire-repellant, protecting your home from structural damage
Insulates spaces that foam and fiberglass insulation don’t reach
❌ Cons of blown-in insulation
Challenging DIY project unless you’re experienced with insulation
Weight of blown-in cellulose can cause ceiling sag
Material is difficult to remove if it gets wet
Insulation settling can leave some unprotected spots in the walls
Where is blown-in insulation installed?
Blown-in insulation is installed in the walls of your home and the attic. Think of installing blown-in insulation like flossing your gums. Blown-in insulation fills in the gaps between the planks, where heat is most likely to escape.
Here are a few spots where blown-in insulation is installed:
Interior and exterior wall cavities: the space between the planks that give your walls support and structure. These planks are sometimes called studs.
Ceiling joist cavities: the space between the horizontal beams that support your ceiling.
Attic floor: Blown-in insulation on the attic floor can prevent conditioned air from escaping out the top of your home.
Blown-in insulation doesn’t hold up well in foundation or masonry walls. Rigid board foam and spray foam are better options, as they offer better moisture control.
Calculate the cost of blown-in insulation
The total cost of installing blown-in insulation depends on a number of factors. Think of fiberglass, cellulose, and rock wool blown-in insulation as a good, better, best tier. Fiberglass is the least expensive, while cellulose is middle-of-the-pack, and rock wool is the priciest.
Loose-fill fiberglass insulation cost
Loose-fill fiberglass costs $0.40 to $1.10 per square foot, on average. Pricing could vary greatly depending on your region. Labor cost for attic insulation ranges from $40 to $70+ per hour.
Cellulose insulation cost
Cellulose insulation costs $0.60 to $2.30 per square foot, depending on brand and quality. Again, pricing may differ for your region. Plus, insulation companies will charge by the hour to move items in your attic to complete the job. It’s a good money-saving option to remove anything in the attic ahead of insulation time.
Rock wool insulation cost
Rock wool insulation costs $1.40 to $2.10 per square foot, on average. While rock wool is the least used type, it’s highly flame-retardant. We recommend it for areas where fire code requirements should be followed, like the walls connecting your house to the garage.
Improve your home comfort with new HVAC equipment.
Get a quote
How to calculate blown-in attic insulation cost
Attics should be filled with dense insulation. Some states enforce a legal minimum R-value for attic insulation.
We suggest Googling “[your state or city] attic insulation compliance guide” before buying any materials. If your city or state has no legal minimum R-value, this free guide from EnergyStar.gov lists the suggested R-value for your climate.
If you’re installing attic insulation yourself, first calculate the square footage of the attic space that needs insulation.
Divide the square footage of your ceiling joist cavities by the square footage covered per bag of insulation. Round up to the nearest whole number. The result is the number of bags of insulation you need to buy.
Let’s look at the estimated cost of materials to pad your attic with fiberglass vs. cellulose blown-in insulation. If you hire a professional, they will supply the correct amount of insulation.
Cost of fiberglass materials
Fiberglass costs about $33 per 25-pound bag, on average. The cost of materials to insulate 1,000 square feet of attic space varies from $429 to $1,056, depending on the R-value and brand of insulation.
Desired R-value
Square feet covered per bag
Cost of materials (1,000 sq. ft)
R30
66-77
$429 – 495
R38
50-60
$554 – 660
R44
43-50
$663 – 759
R49
38-44
$746 – 858
R60
31-37
$1,056
Cost of cellulose materials
A 25-pound bag of cellulose insulation costs anywhere from $15 to $30. The cost of materials to insulate a 1,000-square foot attic ranges from $641 to $2,256.
Desired R-value
Square feet covered per bag
Cost of materials (1,000 sq. ft)
R30
13
$641 – 1,282
R38
15
$840 – 1,680
R44
18
$993 – 1,986
R49
23
$1,128 – 2,256
How to calculate blown-in wall insulation cost
Blown-in wall insulation isn’t as thick or heat-resistant as attic insulation. Usually, wall insulation has an R-value between R-13 and R-24.
We recommend hiring a pro for the installation (more on that below). The pro will decide how many bags of insulation you need.
Cost of blown-in wall insulation materials
Here’s a breakdown of the estimated cost of materials for 1,000 square feet of wall space. Pricing reflects national averages and excludes labor costs.
Fiberglass: $400 – 1,100
Cellulose: $600 – 2,300
Rock wool: $1,400 – 2,100
Labor costs of blown-in insulation
Hiring a professional to install the insulation adds labor fees to the total cost. Labor costs range from $40 to $70 per hour, depending on your location and the time of year.
The charts below show the average labor time and cost by R-value. Depending on your attic or wall’s square footage, your final labor costs may vary.
Labor cost of attic insulation
Installing blown-in attic insulation can be a DIY project. It’s also relatively inexpensive to hire a professional for a job. Installation takes a half-day to a full day, depending on your square footage.
Labor costs average $160 to $560 in the U.S. Compared to wall insulation, attic insulation is less invasive and time-consuming to install.
Insulation R-value
Labor hours (per 1,000 sq. ft)
Labor cost
R-30
4
$160 – 280
R-38
5
$200 – 350
R-44
6
$240 – 420
R-49
7
$280 – 490
R-60
8
$320 – 560
Labor cost of wall insulation
Wall insulation is more expensive and time-consuming to install. Cutting a hole in the wall runs the risk of hitting a pipe or electrical wire, so a skilled professional is your best bet.
The labor cost of installing blown-in wall insulation averages $800 to $2,100. This range does not include the cost of materials and other service fees.
Insulation R-value
Labor hours (per 1,000 sq. ft.)
Labor cost
R-13
20
$800 – 1,400
R-15
23
$920 – 1,610
R-21
27
$1,080 – 1,890
R-24
30
$1,200 – 2,100
Finding a professional doesn’t have to be a hassle. Here are our tips for getting a quality job done at a reasonable price:
Get 3-5 quotes from local HVAC contractors before choosing one.
If you can, wait until the off-season in late fall or early winter. This season is generally a slow time for contractors, giving you the best chance of low wait times and labor costs.
Budget for about 15% more than our highest estimate. The HVAC market fluctuates, and prices change often.
Should you install blown-in insulation yourself?
Installing blown-in attic insulation can be a weekend DIY project for someone familiar with the work. Otherwise, hire a professional.
We don’t recommend installing blown-in wall insulation yourself. The pipes and electrical wiring behind the drywall are a safety hazard for inexperienced drillers. Go with a licensed and insured professional.
Talk to an HVAC professional about insulating your home.
Yes, please!
Blown-in insulation machine rental cost
Home improvement stores usually rent out insulation blowers in 24-hour time slots. Nationally, daily rental costs $100 to $200.
Seasonal discounts and deals can reduce the machine rental cost. Some companies offer free 24-hour blower rentals when you buy insulation in bulk.
Installation toolkit
Installing blown-in attic insulation yourself? You’ll need these affordable, easy-to-find safety materials.
Ductless mini split ACs are gaining popularity. Customers appreciate their efficiency, affordability, and ease of installation compared to traditional air conditioners.
But what brand is best? In this piece, we’ll review the pros and cons of Fujitsu mini splits vs. LG mini splits.
LG vs. Fujitsu mini splits
LG
Fujitsu
🏠 Headquarters
South Korea
Japan
🏆 Noted for
Innovation
Reliability
💰 Mini split pricing
$3,500-6,500
$3,700-5,700
☔ Warranty
10 years
5-7 years
LG mini splits
LG is a well-known manufacturer of home appliances and electronics. The company is based in Seoul, South Korea.
As a brand, LG is known for innovation. It’s currently ranked fourth in the world for published patents.
In the HVAC industry specifically, LG is considered a mid-tier brand. The average price of its mini split systems ranges $3,500-6,500, including installation.
Fujitsu mini splits
Fujitsu is a multinational brand, selling technology hardware and software, telecommunications products, and electronics. It’s based in Saga, Japan.
The company’s been making residential and commercial air conditioners for over 50 years. Fujitsu’s latest models use artificial intelligence and Internet of Things (IoT) technology to automate cooling.
HVAC experts prefer Fujitsu units for installations in smaller spaces. They are known to be reliable and competitively priced. Fijitsu mini splits range $3,700-5,700, including installation.
Connect me with a local mini split dealer.
Yes, please!
LG ductless mini split reviews
LG offers a comprehensive line of mini splits, which include an indoor unit (evaporator) and an outdoor unit (condenser). Its indoor units meet various mounting preferences, from floor to wall to ceiling. You can mix and match elements to design a unique HVAC system specific to your home.
LG outdoor units are quieter and more energy-efficient than conventional AC condensers. Its variable-speed inverter technology allows them to function at the optimal level to seamlessly maintain the desired indoor temperature.
LGRED° is LG’s proprietary heating technology that enables effective warming in extreme weather conditions. While some mini split manufacturers build outdoor units for more temperate climates, LG says its compressor can operate in weather conditions as low as -13℉.
Single-zone LG mini splits
LG offers single-zone ductless systems as bundles containing one indoor and one outdoor unit. Each indoor unit is wall-mounted or cassette style (ceiling mount).
Depending on your needs, there are three product lines to choose from: Standard efficiency, Mega, and Mega 115V. Each line has several models with varying BTU output. Check out our AC Size Guide to learn how many BTUs you need to cool your room.
Multi-zone LG mini splits
LG’s multi-zone mini split offerings are much more varied. You can pair an outdoor unit that meets your capacity needs with an indoor unit that matches your mounting preference and aesthetic.
For example, the LG Art Cool Gallery line offers indoor units that mount to the wall. They look like picture frames, and users can customize digital artwork to display on the unit.
The LG Art Cool Mirrored line features indoor units with a mirrored exterior to better blend with your home’s decor.
LG also has indoor mini split components that mount on the ceiling and lower on the wall.
LG’s current line of mini splits includes the following elements. (Note: Click on the model number for product details.)
Fujitsu’s line of mini splits is called Halcyon. It offers single- and multi-zone systems supporting up to eight zones.
Most Fujitsu mini splits can be controlled wirelessly via its FGLair app. The app integrates with Google Home and Amazon Alexa for voice control capabilities.
The company prides itself on reliability, claiming 99.99% of its products don’t require replacement within their expected lifespan. Fujitsu uses state-of-the-art testing to ensure durability amid extreme weather conditions.
Fujitsu’s mini splits are also energy-efficient. A number of its products have earned the “Most Efficient” ENERGY STAR rating, functioning more than twice as efficiently as the minimum standard.
Single-zone Fujitsu mini splits
Fujitsu sells its single-zone mini splits as a bundle, including one indoor and one outdoor unit. With more than 40 bundles, Fujitsu has four times more selection for single-zone mini splits than LG.
Fujitsu offers a variety of indoor mounting options, as well as outdoor units specialized for low-temperature operation and energy efficiency.
Confused by all the options? Let us help pick the best mini split for you!
Yes, please!
Multi-zone Fujitsu mini splits
Fujitsu’s line of multi-zone mini splits is not as varied. It sells a handful of outdoor units, some of which are optimized for areas that get especially cold in the winter.
There’s an assortment of mounting options for Fujitsu’s multi-zone indoor units. Each type has a few capacity options depending on what size room you’re cooling.
Fujitsu’s current line of mini splits includes the following product options.
While both Fujitsu and LG deliver comparable mini splits at a mid-range price point, each brand has distinct benefits and drawbacks.
LG mini splits
✅ Pros
❌ Cons
Array of indoor multi-zone options
Few single-zone bundles
Unique indoor cabinets, including mirrored cases and art displays
Only wall-mount units for single-zone systems
Ability to control some systems via app
Larger range of capacities available
Extended piping options
Longer warranty period (10 years)
Fujitsu mini splits
✅ Pros
❌ Cons
Wide variety of single-zone bundles
Limited multi-zone options
Outdoor units optimized for low temps
Traditional-looking indoor cabinets
Ability to control some systems via app
Shorter warranty period (5-7 years)
Generally more energy-efficient
Typically less expensive
How to buy a mini split
If you’re ready to invest in a mini split, its best to contact a certified local dealer for your chosen brand.
You can purchase mini splits from third parties like Amazon or other HVAC retailers. We don’t recommend this. Many manufacturers void their warranties if their products are purchased or installed by third parties.
We also don’t recommend going the DIY route for installation. Setting up a mini split involves refrigerant. Only licensed HVAC technicians can legally handle refrigerant.
HomeAdvisor says you should expect to pay about $500 in labor costs for mini split installation.
Connect me with a local mini split dealer.
Yes, please!
Fujitsu vs. LG mini splits: The bottom line
Fujitsu and LG are both known for producing quality home electronics. We feel each brand can benefit different mini split shoppers.
Fujitsu mini splits are best for users:
Concerned with decor aesthetics
In need of a multi-zone system
Who plan to stay in this home for at least 10 years
LG mini splits are best for users:
Shopping for a single-zone system
Looking for low pricing
Who prioritize energy-efficiency
Still not sure which is best for you? Click below to connect with an expert who can help you choose.
The SEER rating quantifies overall AC system efficiency on a seasonal basis. It helps consumers compare energy efficiency when choosing a new air conditioner.
How is SEER rating calculated?
To calculate an AC’s SEER rating, divide its cooling output by its electric energy input during a typical cooling season. The higher the number, the more efficient the AC.
For example, if an AC puts out 5,000,000 BTU of cooling seasonally while using 300,000 kW of electricity, its SEER is 16.6 (5,000,000/300,000 = 16.6).
SEER testing occurs in a laboratory setting that simulates indoor and outdoor environments. Generally, the outdoor temperature is just two degrees higher than the indoor temperature in the simulation.
The laboratory controls the conditions for consistent and accurate results. However, they don’t necessarily reflect reality. For example, your AC may consume more electricity in your home compared to the laboratory.
SEER vs. EER
One distinction to be made is SEER vs. EER. The “S” refers to the average operating time and energy efficiency over the entire summer season.
Comparatively, EER is only a snapshot of the efficiency of a system at one moment in time based on specific conditions.
What is a good SEER rating?
In the northern United States, new HVAC systems must have a minimum SEER of 13. In the South and Southwest, 14 is the minimum SEER. Come 2023, these minimums will change to 14 and 15, respectively.
Older ACs have lower SEER ratings in most cases. For example, air conditioners from the 1990s are generally rated 8-11.
SEER ratings of 13-15 are considered good, 16-19 are better, and 20-24 is best.
SEER chart
The highest-SEER central AC currently available is rated 26. This is far more energy-efficient than most models on the market today. Carrier, Bryant, and Lennox make 26-SEER air conditioners.
Mini splits are typically more energy efficient than even the best central ACs. Carrier makes the highest-SEER mini split with a rating of 42. Again, this rating is impressive but atypical.
Schedule a consultation with a local air conditioning expert.
Book now
Is a high SEER worth it?
The higher the SEER, the more efficient the air conditioner. This is good news for the environment and your savings account. However, higher-SEER ACs are usually more expensive upfront.
Higher-SEER air conditioners have several notable advantages:
💧 Less humidity
High-efficiency systems more effectively remove moisture from indoor air. This may mitigate mold issues and other airborne contaminants.
🌎 Better for the environment
Energy-efficient air conditioners release fewer greenhouse gasses and burn less fossil fuel.
💰 Incentives and rebates
You may find rebates on state and national levels for energy-efficient HVAC equipment. The ENERGY STAR site is a great place to start looking.
💵 Lower utility bills
Less energy consumption leads to lower power bills. See what you can expect to save using this helpful calculator.
The rebates and cost savings you experience with a higher-SEER AC cancel out the higher price in just a few years. Purchasing the highest-SEER system you can afford is a smart investment if it’s time to replace your air conditioner.
If you’re interested in learning more, check out this article, where we examine the pros and cons of purchasing a 14-SEER vs. 16-SEER air conditioner.
What is SEER 2?
The SEER 2 standard will replace the SEER rating in 2023. The main difference is the testing conditions.
SEER 2 requires a higher external static pressure during testing. This change makes the laboratory conditions more like a real-world ducted AC system.
The SEER formula remains the same with SEER 2. However, most systems will likely receive a slightly lower rating in the new testing conditions. For example, an air conditioner rated 16 with SEER may earn a 15.4 with SEER 2.
Starting in 2023, all air conditioners for sale must list their SEER 2 rating.
The bottom line on SEER
We believe it’s wise to splurge on the highest-SEER system within your budget. Not only will you save money in the long run, but you’ll also positively impact the environment.
If your AC is currently running fine, there’s no need to dump it and buy a higher-SEER system. But when the time comes for a replacement, go big on SEER.
The Inflation Reduction Act of 2022 (IRA) invests significantly in clean energy and lowering the cost of living for American families. Part of the program offers free or discounted heat pumps based on annual household income.
In Greenville, SC, you qualify for one of the following heat pump rebates or tax credits:
Annual household income
Discount
Value
$64,240 or less
100%
Up to $8,000
$64,241-120,450
80%
Up to $8,000
$120,451 or more
30% tax credit
Up to $2,000
How to get a free heat pump in Greenville
The IRA heat pump rebates haven’t begun. In November 2022, The Department of Energy (DOE) announced that it will deliver funding and guidelines to each state in spring 2023.
When the program begins, the state of South Carolina will issue your rebate. The rebates will occur at the “point of sale,” which means you won’t have to submit for a refund. Instead, the retailer will deduct the rebate from the heat pump cost at the purchase time.
Each state may have a different process for securing a rebate. We’ll have to wait until next spring to learn the procedure for Greenville.
How to get a heat pump tax credit
Though the guidelines haven’t been released yet, the government typically issues tax credits when you file your income tax return.
If you purchase a heat pump in 2023, save your receipt. You’ll probably be able to claim it on your taxes.
If you can’t wait until 2023, there’s a lesser $300 credit for heat pumps that meet specific efficiency standards. Additionally, Duke Energy offers up to $450 for installing an energy-efficient heat pump in Greenville.
Are heat pumps good for Greenville weather?
Yes! In fact, South Carolina is the state with the most heat pumps. Forty-six percent of South Carolina homes use a heat pump for heating and cooling.
Heat pumps are ideal for areas with moderate winters. They provide plenty of warming power for Greenville’s mild climate.
Heat pumps are especially good at removing humidity from your home – something you’ll appreciate during Greenville’s balmy summers.
🧑🔧 Talk to a Greenville heat pump dealer 🧑🔧
Yes, please!
Why choose a heat pump?
The IRA targets heat pumps because they’re energy-efficient electric appliances. Simultaneously, the government is investing in developing an infrastructure of clean electricity to reduce emissions and support decarbonization.
Besides energy efficiency, heat pumps have some advantages over traditional heating equipment, such as:
🔥 Perform the jobs of heater and air conditioner
📏 Save space – you don’t need room for two large appliances
🍃 Boost air quality with filtering and dehumidifying capabilities
🦺 Improve safety compared to gas heaters
👂 Run quieter than traditional furnaces
Ready to take the next step and learn more about installing a new heat pump in Greenville? Click below to connect with one of our heat pump experts for a quote.
A broken furnace is frustrating – especially in Greenville, where average winter lows reach 35℉. This article will give you an idea of what you can expect to pay for furnace repair costs in Greenville.
Book an appointment with a Greenville furnace repair expert.
Yes, please!
How much does furnace repair cost in Greenville?
According to HomeAdvisor, the average furnace repair cost in Greenville, SC, is $503. That’s significantly more than the national average of $310. We estimate the average is so high due to the quantity of large, historic homes in the area.
The typical range for furnace repairs in Greenville is $140-897. Furnace repair costs can vary based on:
The type of fuel the furnace burns
The size of the furnace and the home
The age of the furnace
The complexity of the issue
The cost of any new parts needed for the repair
Get a quote for Greenville furnace repair.
Yes, please!
Common furnace issues in Greenville
No preventative maintenance
You can prevent most furnace repairs by conducting routine maintenance on your system. This includes changing the filters regularly and scheduling an annual furnace tuneup.
Replacing your furnace filters is an easy task you can do yourself. New filters cost less than $20 each. They protect your furnace and improve your home’s air quality.
An annual furnace inspection costs between $50-100. It can potentially head off more serious issues and extend the life of your furnace.
Thermostat problems
If your thermostat isn’t working correctly, it can throw off your entire HVAC system. Thermostat repairs cost an average of $209. If you suspect your thermostat is the issue, try some of our thermostat troubleshooting tips before contacting a pro.
Depending on your needs and the age of your existing thermostat, replacing the unit may be more economical. Several smart thermostat models cost $50-120 and deliver a major upgrade compared to older units.
If your furnace won’t start, a faulty flame sensor may be to blame. Check out our tips for cleaning your flame sensor.
If you’re uncomfortable doing it yourself, a Greenville heating contractor can do it for you. Expect to pay $75-250 for a flame sensor repair or replacement.
Blower motor breakdown
If you don’t keep your air ducts clean, dust and debris may damage the blades of your blower motor. The blower motor is a fan that pushes warm air from your furnace through your home.
Blower motor repairs run $150-450. If the entire unit needs replacing, it can cost up to $2,000. Check out our duct cleaning tips to avoid a costly repair.
Faulty circuit board
A circuit board controls the operation of the furnace’s components. Depending on the age and style of your furnace and whether this part is readily available, it could be a simple fix or a lengthy process.
Circuit boards cost about $200-600 to replace, including labor.
Cost to replace your furnace in Greenville
A new furnace in Greenville costs an average of $4,873. Furnace prices depend on variables, including the size of the system and its efficiency rating. A furnace technician will be able to recommend the best furnace for your needs.
In addition to the furnace itself, you’ll have to pay for installation. This can range $2,000-10,000.
You may also need to budget about $300 to remove your old furnace.
When is this expense worth it?
When to replace your furnace
Furnaces last 15-20 years. If your furnace is towards the end of its lifetime, it may not be worth investing in a repair.
We recommend using the “$5,000 rule” to determine when a furnace repair makes sense. First, you’ll need to contact a Greenville furnace repair expert for a quote.
Multiply the estimated furnace repair cost by the age of your furnace in years. If the resulting sum exceeds $5,000, you should seek a replacement instead of a repair.
For example, if you receive a quote for a $400 repair on your 5-year-old furnace, you should move forward with the repair rather than replacing your furnace, as $400 x 5 = $2,000.
Ready to book your furnace repair or talk to an expert about a potential furnace replacement? Click below to connect with one of our Greenville heating experts.
Furnace air filters are a critical component of your heating system. You should replace yours at least once every three months.
In this piece, we’ll help you select the best furnace filter for your needs, explain how to change yours, and describe how furnace filters work.
What are furnace air filters?
Furnace air filters usually consist of a cardboard frame, a fiberglass filter, and metal mesh. The frame and mesh exist to strengthen the filter.
Furnace filters improve air quality in your home and protect your HVAC components from dust and debris. Without a filter, your HVAC equipment would become dirty, negatively affecting its performance (and likely increasing your utility bills).
The filter catches and traps contaminants as air passes through your heating system. If you don’t replace or clean your filter regularly, it could restrict airflow and damage your HVAC equipment.
How often should you replace your furnace air filters?
In most cases, you should change your furnace filters every three months. However, there are some situations when you may want to change your filter more or less often.
Change your filter MORE often if:
You have multiple pets
You or your family members have respiratory challenges
You live in an area with high pollution
You’ve recently remodeled or done construction in your home
Change your filter LESS often if:
The home is a vacation property that’s not always inhabited
Your furnace takes super-thick filters (3+ inches)
How do you replace furnace air filters?
Furnace air filter replacement is a job you can DIY. Watch our air filter replacement video or follow the instructions below.
1. Find the filter compartment. It’s usually between the return air duct and the furnace.
2. Open the filter compartment door.
3. Slide out the used filter and dispose of it.
4. Unwrap your new furnace filter and slide it into the filter compartment. Position it using the printed arrows on the frame as a guide.
5. Replace the filter compartment door.
Need help changing your filter? Book an appointment with an HVAC pro.
Yes, please!
Types of furnace air filters
There are many variables to consider when choosing your furnace air filter replacement. Our article on the best air filters for your lifestyle can help you choose the ideal one for your needs.
When purchasing furnace filters, you’ll see the following attributes on the packaging:
📏 Size
Furnace air filters come in a variety of sizes. Make sure you purchase one that matches the size of your existing filter. You can learn more in our helpful guide on common air filter sizes.
💨 MERV rating
A furnace filter’s MERV rating indicates the granularity of particles it can trap. We recommend a filter with a MERV rating of 8 or above. However, you should always check your user’s manual for the manufacturer’s suggested MERV. Too high a MERV can restrict airflow. Too low a MERV can leave your system vulnerable to dust and dirt.
🧵 Material
We think pleated electrostatic filters are the best. Compared to synthetic fibers, electrostatic materials help attract more harmful particles and are more durable. Pleated filters are more effective because they have a larger surface area to capture dust and debris.
Always choose the best quality filter you can afford. Furnace air filter replacement is an easy way to extend the life and improve the function of your HVAC system.
Looking for heating and cooling help? Book an appointment now.
If you’re wondering what month to turn the heat on in Greenville, SC, the short answer is October. Overnight temperatures reach the low 50s towards the end of the month.
We recommend setting your thermostat to “auto,” “heat,” and 68℉ when the outdoor low temperature drops below 58℉.
Keep your home comfortable this winter. Book annual furnace maintenance now.
Yes, please!
The best thermostat setting for Greenville
The World Health Organization (WHO) says your indoor temperature should be 64-75℉. If you have babies, older adults, or people with health problems living in your home, you should keep the temperature above 68℉ at all times.
We recommend setting your thermostat to 68℉ during the day in the fall and winter in Greenville.
You can lower your thermostat to 64℉ when you sleep or when you’re away. This will help you save energy (and money on your utility bills!). If you have a programmable thermostat, you can set it to adjust on a schedule.
A smart thermostat can detect your habits, including when you leave the house. It can change the temperature setting automatically to keep your home comfortable and conserve energy.
When to turn the heat off in Greenville
Generally, the inside of your home is 10-15 degrees warmer than the outside temperature in the fall and winter months.
Outdoor low temperatures in Greenville remain below 60℉ through April. Though you likely won’t need the heat during the day in the spring, you may want it on occasion at night.
We recommend turning the heat off in Greenville in mid to late April, or whenever matches your comfort level.
Switching between heating and cooling
In the fall and spring in Greenville, the temperature may swing dramatically. You may alternate between boots and flip-flops in the same week!
Greenville also experiences high humidity, occasionally spilling into the fall and winter months.
You may feel the need to switch between heat and air conditioning to keep your family comfortable. This is safe for your HVAC system as long as you do it slowly.
How to switch between heating and cooling safely
Allow your AC or furnace to complete its cycle if it’s actively blowing air.
Turn your thermostat off.
Wait five minutes.
Turn your thermostat back on.
Switch from “heat” to “cool” or vice versa as needed.
We suggest you refrain from using your air conditioner when the outdoor temperature is below 60℉. It may damage some of the components.
How to prep your home for winter in Greenville
Greenville gets an average of 3 inches of snow per year, so winter prepping isn’t especially intense. Consider the following guidelines to keep your home warm this winter.
Regularly clear your furnace flue of debris, leaves, and snow.
✅
Keep your vents and ducts clean and free of blockages.
Remember to turn your heat on before you’re uncomfortably cold. If you wait too long, your furnace may have difficulty keeping up and reaching your preferred indoor temperature.
Schedule furnace maintenance now with a Greenville HVAC pro.
Yes, please!
What month to turn the heat on in Greenville
We recommend running your heater from October through April if you live in Greenville, SC. That’s when your indoor temperature will naturally dip below 68℉.
However, you can turn your heater on whenever you want! Set your thermostat to your preferred temperature and enjoy the cozy warmth.
Greenville is booming as residents of other states migrate to the city, attracted by its low cost of living. The Greenville Journal reports that Greenville gets 19 new residents per day, many from more expensive states like Florida, New York, and California.
One thing that might surprise new residents is that Greenville’s utility costs are comparably high. While the overall cost of living in Greenville is 28% lower than the national average, its utilities are only 3% below the national average.
If you want to lower your heating bill in Greenville, follow our simple tips. We’ll help you save money while keeping your home cozy this winter.
💰 Apply for rebates
Contact your utility company and ask about rebates and other money-saving programs. Or, check their websites for rebate opportunities.
For example, Piedmont Natural Gas offers Greenville residents a $300 credit for upgrading to a more efficient furnace model. Duke Energy has a Smart $aver program that credits you up to $450 when you install an energy-efficient furnace.
Additionally, there may be federal rebates available for energy-saving HVAC equipment. Check your zip code on the ENERGY STAR Rebate Finder for more information.
🔧 Schedule routine maintenance
Annual furnace maintenance keeps your system running at its most efficient all season long. It may also prevent future heating issues requiring costly repairs.
Furnace tuneup appointments usually cost $50-100. If you subscribe to an HVAC company’s regular maintenance program, you may get a better price.
This small investment can potentially save you thousands of dollars in the long run.
Schedule furnace maintenance in Greenville with a trusted pro 🧑🔧
Book now
💨 Change your furnace filter
One of the most common causes of heating issues is a clogged furnace filter. It may force your furnace to work harder than necessary, raising your utility bills.
Changing your furnace filter is a simple DIY task you should perform every three months. Check out our video instructions to help you change your furnace filter. If you don’t know which filter to buy, we also have a guide to help you find the best air filter for your home.
💡 Use a smart thermostat
Smart thermostats deliver advanced features that can help lower your heating bill. Most models can sense your habits and adjust your thermostat settings automatically to help you save.
Many popular smart thermostats also offer reporting via app to show your energy usage. This reporting usually includes suggestions, like lowering the temperature while you sleep, to improve your home’s energy efficiency.
If you’re unsure which one is right for you, we have a guide to help you choose the best smart thermostat for your budget. One of our trusted local HVAC experts can assist with installation.
Connect me with a Greenville HVAC installer.
Yes, please!
🧹 Clean your air ducts
Dirty, dusty air ducts will make your furnace work harder than it has to. Cleaning your air ducts is a simple project that can save you money.
While you’re cleaning, make sure to remove anything blocking your air vents. Blockages can also make your furnace work overtime, costing you more on your heating bill.
🚪 Seal air leaks
If your home has leaks, hot air may escape. Your furnace will constantly work to keep up, wasting energy.
Lower your heating bill in Greenville: the bottom line
The best way to lower your heating bill is to ensure your furnace runs efficiently. This will help align your utility budget with the low cost of living in Greenville.
You may have to make small upfront investments, like paying for furnace maintenance, new air filters, or a smart thermostat. But these expenses will net major returns on your monthly heating bills.
Connect me with a Greenville heating contractor now.
The Inflation Reduction Act of 2022 (IRA) offers free or significantly discounted heat pumps to homeowners across the U.S. If you live in Charlotte, you qualify for the following rebates or tax credits toward the purchase of a new heat pump:
Annual household income
Discount
Value
$73,360 or less
100%
Up to $8,000
$73,360-137,550
80%
Up to $8,000
$137,551 or more
30% tax credit
Up to $2,000
How to get a free heat pump in Charlotte
The IRA heat pump rebates have not yet begun. The Department of Energy (DOE) announced in November 2022 that it will issue funding and guidelines to the states in spring 2023.
When the program begins, the rebates will occur at the state level. That means each state may have a different process for securing a rebate.
One thing is for sure; the rebates are “point of sale,” so the rebate amount is automatically deducted from the price of the heat pump when you buy it. You won’t have to pay upfront and submit for a refund.
Get a quote for a new heat pump.
Yes, please!
How to get a heat pump credit in Charlotte
If you have a household income of more than $137,550 in Charlotte, you won’t get a heat pump rebate. However, you are eligible for a 30% tax credit.
Though the DOE hasn’t yet issued the guidelines, tax credits usually involve saving the receipt. You can apply for your heat pump credit when you complete your annual taxes.
Are heat pumps good for Charlotte weather?
Heat pumps are ideal for Charlotte weather conditions. In fact, the Carolinas have more residential heat pump installations than any other states. About 40% of homes in the region rely on heat pumps for heating and cooling.
Heat pumps are best in climates with moderate winters. Since Charlotte’s weather rarely drops below freezing for an extended period, heat pumps provide plenty of warming power.
Additionally, heat pumps do a better job of removing humidity from your home than other cooling appliances. Any Charlotte resident knows this is a major plus in the balmy summer months!
Hook me up with a new heat pump!
Get a quote
What are the benefits of using a heat pump?
Aside from the big savings thanks to the IRA, heat pumps offer a number of benefits compared to traditional split central AC and heating systems.
🌎 Energy efficiency
Heat pumps run more efficiently and use electricity, which is important as we move towards decarbonization.
🍃 Better air quality
Heat pumps have air filtering capabilities.
☁️ Less humidity
Heat pumps do a better job of removing indoor humidity.
💵 Lower utility bills
You’ll see a reduction in your monthly bills, since heat pumps use less energy to run.
📏 Space savings
A heat pump is an AC condenser and a heater. So, you won’t have to make room for two large appliances.
👂 Less noise
Heat pumps run quieter than traditional heaters and ACs.
🦺 Improved safety
Heat pumps aren’t prone to gas leaks or other dangers associated with some heaters.
Duke Energy offers lesser incentives for energy-efficient HVAC equipment if you can’t wait until spring 2023 to purchase a new heat pump.
When you’re ready to talk to an installer about buying a new heat pump, check out our list of preferred HVAC technicians in Charlotte.
Charlotte winter low temperatures average 36℉, so you’ll want to handle a broken furnace quickly. A heating choice homeowners often face is whether to repair or replace the furnace.
Asking the right questions and understanding your investment will help you make the right decision. Use our expert tips to decide whether you need a quality Charlotte furnace repair tech or if it’s time to replace the system.
Broken furnace? Schedule a consultation with one of Charlotte’s top-rated HVAC companies.
Book now
Charlotte furnace repair
The average bill for Charlotte furnace repair is $275, slightly below the national average of $309, according to HomeAdvisor. (For more pricing details, read our piece on Charlotte HVAC technician costs.)
In most cases, your technician will charge a trip fee when they visit your home to diagnose the issue. According to our recent survey of Charlotte homeowners, this fee often costs between $51-100.
If your heating contractor can diagnose and fix your furnace in one trip, they will. However, there may be instances when they need to get a part or schedule more time for a complex job.
Charlotte furnace replacement
In Charlotte, a new furnace costs an average of $5,454, according to HomeAdvisor. That price is above the national average of $4,687.
Of course, the cost of a new furnace depends on many variables, including the size of the system, its fuel type, and its efficiency rating. Electric furnaces are usually the least expensive and most environmentally friendly. Your technician will be able to recommend the best furnace for your home.
When replacing your furnace, you’ll not only have to pay for the equipment itself but also for installation. Labor can range $2,000-10,000. Most furnace contractors charge a flat fee for installation that calculates out to $50-100 per hour per technician.
You may also need to budget for the removal of your old furnace. The 2023 National Plumbing & HVAC Estimator says this should cost no more than $300.
Shopping for a new furnace?
Get a quote
Furnace repair vs. replacement
There are a number of considerations when deciding whether to repair or replace your furnace.
Furnace age
Furnaces generally last 15-20 years. If your furnace isn’t working and it’s towards the end of its lifespan, it may not be worth it to repair the unit.
Newer furnaces run more efficiently. Investing in an updated furnace could reduce your utility bills.
Repair frequency
As your furnace ages, it may run less effectively. You may notice more issues that require repair.
If you have to call a repairperson multiple times a season, it may be time to start researching a furnace replacement.
Cost of repair
We recommend using the $5,000 rule to evaluate whether it’s more cost-effective to repair or replace your furnace.
Your HVAC technician should diagnose your furnace issue and provide a quote for a repair when they visit your home. Multiply the age of your furnace by the estimated cost of repair. If the resulting sum exceeds $5,000, you should consider skipping the repair and replacing your unit instead.
For example, if your furnace is 12 years old and your repair quote is $550, multiply 12 times $550. 12 x $550 = $6,600. Since $6,600 exceeds $5,000, a replacement might be a better investment.
Need a furnace quote? We’ve got you covered.
Schedule now
Getting a second opinion
It’s a good practice to get at least two diagnoses if you’re considering replacing the unit. Schedule an appointment with two Charlotte furnace repair companies to compare their diagnoses, suggestions, and cost.
Most furnace repair companies in Charlotte will do a home diagnostic visit for less than $100. If you need a diagnostic visit and quote, HVAC.com can connect you with one of our preferred HVAC technicians in Charlotte.
Wondering when to turn your heat on in Charlotte? We recommend turning it on before your indoor temperature drops below 68℉. Usually, this happens around October 15.
Want more heating tips to keep your Charlotte home cozy this winter? We’ve got you covered below!
Get heating advice from a pro. Schedule an appointment with one of our technicians.
Book now
The ideal indoor temperature
According to the World Health Organization (WHO), your indoor temperature should be 64-75℉. If your home includes infants, older adults, or individuals with health problems, you should keep the temperature above 68℉.
You can often set your thermostat to automatically switch to heat when the temperature is colder than 64℉.
When does it get cold in Charlotte?
Generally, your indoor temperature naturally ranges 10-15 degrees above the outdoor temperature in the fall and winter. That means it will be about 58℉ outside when your home gets to 68℉ inside.
According to the National Weather Service, low temperatures in Charlotte begin to reach the 50s in mid-October. We suggest turning your heat on around that time.
Of course, in Charlotte, fall temperatures can vary widely. One day you’re in a coat, and the next, a tank top. Plus, humidity can still be uncomfortable through October.
You may be tempted to switch back and forth between heat and AC as the weather changes.
Is it bad to alternate between heat and AC?
Switching between the heat and air conditioning is OK as long as you do it slowly.
You should always set your thermostat to “auto” rather than “on.” If it is cycling (actively blowing hot or cold air), allow it to complete the cycle before making any adjustments.
When the cycle is complete, turn your thermostat to “off,” and wait five minutes. Then turn it back on, and choose whichever setting you need: “heat” or “cool.”
Set your thermostat to “auto” and choose the temperature at which you’re most comfortable.
What temperature is too cold to run your AC?
While switching between heat and air conditioning in the early fall is safe, we don’t recommend doing this once winter sets in.
When the outdoor temperature is below 60℉, running your AC might cause damage to the outdoor components.
However, if you have a heat pump designed to both heat and cool your home, you can safely run the unit throughout the winter.
Recommended thermostat settings for fall and winter in Charlotte
We think 68℉ is the ideal indoor temperature for Charlotte winters. It strikes a good balance between comfort and energy efficiency.
When you’re asleep or away, we suggest lowering the temperature to 64℉ (as long as you don’t have medically fragile individuals in your home). You can do this manually or automate this setting on a smart thermostat.
How to prep your home for cold weather in Charlotte
Keep your home at a consistently comfortable temperature by following these steps.
🗓️ Schedule furnace maintenance
It’s important to book an annual furnace tuneup to keep your heating system running efficiently.
🧹 Clean your ductwork
Ensure your ductwork is clean and free of blockages. Follow our DIY duct cleaning instructions.
🚪 Seal windows and doors
Air leaks can make your home colder. They cause your furnace to work overtime. Seal them with weatherstripping.
🌡️ Turn on your heat before you’re cold
If you wait until your home is uncomfortably cold to turn on the heat, it may have difficulty keeping up.
🍁 Clear your furnace flue
Remove fallen leaves and other debris from your furnace flue.
🎄 Don’t block your vents
Move seasonal decor, furniture, and other clutter away from your air vents. Open the louvers.
Keep your heater working all winter long. Schedule routine annual maintenance now.
Yes, please!
When to turn the heat on in Charlotte
Trust your gut when it comes to turning on the heat in your home. If you’re cold, just do it!
If you need a guide to point the way, we recommend setting your thermostat to “auto,” “heat,” and 68℉ on or around October 15.
Baseboard heaters have been in use for more than 70 years. Today’s options are notably more appealing, but are baseboard heaters good at warming your home?
Electric baseboard heaters run quietly and effectively while heating cool spots in your home. Installation is straightforward and sometimes DIYable.
Consider baseboard heater pricing, pros and cons, and how the heaters work to make the best choice for your home.
What is a baseboard heater?
A baseboard heater is a long rectangular heating element installed at floor level – typically over or above the baseboard trim.
Old-fashioned baseboard heaters circulate water or oil heated by a boiler through the home to heat it. Today’s electric baseboard heaters contain an internal heating element that creates heat and releases it to warm the room.
Electric baseboard heaters are usually hardwired into the home. However, some electric baseboard heaters are portable and can be plugged into a standard electrical outlet.
Where do baseboard heaters work best?
Electric baseboard heating can be hot to the touch, so it has limited practical applications.
We don’t recommend electric baseboard heating if you:
Have small children
Have pets
Need to place furniture against the wall where it’s installed
Have long draperies on the wall where it’s installed
Have electrical outlets above the area where it’s installed
Electric baseboard heating requires a mostly empty wall. You should not place anything within 12 inches in front of the heater or 6 inches to the side of the heater.
We suggest using electric baseboard heaters like space heaters. They work well to heat a singular room but are not the ideal solution for whole-home heating.
Electric baseboard heaters are well-suited for home additions or spaces that aren’t adequately heated by your existing heating system. A garage workshop or bump-out bonus room are great places to install an electric baseboard heater.
Baseboard heater buying guide
When shopping for a baseboard heater, consider the following factors:
📏 Size
Your baseboard heater should fit the length of your wall. Most range 30-96” long.
🛋️ Placement
You need the area around the heater to be free of furniture and outlets. If you don’t have a spot where this is possible, choose another type of heater.
⚡ Output
The heating output of electric baseboard heaters is measured in watts. To figure out the wattage you need, multiply the square footage of the room you wish to heat by 10. You may need more or less wattage depending on the room’s ceiling height and the quality of its insulation.
🔌 Power source
You may be able to plug a 120V baseboard heater into an electrical outlet. However, we recommend you have your baseboard heater professionally hardwired to a dedicated circuit in your electrical system. 240V baseboard heaters require hardwiring in the U.S.
🌡️ Temperature control
Some baseboard heaters have a built-in thermostat. Others come with a remote control. Make sure the temperature control on the unit you purchase meets your needs.
Baseboard heater costs
Baseboard heating generally costs between $25 and 250. They are available via online retailers like Amazon. You can also find them in home improvement stores like Home Depot and Lowe’s.
Some baseboard heaters plug directly into a standard electrical outlet. These types of heaters do not require professional installation.
We recommend having other types of baseboard heaters professionally installed to ensure they’re wired correctly. On average, plan for heating and cooling work to run about $150 per hour.
Consult an HVAC technician about baseboard heater installation.
Yes, please!
Baseboard heater pros and cons
Is electric baseboard heating a fit for your home? Explore the benefits and drawbacks below.
Hot to the touch, so unacceptable for homes with small children or pets
Requires a large empty wall
Less energy efficient than alternative heating methods
Can only heat (no cooling capability)
We think electric baseboard heaters are a decent option for warming a home addition or a room that your furnace doesn’t keep warm. However, we suggest you install them in low-traffic areas of your home, free of kids, pets, furniture, and decor.
If baseboard heaters don’t seem to match your lifestyle, consider a ductless mini split instead. These systems are energy-efficient, plus they can heat and cool.
Heating and cooling systems are undoubtedly expensive to repair and replace. We’ve gathered resources that may help make the cost more manageable.
From financing options to free programs, below are nine ways to save money on HVAC repair or replacement in 2022.
Free assistance
Your HVAC repair or replacement could potentially be free. From home insurance to home warranties, your home policies may cover more heating and cooling-related costs than expected.
Home insurance
Your home insurance provider may cover the cost of a broken heating and cooling unit. Home insurance policies usually don’t cover standard wear-and-tear, but they may cover accidental damage.
To find out if you’re eligible, contact your agent about filing a claim. Your policy may cover other circumstances you had not considered, such as vandalism or storm damage.
Home warranty
Unlike home insurance providers, some home warranty providers cover damage from standard wear-and-tear. Many coverage options also include major appliance repairs. If you already have a home warranty, review your contract.
If your heating and cooling system was damaged in a natural disaster, and you’re not covered by an insurance policy, the U.S. Federal Emergency Management Agency (FEMA) may be able to help.
As W. Michael Moore of FEMA stated in 2013, “FEMA’s mission includes ensuring that all homes affected by the flooding are habitable. In order for homes to be habitable, furnaces and central air conditioning systems must be in working order.” Visit disasterassistance.govor call 800-621-3362 for more.
Financing: from loans to grants
The amount of money needed to finance a heating and cooling system is “too big for a credit card, too small for a home loan,” said Peter Krajsa, chairman and chief executive officer of AFC First Financial in Allentown, PA. AFC offers financing for energy-efficient home improvements.
Consider the five financing options for your HVAC system below.
Check with the installers
The company installing your new heating and cooling system may be the quickest source of financing.
Kevin Stralo of Quality Air in Quakertown, PA says financing for HVAC clients is usually approved within 24 hours. Dean Lane of Chas Roberts Air Conditioning and Heating in Phoenix, AZ said his clients usually get approved the same day as well, although response time can be a bit slower in summer.
Stralo said his company offers several financing options for new systems, but they do not cover repairs. Quality Air, like most HVAC contractors, doesn’t loan money directly to customers.
Instead, Quality Air uses third-party financial companies. Interest rates for these loans are about 13.5 to 19.5 percent. Quality Air also offers financing through big box stores such as Home Depot.
Borrow against equity
If your state has no energy efficiency loan program, your lowest-cost option may be to borrow against the equity in your home. These rates are lower than standard loans because you use your home to secure the debt, making your loan low-risk for the lender.
In many cases, the interest on home loans is tax-deductible. A home equity loan has a fixed interest rate, while a home equity line of credit has a variable rate.
Interest rates depend on many factors, such as the applicant’s credit rating and the amount of equity in their house. However, home loans can take 60 or more days to close.
Another problem with borrowing on your home is that you may not be able to take out a small loan if you only need a few thousand dollars. For most banks, the minimum loan is $10,000.
Your local governments offer low-interest loans to qualified homeowners for home improvement projects. Visit your local government office or call your local utility provider for more.
HUD Title I loans
The U.S. Department of Housing and Urban Development (HUD) has a program encouraging private lenders to provide loans for home improvements. HUD insures these Title I loans.
A loan officer in Miami, who asked not to be identified, said Title I loans can be as much as $25,000.
Credit card offers
If you’re putting the cost of the new system on a credit card, look for a balance transfer offer. You may be able to get a low or zero-interest loan for up to a year.
Apply for a grant
Several assistance funds may help you replace a necessary appliance. The Federal Low Income Home Energy Assistance Program (LIHEAP) helps low-income Americans with heating and cooling expenses. Apart from small grants, LIHEAP offices also help consumers find resources to help pay for the cost of replacing furnaces and air conditioners.
Check the LIHEAP website for your local office’s contact information. If your utility company has shut off your power, LIHEAP funds can be made available within a few days. Qualification is based on household income, and the income limits vary by state.
12. Some philanthropic organizations offer one-time grants for emergency expenses with essential appliances. Modest Needs, for example, offers grants up to $1,000 to repair broken systems or purchase window or portable air conditioning units.
Government Programs
U.S. federal, state, and local governments offer programs to assist with the cost of updating and replacing your heating and cooling system. Senior citizens, active duty military and veterans have additional options.
The state programs associated with WAP install and fund energy-efficient appliances, promoting lower energy consumption.
Military and veterans
Military aid societies, such as the American Red Cross, work with partner organizations to assist active duty military and veterans with the cost of HVAC repair and replacement. Call 877-272-7337 or submit an application online to find out if you qualify.
The Veteran Loan Center can help finance the addition of energy efficient appliances to your mortgage.
Senior citizens
If you’re 62 or older, the United States Department of Agriculture offers income-based grants and long-term, low-interest loans for heating and cooling equipment.
The grants and loans fund various home improvements, including HVAC purchase and repair. Applicants may receive a grant of up to $7,500 or a loan of up to $20,000.
Some states offer seniors financial aid through state and city-wide programs. Contact your local government office to learn more.
Other options
Central heating and cooling isn’t your only option for indoor comfort. Whether you’re waiting on a central HVAC repair or looking for a new system, we’ve got you covered.
🪟You may find low-cost or free window air conditioners and heat pumps on consignment websitessuch as Craigslist.
🔌Consider installing a portable air conditioner or heat pump to make your space more comfortable while you wait.
♨️Ductless HVAC systems, such as a mini split, may be less expensive than replacing or repairing a central system.
Conclusion
If you’re looking for an affordable, efficient heating and cooling system, you have options at any budget. To promote energy conservation, state and federal governments offer tax rebates and credits on heating and cooling systems.
Curious about HVAC repair and replacement costs in your area? Connect with the most trusted heating and cooling professionals near you.
High-efficiency air conditioners require less energy to cool a home, resulting in energy savings and lower utility bills. Installing a high-efficiency central air conditioner can save you 20-50% on cooling compared to an older system.
Shopping for a new air conditioner?
Get a quote
How air conditioner efficiency is measured
It’s important when looking for a high-efficiency air conditioner to know how to compare units. Seasonal Energy Efficiency Ratio (SEER) and Energy Efficiency Ratio (EER) measure the cooling efficiency of AC units.
Determine the SEER by taking the total cooling energy needed for a cooling season and dividing it by the total electrical energy used by the air conditioner during the cooling season. A higher SEER indicates higher efficiency. SEER values generally range from about 13 to 26.
New 2023 HVAC regulations raise the efficiency requirements for central air conditioners. Those sold in the northern portion of the United States must have a minimum SEER of 14. Those sold in the southern United States must have a minimum SEER of 15.
EER is an older method of calculating efficiency. Determine the EER of a cooling unit by dividing the total cooling energy output by the total electrical output. Room air conditioners most often use EER ratings.
The difference between the two is that EER measures efficiency at one constant temperature, while SEER calculates efficiency at varying temperatures.
Talk to an air conditioning expert now.
Yes, please!
Pros and cons of high-efficiency air conditioners
✅ Pros
❌ Cons
Save money on utility bills
Higher price upfront
More environmentally friendly
May be incompatible with existing furnace and blower motor
Should you buy a high-efficiency central air conditioner?
If you can afford the upfront investment, we recommend purchasing an efficient air conditioner. Not only will high-efficiency air conditioners save you money in the long run, but they’re better for the environment.
The HVAC.com team surveyed 100 Charlotte-area homeowners to learn about their heating and cooling needs. What we found is that HVAC Charlotte, NC service providers generally respond quickly and homeowners are satisfied with the work quality.
When it comes to Charlotte, NC AC repair or furnace inspection, technicians have varying diagnostic fees. Our research suggests there are common AC repair needs that the majority of Charlotte homeowners face.
As you search for the best HVAC companies in Charlotte, NC, take a deep dive into our data. Know what to expect before you hire a technician and how your AC maintenance routine compares to your neighbors.
Charlotte NC AC repair
Searching for “AC repair near me” is one of the most popular ways to find a local technician. About 46% of the Charlotte homeowners we spoke with rely on a search engine, like Google, to find HVAC help.
The second most common method for finding heating and cooling repair is word of mouth. An estimated 38% of participants rely on a family member or friend for a company referral.
Protecting your family and home is the top priority. Ensure the repair company is licensed to complete the work and insured in the event something goes wrong to cover the expense.
Do you offer a written, itemized quote?
A verbal estimate can quickly change once the work begins. Request a written quote that itemizes the work and parts.
What is your labor warranty?
Ask how long the company is willing to back the technician’s work. You’ll want a copy of the labor warranty in writing.
How much is your diagnostic fee?
Some Charlotte AC repair companies do not charge a diagnostic fee. However, you’ll want to be prepared by asking for the cost to inspect the air conditioner or furnace.
Fast AC repair in Charlotte
While finding a trustworthy AC and furnace repair company is the goal, response time is also important. The large majority (84%) of Charlotte homeowners who spoke with us say a technician was at their home within 24 hours of them making the phone call. Of those, 37% report the technician arrived within 12 hours of their call.
In addition, most homeowners opt for the first-available Charlotte dealer who can restore comfort. An estimated 65% of our respondents collected just one quote from Charlotte HVAC contractors. There are a few reasons getting a single quote may not be in your favor.
Get three AC repair quotes
The average temperature in Charlotte during the summer is near 90 degrees, so we understand prioritizing the speed of an AC repair tech. The challenge with collecting only one quote is the risk of being overcharged for parts or labor.
The supply chain for some AC repair companies may be more restricted than others. The strained access to parts may be reason for some technicians to increase costs. Plus, while the average AC repair labor cost falls between $75 and $150 per hour, companies have the ability to charge outside that average.
AC repair diagnostic fee
Diagnostic costs are optional and included at the discretion of the company. Diagnostic fees are sometimes referred to as a service call fee. It’s the price you’ll pay for the technician to come to your home and inspect the unit. In some cases, the diagnostic, or service fee, is reduced from the repair quote if you opt to hire the company.
Just over one-third of our Charlotte homeowners reported their HVAC technician did not charge a diagnostic fee. The majority (27%) of those who were charged a fee paid between $51 and $100.
Most common air conditioner problems
There’s certainly a theme to Charlotte AC repair needs. Amongst the 100 homeowners we surveyed, 46% report the diagnosis was a broken AC capacitor. Not far behind was a “low refrigerant” diagnosis for 31% of homeowners.
Depending on the age and brand of your AC, costs to make those repairs will fluctuate. It’s worth noting that roughly 20% of Charlotte homeowners report their technician’s recommendation was a full AC replacement.
HVAC maintenance service
The best way to prevent a heating and cooling breakdown in your home is routine HVAC maintenance. Most Charlotte homeowners agree. Nearly 43% of our participants say they have their system serviced twice a year.
A seasonal inspection – once in the spring and again in the fall – is the most popular recommendation from HVAC.com dealers. Paying a one-time fee or signing up for a maintenance plan can be much kinder to your budget than a large payout for a repair or to replace your system.
New HVAC regulations
As the heating and cooling industry moves toward a more eco-friendly approach to home comfort, energy requirements will change in 2023. Homeowners will not only benefit from a required higher SEER rating for new units, but the Inflation Reduction Act also allows for a large discount for many on heat pump installation in Charlotte.
HVAC technicians must apply calculations based on your home size and other factors to install a correctly sized heating or air conditioning unit. Manual J is the standard calculation they apply to get the job done.
If you’re curious about how to size your HVAC system, we’ll share some tips from heating and cooling experts in this piece. But the easiest (and most accurate) way to correctly size your system is to have a certified professional do it for you.
Have a heating and cooling pro size your system 🧑🔧
Book an appointment
Manual J calculations
The industry standard for how to size your heating or cooling system is the Manual J formula. Manual J is a series of calculations used by HVAC technicians that includes factors such as:
The home’s square footage
The home’s layout
The measurements of each room
The height of the ceilings
The orientation of the living areas
The climate in which the home is located
The construction materials used to build the home
The landscaping surrounding the home
The number and placement of windows and doors within the home
Manual J tells you the heating and cooling load of a home. Once you know the load required, your HVAC technician will recommend equipment with output levels that meet your needs.
Is size important in HVAC?
The size of your system is critical when purchasing heating and cooling equipment. If your system is improperly sized, you may experience problems such as:
Radiant heating is a great option for homeowners — whether you’re building a new house or retrofitting your existing home. This style of heating is discrete and efficient. But it can be costly to install.
If you’re wondering how to buy a radiant heating system, your best bet is to work with an HVAC contractor who specializes in radiant heating.
Connect me with a radiant heating specialist now 🔥
Yes, please!
Things to consider before you buy radiant heating
💰 It’s expensive
Radiant systems cost a lot upfront, though they may help you save money on heating long-term.
🔨 It’s hard to install
It’s best to install radiant heating in a new build or during a major renovation. Installation costs are high, as the work is difficult.
🚫 It may void your flooring warranty
If the flooring material you’ve purchased comes with a warranty, check it before installing radiant flooring.
🛀 It’s best for small spaces
Radiant heating is not a great option for heating your whole home. It’s best in targeted rooms, like in your bathroom, where tiles are cold in the winter.
❄️ It’s not ideal for humid climates
Radiant heating doesn’t dry the air like a furnace does. If you live in a humid climate, you’ll need to add supplemental dehumidifiers and fans to rooms with radiant heating.
Radiant heating options
When shopping for a radiant heating system, you’ll need to weigh the following options.
Hydronic vs. electric
Hydronic and electric are the two most popular types of radiant heating systems.
Hydronic systems rely on hot water to circulate heat. They pump hot water from your boiler through a series of tubes. The heat from the water is transferred to your radiant heating panels or floor.
If you don’t already heat your home with a boiler, it might not make sense to invest in a hydronic system.
An electric radiant heating system doesn’t use water and can be installed without a boiler. It uses wires or conductive mesh to spread heat.
Radiant air heating is another option. It’s not as popular and considered by most heating pros to be inefficient.
Thermal mass
Thermal mass is the metric that dictates how well a material stores and radiates heat. Building materials with a demonstrably high thermal mass include concrete, tile, sand, and special paneling made specifically for radiant heating surfaces.
Budgetary constraints and personal preference may dictate what thermal mass materials you use. Keep in mind that you want your flooring to conduct and radiate the heat energy, not insulate it.
Panel vs. floor heating
Next, you must determine from where your heat should emanate. Radiant heating systems come in one of two varieties:
Standard radiant heating systems that use wall or ceiling panels to disseminate heat
Radiant floor heating systems that transfer heat to conductive flooring materials
Even though hot air rises, remember that radiant heating doesn’t move using the air and can therefore come from any direction. If you have carpet on the floor or you want to bring more heat into an addition, it might make sense to put the radiant system in the walls.
If budgeting is your primary concern, radiant ceiling panels are the easiest and cheapest to install.
Get a quote for radiant heating.
Book an appointment
How radiant heating works
Radiant heating works without ductwork or a fan by applying heat directly to specially designed equipment in the walls, ceiling, or floors.
Radiant heating can be adapted to use any common fuel source already present in a house, including boilers, heat pumps, active solar heat, and electric heating.
The primary division among radiant heating methods lies in the use of either water-filled tubing or an electric thermal mass heater.
A purely electric system, which uses plates or conductive mesh embedded in a heat-retaining material such as concrete or tile, is simple and effective but can be more expensive to implement and maintain. The cheaper solution is a hydronic system, which pumps hot water through tubes.
For more information, including costs and installation methods, check out this helpful piece on radiant heating.
How to buy a radiant heating system: the final word
Our experts say the two biggest variables to consider when choosing a radiant heating system are:
Your budget
The fuel sources already available in your home
Always engage an HVAC professional when purchasing a new radiant heating system. It’s definitely not a DIY job!
Our network of top-rated heating technicians can help you choose a radiant heating system. Schedule a consultation.
Most homeowners are challenged to find competent, trustworthy contractors who will stand behind their work. One way to do this is by checking references for your HVAC contractor.
After hearing from readers, we set out to understand what it takes to find a great contractor by talking with homeowners, contractors and attorneys. We invited 2,000 people to answer a nine-question survey about their experiences with heating contractors — and we analyzed their responses to figure out how the most satisfied homeowners had selected their contractors.
It turns out that the happiest homeowners were the ones who checked their contractor’s references before they hired them. However, three out of four homeowners don’t bother to check references.
Why some homeowners think checking references doesn’t matter
The biggest problem with checking references is that the contractor chooses which names to give you. Every contractor we interviewed told us the same thing — they only use their most satisfied customers as references.
“I’m not going to send you a name and a phone number of a job that didn’t work out well,” said Chris Stock, a Philadelphia builder whose company, The Stock Group, installs heating and cooling systems. “Why would I?”
Consumers recognize this bias: as one survey respondent told us: “Contractor references will always be satisfied customers. Contractors will not provide references to contact unsatisfied customers!”
Worse, one contractor, who asked not to be named, admitted that he used his family and friends as references when he first started his business until he had enough satisfied clients to call on.
So if there’s a built-in bias, why should you check references?
Looking for an HVAC contractor? We’ve got you covered.
Schedule an appointment
The case for checking references for your HVAC contractor
“I can’t tell you how often people just hire somebody off the street,” said Andrea Goldman, an attorney at Rosen Law Office in Newton, Massachusetts, who focuses on construction, business, and employment law.
1. Shoddy contractors often have difficulty providing valid contact information for three happy clients. One homeowner interviewed for this article told us , “I needed to hire a roofer for my home. The first reference I called said, ‘I don’t believe in giving out references,’ and then hung up. I couldn’t reach the roofer’s other references. I hired the guy anyway, and then spent months trying to get him to finish the job correctly.”
2. Even happy clients may have had aspects of the job that they weren’t happy about. Talking to them allows you to ask detailed questions about the part of the project that concerns you the most: pricing, schedule, quality, etc.
3. It’s a good idea to ask contractors for a reference from a project that hit an unexpected snag. Everyone has those sorts of jobs — what you care about is how well the contractor handled the situation when it occurred. As Nick Bailey, the owner of Bailey Construction Services in Des Moines, Iowa, said, “This is a business of surprises. Just because I give you a reference doesn’t mean we didn’t have some bumps along the way.”
4. If you’re good at reading people, you can learn as much from the tone of someone’s answers as the content of the answers themselves.
Beyond theoretical reasons, our survey correlated checking references with higher levels of satisfaction. Ninety-four percent of the people who checked references declared themselves “very satisfied” with the outcome. The remaining 6% described themselves as “somewhat satisfied.”
In contrast, of people who did not check references, 63% described themselves as “very satisfied,” 29% as “somewhat satisfied,” 2% as “somewhat dissatisfied,” and 6% as “very dissatisfied.”
How common is it for homeowners to ask for references?
While slightly less than 25% of the respondents to our survey checked references, the contractors we talked to gave widely varying estimates.
Stock said only 2-3% of his clients ask for references. Bailey said about a third of his potential clients ask to speak to his references.
One explanation for the lack of reference requests is that most business comes from referrals.
Stock said most of his business comes through recommendations from real estate agents, friends, or neighbors, which provide a built-in reference. “People are coming to me already knowing they like something about me,” he said. Carl Kurtz, the owner of the Philadelphia-based company, Kurtz Mechanical Contracting, agrees. He said he doesn’t advertise his business, relying instead on referrals from other contractors, or from homeowners who were happy with his work.
Bailey does a lot of advertising, so many of his inquiries come from people who heard about him through his ads and not through a friend or family member. This may explain why a larger percentage of his potential clients asked for references.
Connect with a local HVAC technician.
Yes, please!
How to check references for your HVAC contractor
Let’s assume you have already received multiple bids from local heating and cooling contractors. You’ve already thrown out the bids that came from contractors who didn’t have the necessary licenses and insurance policies. This is the point at which you should call references.
1. Make a list of the aspects of the job that are the most important to you. Do you need the project done by a certain date? Ask the contractor if you can talk to past clients who had a tight deadline. Do you own an older house? Ask the contractor if you can speak to a client whose house is a similar age.
2. Begin by asking each contractor for references from projects that are similar to your own project. Make sure to ask each contractor for at least one project that had an unexpected problem, so that you can ask the reference how the contractor handled that problem.
3. Make a list of questions you want to ask, listing the most important at the top in case you only have time for a few. “Talk about specifics,” advised Goldman. And avoid asking questions that could result in “yes” or “no” answers.
4. Call three references for each contractor you’re serious about. Bailey said most of his clients call two or three of his references, and some even ask for a tour of houses he’s worked on in the past.
5. Once you have a contractor’s reference on the phone, your first question should confirm that the contractor actually did the work he or she claimed.
Here are some questions to consider asking when checking references for your HVAC contractor:
How well did the contractor keep to the timeline you originally agreed on?
Did any issues come up about the price of the project or the payment schedule?
Did the contractor keep the work area neat?
Do you have any concerns about how well the system worked after it was installed?
If there were problems after the installation, did the contractor come out quickly to fix them?
Were there any surprises that the contractor discovered after the project began? How were those handled?
How would you compare this contractor to contractors you’ve hired for other jobs?
Would you hire this contractor to do a similar project again?
Is there anything you can’t ask a reference?
We wondered whether there’s anything a reference shouldn’t say. For example, if a contractor doesn’t get hired because of a negative comment made by one of their references, can the contractor hold the reference responsible for the lost work?
Goldman said this is not a major concern. “It’s not against the law to say somebody’s bad,” she said. “It’s just you don’t want to trigger something where they’re going to make some claim against you.” She pointed out that it’s unlikely the contractor will find out why they didn’t get the job, so the risk to the reference is fairly small.
Even though it’s not illegal for a reference to say negative things about a contractor, some people are reluctant to say something unflattering about another person. Try asking whether they’d hire the contractor for a similar job in the future, or ask them to compare this contractor to others they have hired.
What about using online review sites?
Online review sites make it easier for potential clients to get the skinny on contractors without making a single phone call.
But it’s important to take online reviews with a grain of salt. Sometimes a contractor’s competitors leave bad reviews in an attempt to drive customers to their own businesses.
In addition, some review sites give more prominence to the reviews written by regular users of the site. One contractor told us a single bad review of his business eclipsed a dozen good reviews because the person who wrote the bad review was a regular contributor.
“Everybody has a bad review of some kind,” Bailey agreed.
A single bad online review shouldn’t sour you on a contractor completely. But a series of bad reviews that cite the same problems should make you concerned. If you’re not sure whether an online review is credible or not, ask the contractor about it. And, in such cases, it’s all the more important to call references.
The bottom line on references
It takes a lot of time to thoroughly vet a contractor before you hire them. But it’s time well spent. You’ll have years to enjoy a well-installed HVAC system.
Schedule a consultation with a top-rated heating and cooling expert.
Planning to move? It’s important to leave behind a well-maintained heating and cooling (HVAC) system for the next homeowner. HVAC problems commonly arise during pre-closing inspections, and they can grind the real estate sale to a screeching halt.
There’s no need to let a dated furnace or faulty air conditioner derail your sale, especially if you are prepared to address some of the most common HVAC problems that appear during home inspections. Click below to jump directly to each issue, or scroll for more.
Whether it’s liquid refrigerant or gas, leaks are among the most common—and potentially dangerous—problems you’re likely to encounter with an HVAC unit.
Kelly Schneider, a real estate agent with RE/MAX Beyond 2000 in Middleburg Heights, OH, can attest after a recent sale.
“The buyer’s inspection came back that the heating unit was emitting enough black soot-like build-up and carbon monoxide that it was deemed deadly,” Schneider says.
💡 Safety tip: If you find a carbon monoxide leak during a home inspection, leave the home immediately. Make sure the seller hires a licensed contractor to fix the leak.
While a problem this severe is worth the buyer’s consideration, it doesn’t have to be a dealbreaker. Schneider requested that the unit and ducts be serviced and cleaned by a licensed HVAC contractor.
Joe Coyne, SRES, broker-owner of RE/MAX Exclusive in Saint Peters, MO, has also seen his share of leaks. In fact, Coyne says, “The biggest [HVAC] problem that we run into is the gas line leaking.”
An inspection from the local gas plant had been a standard step of any home purchase in Coyne’s market, until recently. Now the buyer has to request the additional check-in. “For a vacant home, it’s strongly recommended just because you don’t know,” Coyne says.
Reach out to your utility provider for more information on your local home inspection policy.
2. Defective parts
In some cases, a leak can be the first indication of a bigger issue.
As Coyne recalls, “The last HVAC problem we had was a house where the furnace failed the gas inspection due to a bad heat exchanger.”
The heat exchanger converts fuel to heat, making it one of the most critical components of a furnace. A broken heat exchanger has the potential to release gas into the air, making it a dangerous and expensive piece to fix.
Unfortunately, a standard home inspection likely won’t catch the problem.
“A lot of buyers aren’t aware that with modern, forced-air natural gas-fired heating systems, home inspectors are within their standards of practice when performing a visual inspection, which does not include most of the heat exchanger,” points out Matthew Difanis, broker-owner of RE/MAX Realty Associates in Champaign, IL.
Difanis also encourages sellers with older HVAC systems to hire a licensed professional for a routine service call and request a clean bill of health in writing.
“That is extraordinarily valuable if the system is obviously older,” Difanis says. “Otherwise, any buyer who walks in the door will be looking at it thinking, ‘this has ticking time bomb written all over it.’”
If the routine cleaning hasn’t been done, the buyer can offer to pay for such servicing before closing, especially if the seller agrees to pay for any material defect the invasive inspection turns up.
3. Poor installation or maintenance
Annual maintenance plays a huge role in how well HVAC systems hold up. Jim Schwarz, former owner of Center Grove Real Estate Inspections in Greenwood, IN, said, “I have found that few homeowners actually have their system under a service contract. Generally, if under contract, the systems are running quite well and their maintenance is very obvious and recorded. Mostly, systems are totally ignored.”
As Wendy Papasan, realtor and owner of the Papasan Real Estate Team at Keller Williams Realty in Austin, Texas, found out in a recent sale, homeowners who neglect annual maintenance may be in for a rude awakening when it’s time to sell.
“We had a buyer who was trying to decide between two homes,” Papasan recalls. “I was present when the inspector pointed out the poor condition of the AC unit. The vent pipe was disconnected and air that was meant to go outside was blowing around inside the AC closet. While this fix was an easy one, the buyer was turned off and ended up making an offer on the other home.”
Not all maintenance issues are quite so visible, so Papasan suggests clients ensure their air filters have been changed recently. “How well an HVAC unit has been maintained can be indicative of how well the entire home has been maintained. If it’s filthy, that can be a clue,” she says.
Papasan also advises buyers to have their HVAC serviced before closing, but she encourages this as extra insurance for a home warranty. “If the unit is in good condition before they buy, but something does go wrong, the home warranty is more likely to pay for it knowing there was no pre-existing condition before the home was purchased,” she says.
A home warranty is a solution commonly recommended for potential heating and cooling problems. “If the HVAC is in operating condition, we are often able to convince the seller to purchase a home warranty that will cover the HVAC system should it become defective in the future. This usually satisfies the buyer’s concerns,” says Rebecca Strobel, team leader at RE/MAX Professionals in Lakewood, CO.
“Home warranties are a real positive, depending on the company you get,” says Strobel. “I would suggest [buyers] get the home warranty company out to look at stuff and see what can’t be warrantied, because spending $350 to $545 for a home warranty is definitely a lot better than spending $8,000 and up for a new water heater, furnace, etc.”
4. Unit age
According to the National Association of Home Builders, most HVAC systems have a life expectancy between 15 and 20 years. Depending on how they’re maintained, some may hold on longer than others, as Strobel learned when listing one older home.
“We had a great offer, but when it came to the inspection, this old home — over 100 years — had an ancient furnace that needed to be replaced,” Strobel recalls. “It was leaking, and there were numerous other issues.”
The furnace was a dangerous antique that the sellers knew had to be replaced. The inspector confirmed, calling the furnace “unsalvageable.” Ultimately, the sellers sank more than $25,000 into replacing the system— and still lost the sale.
“After much back and forth and, it turns out, to-do about nothing, the buyers decided that this was too big of an item to deal with,” Strobel says. “This made them leery of any other items that might need work and cost them more than they were hoping to invest in the home.”
If a unit does need to be replaced, Strobel suggests seeing if the buyers can meet the sellers halfway on the purchase price. After all, Strobel says, the buyers the ones benefiting from the new HVAC unit.
The compromise could prove worthwhile in the long run. “Get a high energy high efficiency unit and make sure it’s certified and taken care of annually and you’ll be paying that back to yourself over the years,” she advises.
On the other hand, if unit age is an obvious problem, it may be beneficial for sellers to switch before they list.
Papasan recalls one home visit with a buyer where this proved effective. “As we pulled up, there was an HVAC installer putting in a brand new unit. The old one had conked out the day before putting it on the market. Our buyer put an offer in on the first day it hit the market,” she says.
5. Missing parts
Vacant homes make an easy target for vandalism and theft. The components inside HVAC equipment can appeal to people who scrap the materials for cash, as Lori Bonarek, owner of Lori Bonarek Realty in Coal City, IL, discovered.
“It was winter and the unit was snow-covered,” Bonarek recalls. Bonarek had just arrived with the potential homebuyers at the home as the home inspector did a primary inspection.
“He turned on the heating and the air conditioning, but the AC wasn’t working,” Bonarek continued. “So he went outside, dusted the snow off of the air conditioner and said, ‘All of the interior components are missing.’ I said, ‘You’ve got to be kidding me!’”
In this case, the seller agreed to take a credit and the issue was resolved. “We realized if we put it in and the house was still vacant, if it happened once, it could happen twice,” Bonarek says.
Educating the Buyer
The performance of HVAC units shouldn’t be overlooked during the sale, but it also shouldn’t make or break the deal. According to Difanis, it’s the buyer’s agent’s responsibility to help homebuyers set realistic expectations for solutions to these common problems.
If the HVAC system must be replaced, Difanis says, “The buyer’s agent, who is looking out for their interests, needs to explain to [the buyer] they aren’t entitled to 100 percent of a new unit, since that’s an unbargained-for upgrade.” He adds, “A lot of the trick in working through that [negotiation] really involves setting realistic expectations with the client.”
But for Bonarek, it’s a matter of ensuring realtors stay educated on these systems to keep up with today’s savvy homeowners. “Buyers are a lot more educated than they used to be,” she says. “Even if their agent doesn’t educate them, I’m seeing that they’re better at educating themselves now.”
In this age of high energy costs and decarbonization, choosing the right cooling system for our homes is crucial. The two main options are heat pump vs. central air conditioner.
Shopping for a new cooling system?
Get a quote
Heat pumps
Heat pumps operate as both heating and cooling systems. In cooling mode, they take heat from the internal air of the home and pump it to the outdoors. To produce heat, they collect it from outside and move it inside.
A high-efficiency heat pump is more desirable in areas with extreme temperature highs and lows. In cold climates, heat pumps use internal burners to melt ice and push warm air into the house, which may elevate operating costs.
In 2023, many U.S. homeowners may be eligible for free or reduced-cost heat pumps as part of the Inflation Reduction Act.
Air conditioners manufacture cool air by evaporating refrigerant. There are coils both inside (for cold air) and outside (for warm air).
AC units contain a compressor to change refrigerant into hot, high-pressure gas that travels through the coils. As it does so, it loses its heat and becomes liquid;. The liquid, in turn, goes through a valve and evaporates into cold, low-pressure gas. When the gas enters the coils, it absorbs the indoor heat and lowers the temperature.
How to decide: Heat pump vs. central air conditioner
Heat pumps and central ACs both provide whole-home cooling. But depending on your unique situation, one may be better suited to your home.
Heat pump
Central air conditioner
Cools your whole home
✅
✅
Heats your whole home
✅
❌
Eligible for Inflation Reduction Act rebates
✅
✅
Better for mild climates
✅
❌
Better for extreme climates
❌
✅
Longer lifespan
❌
✅
Less expensive
❌
✅
More energy-efficient
✅
❌
One of the major advantages of a heat pump is that it heats and cools your home. So, while an air conditioner is more expensive than a heat pump, a heat pump is less expensive than buying an air conditioner and a furnace.
Need help choosing which system is right for you? Our certified HVAC technicians can help.
Along with a chill, winter brings dry air, which your furnace circulates throughout your home. This may have you wondering about how to buy a whole-house humidifier.
A licensed HVAC technician can help you purchase and install a whole-home humidifier. Not only will these systems improve your comfort, but they can also extend the life of wood floors, musical instruments, and artwork.
Get a quote for a whole-home humidifier.
Yes, please!
Types of whole-house humidifiers
Whole-home humidifiers disperse warm or cool vapor through either an evaporative or ultrasonic process. They add moisture to the air heated by your furnace to increase humidity in your home.
Evaporative humidifiers
Evaporative whole-house humidifiers pass warm air through an evaporator pad, which is a ceramic-coated pad saturated with water. The hot air absorbs the moisture and moves it through your home.
Evaporative humidifiers are powered by your furnace’s fan and are installed in your ductwork. An HVAC contractor will install one in your cold-air return where warm air from the furnace supplies the humidifier.
During summer, when your air conditioner is running, a damper in the bypass vent pipe closes off airflow through the furnace humidifier.
Evaporative humidifiers are typically more affordable but require regular filter replacements.
Steam humidifiers
A steam humidifier heats water in a canister and converts the water to steam, which the unit forces through your ductwork. Although these systems are installed in your ducts, many do not need to connect to your furnace.
These fan-powered models install directly on the warm-air plenum. They can also install on the cold-air plenum if connected to a source of hot water.
The built-in fan pushes the moisture from a steam humidifier into the outgoing flow of warm air for distribution through the home.
Whole-house humidifier capacity and compatibility
When choosing a humidifier, select a model that can provide enough moisture for your entire home. Approximately 12 gallons of water per day can humidify an area of up to 3,000 square feet. A heating and cooling contractor can use a humidity calculator for more precise sizing.
Many manufacturers offer humidifiers that are compatible with your specific furnace. Installation of a universal humidifier typically does not void a furnace’s warranty. However, you should review all warranty information or consult with an installation technician before installing a humidifier.
Talk to an HVAC installer now 🧑🔧
Yes, please!
Installation and maintenance of whole-house humidifiers
Some humidifiers are reversible, meaning they can be installed on the warm-air plenum or the cold-air duct. Many humidifiers must be connected to a drain. You may void the warranty if you attempt a DIY installation.
Humidifiers require routine maintenance. Otherwise, they may breed contaminants like mold.
For evaporative units, HVAC technicians advise replacing the humidifier pad annually, as prolonged use may reduce the pad’s ability to absorb water. If you have a steam humidifier, you should flush sediment from the tank annually.
Consult your owner’s manual to determine the ideal maintenance schedule for your system.
Whole-house humidifier price
According to HomeAdvisor, a whole-house humidifier costs $400-2,500. Installation costs $200-2,000.
How to buy a whole-house humidifier: the bottom line
A licensed HVAC technician can help you buy a whole-house humidifier. They will survey your home and suggest models that meet your family’s needs.
If you’re noticing dryness in your home this winter, contact one of our top-rated technicians for assistance.
Converting an oil furnace to natural gas is a big investment. Natural gas is certainly more versatile than fuel oil — you can use it to run your furnace, stove, washer and dryer, grill, and other home appliances. However, there are significant tradeoffs to consider.
Need HVAC help? We’ve got you covered.
Book an appointment
Pros of converting an oil furnace to natural gas
⛽ Natural gas is piped into your home, so you don’t have to remember to fill your tank, as with oil.
🌎 Natural gas burns more completely, so it’s more efficient.
💰 You pay for your natural gas use monthly. You pre-pay for oil.
💥 Natural gas companies offer rebates for switching from oil to gas.
⚖️ Most natural gas is produced in the U.S., making the cost less volatile.
💵 In many cases, it’s less expensive to heat your home with natural gas.
Cons of converting an oil furnace to natural gas
🚫 Your area may not have a natural gas supplier.
🔧 If your home doesn’t already have a gas hookup, you’ll need to install one. This involves running a pipe from your home to the main at the street.
🛢️ If you have an oil furnace, you’ll have to pay to convert it to gas or buy a new one.
🚿 If your water heater burns oil, you’ll need to convert that to gas as well or buy a new one.
🚛 You’ll have to remove and haul away your oil tank.
How do I know if natural gas is available for my home?
Ask your neighbors. Some of them might be longtime residents with advice on dealing with local utility companies.
Call the local utility company and ask about natural gas options.
Search Google for “natural gas availability.” Some websites can tell you whether natural gas is available at your specific address.
If you’re buying a new home, ask the seller or the realtor.
Are there rebates available for converting an oil furnace to natural gas?
The Environmental Protection Agency (EPA) offers federal tax credits through its Energy Star program because gas furnaces are typically more efficient than oil furnaces.
Additionally, many natural gas suppliers offer rebates for customers who convert to natural gas. A quick phone call can let you know if your local utility company offers rebates.
What expenses are involved in converting an oil furnace to natural gas?
If your house doesn’t have hookups to the main gas supply, then you’ll need to bury a line from your house to the street. You might also need to add gas piping inside your house and replace any copper piping with steel or another approved material. This can cost between several hundred to several thousand dollars.
The average cost of a new natural gas furnace is $3,800-10,000, according to HomeAdvisor. Installation costs $2,000-10,000.
Need a new furnace?
Get a quote
How can I calculate the cost of natural gas?
You can check natural gas prices on the U.S. Energy Administration website.
Costs vary based on location. Your specific home and furnace will also impact the price.
Oil furnaces usually have large, obtrusive tanks that take up needed space in the yard.
Some services will remove and haul away your old oil tank. Expect to pay $400-3,000 for oil tank removal, according to Angi.
If you can’t afford to convert your furnace from oil to natural gas, but you don’t like your outdoor tank, you may be able to move it. Some smaller tanks can fit inside your basement.
Converting an oil furnace to natural gas: the bottom line
Switching to natural gas from oil is not necessarily straightforward. It can be complicated and expensive.
If you decide to make the move, we recommend doing it when it’s time to purchase a new furnace. Converting your existing furnace may cost the same or more than buying a new one.
Our team of HVAC pros can help walk you through the process and make the right choice for your home.
An evaporator that removes unwanted heat from the air and transfers it to a refrigerant
A condenser that removes unwanted heat from the refrigerant and transfers that heat outdoors
Condensers are heat exchangers that induce condensation on the pressurized refrigerant to change the phase from a gas to a liquid. The primary component of a condenser is the condenser coil, through which the refrigerant flows.
Types of condensers
There are three types of condensers. These types differ in how they remove excess heat:
Air-cooled condensers remove heat by blowing air over the condenser coil. This is the most common type of condenser in residential systems.
Water-cooled condensers remove heat by pouring water over the condenser coil.
Evaporative condensers do not typically use refrigerant. They remove heat by allowing water to evaporate directly into the air.
Need HVAC help? We’ve got you covered.
Book an appointment
Condenser parts
Both split air conditioner and heat pump condensers have the same basic parts. The condenser cabinet contains the condenser coil, a compressor, a fan, and various controls.
Condenser coils can be made of copper tubing with aluminum fins or all-aluminum tubing so heat can rapidly transfer. You should keep it as clean as possible to maintain its heat-transferring efficiency.
The condenser fan is a vital part that circulates air across the coil to facilitate heat transfer. The efficiency will be impacted or the compressor could fail if the airflow is blocked. The area around the compressor’s coil and fan must be free of dirt so that maximum airflow can occur.
The compressor is the heart of the system since it compresses the refrigerant and pumps it to a coil in the form of a hot gas. In air conditioners, this is cooled at the condenser into a warm liquid and passes through a pipe into the evaporator coil, where it expands and cools. In heat pumps, the hot gas is pumped directly to the evaporator coil to provide heat.
Air conditioner condensers
Condensers used only in air conditioning do not have many controls. A contactor switches the power on and off. Capacitors start and run the motors.
Some optional controls like brownout time delay, hard start kit, crankcase heater, and low ambiance control are available. Brownout time delay protects the compressor, shutting the contactor off when voltage drops and too much current is pulled in by the motors.
Heat pump condensers
These have controls that are more complex than those of an air conditioner. In addition to the contactor, capacitor, and other optional controls, there is also a reversing valve, defrost timer, and adjustable temperature sensor.
The reversing valve directs the flow of compressed gas to the condenser coil for air conditioning or to the evaporator coil for heating.
The condenser coil extracts heat from the air outside the home. When it does this, it becomes very cold and frost collects on it. An excess of frost restricts airflow, reducing the coil’s effectiveness.
The defrost control automatically switches to the air conditioning mode even without the condenser fan running. This makes the ice melt when the hot gas runs through the coil, after which the system switches back to heating mode.
Without a natural gas source, most homeowners turn to either propane gas or oil furnaces for their heating needs. When replacing an older furnace, it is possible to switch to a different fuel type, though most homeowners stay with what they already have.
If you’re deciding between an oil vs. propane furnace, consider the following variables.
A propane furnace costs $700-3,500. Installation ranges $1,000-2,000, according to HomeAdvisor.
Average system cost
Average installation cost
Oil furnace
$6,750-10,000
$2,000-10,000
Propane furnace
$700-3,500
$1,000-2,000
Furnace types: propane vs. oil
There are three styles of oil furnace:
↔️ Horizontal
Air enters one side and leaves via a duct at the back. These furnaces can be laid on the ground, placed on a platform, or suspended from the ceiling. They are good for smaller homes.
⬆️ Upflow
Air is taken from the bottom and forced upwards. It is then pumped out the top as soon as it hits the right temperature.
⬇️ Downflow
A fan is used to draw air into the top of the furnace. The air is then warmed and expelled through the bottom of the unit.
There are three types of propane furnace:
🪟 Wall units
Best suited for small homes or a single space, such as a garage, due to their convenient size.
🏠 Central units
These units are bigger but are much more efficient as they can be powered from any location within the house.
🔥 Combination heaters
With a combination heater, there is a dual function in heating the house and also providing propane fuel to other appliances. Combination heaters can also use any excess heat available, thus eliminating energy waste.
When shopping for an oil or propane furnace, consider these factors
🛢️ Fuel availability
It’s simpler to stick with the same fuel type as your existing heating appliance. If you decide to switch from oil to gas or vice versa, make sure that fuel is readily available in your area and that you have a place to store it.
💰 Cost
Consider the upfront investment as well as the ongoing cost of running the furnace.
🌎 Efficiency
Furnace efficiency is measured with AFUE ratings. The higher the rating, the more efficient the furnace.
💨 Blower speed
Single-speed furnaces are the least expensive and the least precise. Dual-speed furnaces allow for more control. Variable speed furnaces allow you the ultimate in customized home comfort.
📏 Size
Have an HVAC professional conduct a heating study to ensure you purchase a furnace with the correct heating output for your home.
☂️ Warranty
Different manufacturers offer different warranties. We recommend you choose a system that comes with at least a 10-year parts warranty.
Oil vs. propane furnaces: the bottom line
In most cases, propane furnaces make more sense than oil. They’re less expensive to purchase and to run. Plus, they’re more environmentally friendly.
However, if your home already has an oil furnace and you’re looking for a replacement, it may be more convenient and cost-effective to stick with an oil furnace.
When choosing a heating system, you should consider the size of the space you want to heat. If you are looking to warm a small room, a wall-mounted heater can be a good option. In this post, we discuss wall-mounted heaters, how they work, how their energy efficiency is measured, and their benefits and costs.
What is a wall-mounted heater?
A wall heater is a heating unit that is installed in or attached directly to a wall. Designed to save valuable floor space, they are usually used to heat smaller offices, single rooms, or compact living spaces. By installing these units, you will not have to expand the HVAC system you are currently using.
During installation, wall-mounted heaters are attached to the wall and wired directly to a circuit in the electrical panel. As such, they are different from portable space heaters that are usually plugged into a wall outlet. With wall heaters, there are no wires to trip on. Since the heaters are self-contained, you don’t have to worry about the costly and time-consuming exercise of installing ductwork.
Types of wall-mounted heaters
There are two main types of wall-mounted heaters: gas wall heaters and electric wall heaters.
Gas wall heaters
Large and complex, these heaters require professional installation. While they cost more to buy, they are more affordable to operate.
With regular maintenance, gas heaters have a lifespan of 10-20 years, which is shorter than that of electric heaters. One of the downsides is the potential leak of carbon monoxide, a poisonous gas that can be fatal.
Electric wall heaters
Compared to gas wall heaters, electric heaters have a lower initial purchase price but are more expensive to operate month by month. The units are quiet and durable, with an average life expectancy of 20-30 years. They are also easier to maintain and do not combust fuel onsite, eliminating the risk of carbon monoxide or gas leaks.
Our HVAC experts can help you install your wall-mounted heater.
Get a quote.
Wall-mounted heater energy efficiency
People often consider energy efficiency when choosing a new heater. As such, it is important to understand how to measure their energy efficiency.
The Annual Fuel Utilization Efficiency ratio (AFUE) measures the standard energy efficiency of a wall-mounted heater. It is calculated by dividing the amount of fuel supplied to the heater by the amount of heat produced by the device, expressed as a percentage.
Generally, heaters with a higher AFUE rating are more energy efficient. Because they use less energy to keep your space warm, the operating costs are lower.
Wall-mounted heaters with AFUE ratings of 80-85% are mid-efficiency, while those with ratings above 90% are highly efficient.
Benefits of a wall-mounted heater
Choosing a wall-mounted heater brings numerous benefits. Following are some reasons to consider installing one of these units.
Fast and efficient heating
Provided you operate the unit with proper safety precautions, it can heat your space in a few minutes. By warming only specific areas, wall heaters consume less energy and run more efficiently.
Space saving
You can attach mounted wall heaters directly to your wall. This frees up your floor space and your window, making them ideal for those living or working in smaller spaces.
Lower your heating costs
For many people, the cost of heating their homes goes up when the temperature drops. Wall-mounted heaters are energy efficient, providing a modern and unique way to reduce energy costs. Instead of heating your home, these cost-effective units allow you to warm up only a specific area.
Easy to install and maintain
Wall-mounted heaters are relatively easy to install. Unlike central heating systems, no major ongoing maintenance is necessary.
Innovative features
Some of the more advanced features include precise thermostats, remote controls, and Wi-Fi controls. Units with precise temperature controls have digital displays and sensitive thermal sensors. These features help you to control temperature accurately for optimal comfort and use less energy to heat your space.
Wall-mounted heater costs
The price for a wall-mounted heater will depend on several factors, including the unit’s power, energy efficiency, and special features. The brand and specific model you choose also influence price.
Generally, a wall heater will cost $450-550. If you choose to have it installed professionally, expect to pay an additional $150-200 in labor costs alone.
When you request a quote, ask for an itemized list of what the job includes. You might be able to save a bit by providing the installation materials yourself.
Book wall heater installation now.
Yes, please!
Wall heater FAQs
Are wall heaters dangerous?
With proper maintenance and the right safety precautions, wall heaters are quite safe. Ensuring your gas wall-mounted heater is in perfect shape will reduce the chances of gas leaks. Leaving reasonable space around your electric wall heater will help to lower the risk of fire caused by heated coils.
How do wall heaters work?
Wall heaters have a relatively simple working mechanism. The units consist of a heating element that converts energy from the fuel source into heat. The wall unit then expels that warm air into your space.
If you live in an area with moderate heating and cooling needs, a heat pump can be an energy-efficient and affordable substitute for your furnace and air conditioner. This versatile heating and cooling system extracts heat from one place and transfers it to another, keeping you warm when it’s cold outside and cool when outdoor temperatures rise.
The heating and cooling needs of every home vary based on factors such as the climate, size of the home and rooms, and insulation. Heat pumps come in different sizes and capacities, each designed to efficiently heat and cool a given area. Comparing heat pump capacities helps you to choose the right unit for your particular space.
Get a heat pump quote now.
Yes, please!
What is heat pump capacity?
Heat pumps have different capacities depending on their size, technology, auxiliary equipment, and other factors. Capacity is rated in British Thermal Units (BTUs), measuring 12,000 BTUs per ton.
A higher BTU rating means a more powerful system. The capacity will determine the square footage a unit can heat or cool efficiently.
2-ton heat pump
3-ton heat pump
4-ton heat pump
BTUs
24,000
36,000
48,000
Home size
1,000 sq. ft.
1,500 sq. ft.
2,000 sq. ft.
2-ton heat pumps
Since there are 12,000 BTUs per ton, a 2-ton heat pump has a capacity of 24,000 BTUs for heating or cooling.
Compared to larger heat pumps, a 2-ton unit will be less expensive and likely occupy less space. These units are more suited for heating and cooling smaller spaces or enhancing comfort in areas with moderate heating and cooling needs.
A capacity of 24,000 BTUs will heat or cool areas of up to 1,000 square feet. But it’s important to confirm with a professional that a 2-ton unit is suitable for your home and climate before investing in one. Picking the right unit ensures you save on energy consumption, reduce wear and tear, and maximize comfort.
3-ton heat pumps
A 3-ton heat pump is rated at 36,000 BTUs per hour. This rating means that it has a higher heating and cooling capacity than a 2-ton unit and a lower capacity than a 4-ton heat pump. It will also consume more energy than a 2-ton unit to maintain indoor air at your desired temperature.
While 3-ton heat pumps are not necessarily heavier than smaller-capacity pumps, they will likely cost more to buy and install. A quality 3-ton heat pump can effectively heat or cool an average area of 1,500 square feet but will be too large for smaller spaces. It’s essential to work with an experienced HVAC professional when sizing a heat pump, so you don’t spend more than you need.
4-ton heat pumps
A 4-ton heat pump is rated at 48,000 BTU per hour. Greater in capacity than 2-ton and 3-ton heat pumps, these units also cost more and use more energy to heat or cool your space.
4-ton heat pumps are designed to keep larger spaces comfortable. Most can easily cover areas as large as 2,000 square feet.
Just like with any other size heat pump, you must ensure that a 4-ton heat pump is right for your space before investing in one. If the unit is too large for your home, it will short cycle and possibly damage the motor. A heat pump that is too small for your space will constantly try to run to meet the desired temperature.
Our HVAC pros can determine the right heat pump capacity for your home.
Book an appointment.
Heat pump capacity: the bottom line
The capacity of a heat pump is the most important factor in determining the right unit for your home.
Heat pumps with smaller capacities are more suitable for smaller spaces such as individual rooms and condos. Large-capacity heat pumps will heat and cool larger spaces more efficiently.
The right unit will help to reduce your utility bills and keep your home comfortable. In 2023, you may be able to get a free or reduced-cost heat pump thanks to the Inflation Reduction Act.
Heat pump capacity FAQs
Is a 3-ton air conditioner enough for my house?
Apart from the capacity of the air conditioner, you also need to account for things like your climate, house size, and existing insulation. In general, a 3-ton air conditioner will work well in an area of around 1,200 square feet.
How many BTUs is a 3-ton heat pump?
Given that HVAC systems are measured at 12,000 BTUs per ton, a 3-ton heat pump is rated at 36,000 BTUs per hour, meaning it can effectively heat or cool mid-sized areas.
How much does a 3-ton heat pump cost?
The price of a 3-ton heat pump will depend on the specific brand and model you choose. On average, a 3-ton heat pump with a 14 SEER costs around $5,229 including installation, according to the 2019 National Plumbing & HVAC Estimator.
How much does a 4-ton heat pump cost?
The amount of money you will pay for a 4-ton heat pump depends on its energy efficiency and technological features. Expect to pay an average of $6,654 for complete system installation for a 14 SEER unit, according to the 2019 National Plumbing & HVAC Estimator.
How much does a 2-ton heat pump cost?
For a 2-ton heat pump, the average price plus installation is $4,352 for a 14 SEER unit, according to the 2019 National Plumbing & HVAC Estimator. The final price will also depend on the brand, efficiency ratings, and other features.
If your furnace runs then shuts off and starts again, you’re experiencing “short cycling.” Short cycling is a common symptom of a few different furnace issues.
Read on to learn why your furnace is short cycling and how to fix it.
Schedule a furnace repair appointment now.
Yes, please!
What causes furnace to start then shut off?
On average, a furnace will run three to eight heating cycles per hour. The typical heating cycle lasts 10-15 minutes. If your furnace shuts off after a few minutes and starts more than eight times an hour, it may require repair.
Common causes of furnace short cycling include restricted airflow, a malfunctioning flame sensor, or a poorly placed thermostat.
Restricted airflow
Blocked vents or a clogged air filter may cause your furnace to run and then shut off too early. It’s easy to fix these issues on your own.
You should change your furnace filter at least once every three months. Follow our guide to do it yourself. If you’re not sure which type of filter to purchase, we’ve got you covered here.
If a new filter doesn’t stop the short cycling, check your vents. Your vent louvers should be in the open position. Remove furniture, piles of clothing, or other household clutter covering them.
Poor thermostat placement
The location of your thermostat might attribute to your furnace’s short cycling. If it’s not in a site that reflects the temperature in the rest of your home, it may cause problems.
Your thermostat should be in a central location where your family spends time. Avoid putting it in a hallway, near a heat source (like the fireplace), near windows and doors, or on an external wall.
If you need to move your thermostat, follow the installation instructions it came with. And check out our guide to thermostat wiring. Don’t feel up to DIY? Contact an HVAC technician for help moving your thermostat.
Overheating
If your furnace is overheating, it will turn itself off automatically. You may also notice a burning smell and a humming sound coming from the system.
A mechanical failure may cause your furnace to overheat. This is a safety issue. It could cause a fire or a carbon monoxide leak.
If you suspect your furnace is overheating, turn it off at the breaker box. Call a heating and cooling professional for help.
Schedule an appointment with an HVAC pro now.
Yes, please!
Broken or dirty flame sensor
A flame sensor is a safety component that detects your burner’s flame. If it doesn’t sense a flame, the furnace will shut down.
Cleaning the flame sensor may resolve this issue. If you’re up for a DIY project, give these steps a try:
Turn off your furnace at the breaker box.
Open your furnace’s outer panel. You may need a screwdriver to do this.
Unscrew the flame sensor with a screwdriver. It’s usually located near the panel opening or behind a burner.
Using a microfiber cloth, scrub the metal rod until most of the carbon buildup comes off.
When you see bare metal, switch to wire wool and delicately scrub the rest.
With your microfiber rag, wipe dust off the sensor and sensor mount.
Screw the flame sensor back in, re-cover the outer panel, and turn your furnace back on.
If those steps don’t work, you’ll have to call an HVAC professional. A faulty flame sensor can become a safety concern if it goes unchecked.
Improper furnace size
HVAC installers typically use industry-standard Manual J calculations to determine the furnace size you need. Your system may be too powerful for your home if your furnace runs then shuts off and starts again.
Your furnace might be too big if you’re experiencing short cycling and any of the following symptoms:
If you suspect you have the wrong size furnace, call a heating and cooling expert. They can discuss the options for more effectively warming your home.
Book an appointment with an HVAC pro now.
Yes, please!
How to fix furnace stopping and starting
You can attempt to fix your furnace’s short cycling by completing a few troubleshooting steps:
Change your air filters
Unblock your vents
Clean your flame sensor
If you suspect thermostat placement, furnace overheating, or furnace size are the cause of your furnace running then shutting off too early, contact an HVAC technician for help.
You’ve got furnace damper questions; we’ve got answers! Learn about your HVAC damper – what it is, how it works, and when to open and close it.
What is an HVAC damper?
An HVAC damper is a plate within your ductwork that regulates airflow and directs it to different areas of your home. It may also be called a duct damper or a furnace damper.
There is a lever that controls the metal plate in your HVAC damper. Turning the lever rotates the plate, which alters the airflow through that duct.
When your damper is open, heated air from your furnace or cool air from your AC can flow through it. When it’s closed, your heated/cooled air cannot enter that portion of your ductwork.
Dampers are an essential part of a zoned HVAC system. Even if you don’t have a smart-zoned system, your central air and heating ducts likely have dampers.
Where is the HVAC damper?
In a traditional HVAC system, dampers are typically located in the main supply trunks of your ductwork just before and after major junctions. You’re likely to find furnace dampers on either side of the large metal box (the plenum) near the furnace. If you have a two-story home, there’s probably another one where the ductwork leads upstairs.
In a smart-zoned HVAC system, you’ll also find dampers to open and close off the different zones. Your home automation system usually controls opening and closing these. You control traditional dampers manually.
The number of dampers in your home depends on its size and the specifications of your HVAC system. In fact, your home may not have dampers at all.
Need help finding your HVAC damper? Our technicians can help.
Book an appointment.
When to open and close your HVAC damper
Opening and closing a manual damper is as easy as turning a nob. Look out for a lever attached to a wingnut outside your duct joints.
How to tell if my HVAC damper is open or closed
Some HVAC installers may do you a favor and label your ductwork, illustrating when the dampers are in the open and closed positions.
If yours aren’t labeled, look at the stem from the damper plate, which is visible in the center of the wingnut. When it’s in a horizontal position, the damper is open. When it’s vertical, the damper is closed.
If your damper doesn’t have a lever to move the wingnut, you may need to use a pair of pliers to change its position.
Should my furnace damper be open or closed in winter?
If you have a two-story home, it’s customary to close the damper leading to your upstairs ductwork in the winter. Your heat will enter the first floor of your home and rise naturally.
Sometimes, if you leave the upstairs damper open in the winter, your upstairs rooms will get too hot.
Should my furnace damper be open or closed in summer?
In a two-story home, you should open the damper to the upstairs ductwork in the summer. Since heat rises, you’ll want to be sure your AC delivers cool air to the upstairs rooms through the ductwork.
Our HVAC pros can help open and close your damper.
Book an appointment.
HVAC damper FAQs
What does the damper do on a furnace?
Dampers control the airflow and pressure of the heated air entering different areas of your home ductwork from the furnace.
What does the damper do on an air conditioner?
Dampers control the flow and pressure of the cool air leaving your air conditioner and entering your home through your ductwork.
Wondering, “How much does it cost to replace a boiler?” On average, boiler replacement costs $5,783, according to HomeAdvisor. A standard gas boiler costs around $4,000. A high-efficiency boiler is about $7,500.
Your boiler heats your home using steam and radiant heat. Whether yours is gas, oil, or electric, replacing your boiler can increase your home comfort and help reduce your heating bills.
Looking for a new boiler? Our technicians can help.
Get a quote.
Boiler replacement: what does it include?
If you’re interested in boiler replacement, a technician will visit your home and conduct a heating survey. This includes examining your existing boiler and assessing your home heating needs. They may check things such as your insulation, window seals, and ductwork.
After the technician surveys your home, they’ll provide recommendations and a quote with the boiler replacement cost. Depending on your needs, they may suggest a new boiler or another heating appliance like a furnace.
If you agree to proceed with your quote, you’ll schedule an appointment to complete the work. Your technician will dismantle, remove, and dispose of your old boiler and install a new heating system at that time.
Boiler removal costs
Make sure your quote includes the removal and disposal of your existing boiler. HomeAdvisor suggests this can cost an additional $200-500. This expense varies based on the difficulty involved. Your boiler’s size, location, and fuel type may influence the cost.
Dismantling a pre-1980s boiler can be especially complicated (and expensive). These boilers may need to be cut up, releasing harmful smoke, iron, asbestos, or steel chips into the air.
To remove an older boiler safely, you’ll need to engage specialists who can contain the efforts with plastic sheeting and a negative air ventilation system.
Boiler installation costs
The labor involved with boiler installation ranges $1,500-2,500. Your technician will usually present labor as a flat fee on your quote.
Replacing a boiler usually takes two HVAC technicians the better part of a day to complete.
If you’re switching to a different fuel type or heating appliance, the job may take longer and cost more.
Our licensed HVAC pros can help you install a new boiler.
Get a quote.
Boiler types
Your boiler replacement cost depends a lot on what features you need in a boiler.
In most cases, your home is already set up to accommodate a certain heating fuel type. This may limit your options when it comes to selecting a new boiler. It is possible to create a hookup for an alternative fuel type, but it can be expensive and time-consuming.
Fuel type
Cost to purchase
Cost to run
Details
⚡ Electric
$1,800-8,000
High
Not the best electric heating option
⛽ Gas
$4,000-9,000
Low
Most common boiler fuel
🛢️ Oil
$4,800-6,700
High
Very fuel efficient
While electric, oil, and gas are the most common modern boiler types, you can also choose a boiler fueled by wood, coal, or biofuel. Biofuel is a type of renewable energy derived from living materials like corn ethanol, for example.
Additionally, you may choose a boiler that does more than just heat your home.
Boiler type
Cost
Use
🔥 Standard
$2,200-7,000
Heats your home
🚿 Combi
$6,000-10,000
Heats your home and water
🏡 System
$3,000-5,500
Heats your home and water, and stores hot water for large homes
Another choice you have when replacing your boiler is whether you want a high-efficiency system. High-efficiency boilers save you 10-20% on utility bills, but they’re more expensive to install.
Boiler efficiency
Cost
🚶 Standard
$2,200-7,000
🏃 High-efficiency
$4,000-10,000
Finally, you can select between a steam or hot water boiler. Steam generally does a better job of transferring heat, making it a good choice for homes in cold-weather climates or those without insulation.
Heat transfer type
Cost
💧 Hot water
$1,200-4,000
🌡️ Steam
$3,500-8,000
Ready to schedule your boiler replacement? One of our licensed HVAC technicians can help you choose the right system for your home. Click below to book an appointment.
As the world moves towards decarbonization, more homeowners are transitioning from gas to electric appliances. Switching your furnace from gas to electric is possible and relatively straightforward with the right contractors on your team.
Schedule an appointment with a furnace contractor now
Yes, please!
The first step to switching from a gas to an electric furnace is to purchase a new furnace. You will not be able to re-wire an existing gas furnace to run on electricity. Check out our article on electric furnaces when you start shopping.
How to convert your house to electric heat
Once you purchase a new furnace, you’ll have to hardwire it into your home’s electrical system. You can’t simply plug a furnace into an electrical outlet for safety reasons.
According to most building codes, an electric furnace must run on a dedicated circuit. The furnace circuit can’t power anything other than the furnace.
As such, the furnace will have its own breaker in your electrical box. Wiring will lead from the breaker box to a disconnect switch to the furnace.
We recommend hiring an HVAC pro to hardwire your new electric furnace once it’s delivered to your home.
Why switch from gas to electric furnace?
Gas and electric furnaces both have their pros and cons. In many cases, homeowners choose to convert their house to electric heat for the following reasons:
⏳ Longer lifespan
Electric furnaces last 20-30 years. Gas furnaces last 15-20 years.
🛟 Safer
If a gas furnace leaks, you may put your home and family in danger. This may cause a fire or carbon monoxide poisoning.
🔌 Easier to install
Electric furnaces don’t require venting.
💰 Less expensive
Electric furnaces cost less than comparable gas furnaces.
🌎 More sustainable
As we move towards renewable energy sources, clean electricity is more environmentally-friendly than gas.
☁️ More efficient
Electric furnaces are more fuel-efficient than gas furnaces.
💡 Readily available
Electricity is commonly available in most homes.
Heat cost: gas vs. electricity
One of the biggest reasons homeowners prefer gas furnaces is that gas is usually less expensive than electricity.
However, electric furnaces are less expensive upfront. HomeAdvisor says a new electric furnace costs $1,600-6,900 while a new gas furnace costs $3,800-10,000.
Get a quote on a new electric furnace
Yes, please!
Gas to electric furnace: the bottom line
Switching your furnace from gas to electric involves purchasing a new electric furnace and hiring an HVAC technician to install and wire it properly.
While you may pay more to heat your home with electricity, it’s an environmentally sound move that will benefit the environment as we move towards a sustainable electric grid.
Your HVAC system brings you indoor comfort all year long. (Did you just think, “Wait, they’ve lost me in the first sentence. What is HVAC?”🤔 You’re in the right place.)
Learn how HVAC systems work and what this fast-growing industry is all about.
What does HVAC mean?
HVAC (heating, ventilation and air conditioning) is the use of technology to treat air. HVAC is an umbrella term for the systems, equipment, manufacturers, contractors and technicians that:
HVAC makes indoor air feel more comfortable. HVAC systems boost the temperature, humidity and air quality of indoor living and gathering spaces.
An HVAC system also adds a buffer between a building and the elements. Without an HVAC system, the temperature inside a building would feel as hot, cold, humid or dry as the air outside.
Residential vs. commercial HVAC
Residential HVAC is the air treatment of homes, apartments, RVs and other living spaces. Smaller systems can heat and cool a single room, while a central system is designed for whole homes.
Commercial HVAC is for corporate offices, industrial buildings and retail stores. Commercial HVAC systems work like residential units, but they’re much bigger because they treat larger spaces.
HVAC: Heating
Heating systems warm indoor spaces. They either create or transfer heat at a central source, then distribute the heat throughout the space.
Furnaces are the most popular heating system in America. While heat pumps are less common, they are gaining popularity with the Inflation Reduction Act that drastically reduces the cost. Heating systems use a range of methods to deliver warm air to a room or building.
Heat distribution methods
Heat distribution methods make sure that warm air actually reaches the room it’s supposed to heat. Although forced air is the most common method in the U.S., there are options for spaces without ductwork.
Forced air heating
A forced air system uses a series of ducts and vents to deliver warm air. In a nutshell, here’s how it works:
Step 1️⃣: Supply vents pull indoor air into the forced air system.
Step 2️⃣: A central heating source, usually a furnace, heats the air.
Step 3️⃣: The warm air leaves the heat source and travels through a network of metal, tunnel-like structures called ducts.
Step 4️⃣: The air reaches a different set of vents. Return vents disperse the air back into the room.
Ductwork is commonly found in commercial spaces and most modern homes, which makes forced air heating so popular.
Radiant heat
Radiant heating systems use direct transfer to deliver warm air. The ceiling, walls or floors have a heat source beneath them. The heat source emits energy, warming the surrounding air on contact.
Radiant heat usually relies on an electric or gas-fueled source, such as a boiler, or a hydronic (water-based) fuel source like a water heater.
The heat source warms the steam, air or water-filled tubes under the floorboard. As a less invasive option, hot panels can be installed in the ceiling or walls.
Radiant heat is energy-efficient, but it’s less common due to its high installation costs.
Geothermal
Geothermal heating uses the ground as its heat source. A few feet under the earth’s surface, the ground absorbs the sun’s rays and keeps a near-constant temperature.
Pipes are buried in the ground, where they absorb the heat. The pipes carry the heat to a heat pump, which transfers the heat and distributes it.
Geothermal heat pumps are gaining popularity, since geothermal energy is considered a renewable resource. It’s expensive to install, though.
Heating systems
A heating system is a device that converts a heat source (or fuel) into warmth. Heating systems use a variety of methods to create or transfer energy.
Check out some of the most popular heating methods and how they work.
Furnaces
A furnace is the most common heating method in the U.S. Furnaces can convert gas, propane, oil or electricity into heat.
Most furnaces are central HVAC systems, meaning they create heat in a single location and send the warm air through ducts.
A heat pump is an air conditioning and heating system in one. Heat pumps come in gas and electricity-powered models.
Heat pumps don’t generate heat like a furnace. They transfer it. In heating mode, a heat pump pulls heat from the air, water or ground outdoors and brings it inside.
In cooling mode, a heat pump works in reverse by pulling warm indoor air and transferring it outside.
Product Callouts Section
Did you know?
Heat pumps are most commonly sold in North and South Carolina.
Ventilation introduces air into an indoor space. A strong ventilation system boosts indoor air quality and promotes even, consistent airflow.
Air purifiers clean and deodorize the air.
Humidifiers and dehumidifiers keep moisture at a safe, healthy level.
Fans and blowers keep air moving.
HVAC systems use a combination of natural and mechanical ventilation to keep air feeling healthy and comfortable.
Natural vs. mechanical ventilation
Natural ventilation is uncontrolled airflow. Think of the wind blowing or air moving through an open window or door. Indoor spaces rely on natural ventilation to add fresh oxygen to the air.
Mechanical ventilation is airflow controlled by equipment or a device. HVAC systems use fans, motors and blowers to move and disperse air.
Air filters
Forced air and central HVAC systems use air filters. Filters catch airborne germs, dirt, debris and even odors.
💡Tip: To boost indoor air quality, make sure your central HVAC system has the right size filter.
HVAC: Air conditioning
Air conditioning cools indoor spaces. 87% of American homes have air conditioning systems, making them more popular than furnaces and heat pumps.
Air conditioning units work by pulling heat and humidity from your home’s air. The heat is converted from gas to liquid and moved outside, cooling the indoor air.
Check out the different types of air conditioning systems.
Central air conditioning
Central AC is for whole-home cooling. To distribute air, central air conditioners use the same forced air system as furnaces.
A tunnel of ductwork moves the air, and vents disperse the air into each room. There are two common varieties of central air conditioners.
Split system
A split system air conditioner has an indoor unit (air handler) and an outdoor unit (condenser unit).
The outdoor unit collects heat. The indoor unit, or air handler, circulates the air and passes it through a filter.
Packaged system
A packaged system is also known as a local HVAC system. It operates in the same way as a split system, but all the parts are contained in a single outdoor unit.
The outdoor unit combines both elements of a split system in one. Some models of packaged air conditioners also double as heat pumps or furnaces.
Packaged systems are great for homes with limited indoor space. With no indoor unit, packaged systems are also quieter than split systems inside the home.
Mini split
Mini splits are ductless air conditioning systems. The outdoor and indoor unit connect through a set of wires, so it’s a great option for homes without ductwork or central HVAC.
An indoor unit, or the air handler, is mounted on the wall, ceiling or floor. The air handler adds cool air directly to the room.
Single-zone mini splits pair one outdoor unit to one indoor unit. For cooling a single room or an add-on to a home, they’re a cost-effective choice.
Multi-zone mini splits, or multi-splits, pair one single outdoor unit with multiple indoor units. You can individually adjust the temperature of each room (known as zoning).
Window unit
Window air conditioning is an affordable option for single-room cooling. Window units are electric, and most plug into a standard 115V outlet.
We recommend window units for apartment living and as supplemental cooling. Over time, window units have gotten quieter and more attractive.
HVAC FAQ
What’s the difference between AC and HVAC?
AC, or cooling, is just one aspect of the HVAC industry. HVAC also includes heating and ventilation, which uses different systems like furnaces.
All air conditioning systems are HVAC systems, but not all HVAC systems are air conditioners.
Where can I buy HVAC equipment?
You can buy central HVAC systems on the manufacturer website or through a local contractor. Some contractors have an exclusive deal with an HVAC manufacturer, so they sell only one brand’s products.
Other contractors sell products from multiple HVAC brands. Mini splits and window units are available from third-party retailers like Amazon.
What is HVACR?
The R in HVACR stands for refrigeration, or keeping something cooler than ambient temperature. Refrigerant is the gas-to-liquid component in air conditioners, heat pumps and fridges.
What are the best HVAC brands?
Trane, Lennox and Carrier are considered elite HVAC manufacturers. High-quality, long-lasting products and strong brand recognition contribute to their high cost.
Rheem, York and Amana have impressive catalogs, but are often less expensive than the elite brands.
How do I find a quality HVAC contractor?
If you’re starting the search for a contractor, get quotes from at least three businesses. Rates vary widely, even in the same location.
Ask each contractor if they’re licensed to operate in your state. To verify, you can ask for a copy of their state license.
The contractor should also be bonded and insured. If a technician is injured in your home, insurance covers the damages.
HVAC contractors near me
Need an HVAC contractor? Let’s help you skip the search. We’ve vetted hundreds of HVAC companies to find the best contractors and technicians in the U.S.
If a natural disaster damaged your whole-home HVAC system, you might be eligible for financial assistance.
Whether a hurricane, flood, earthquake, or other “Act of God” harmed your HVAC equipment, you have options to consider for repair or replacement.
Read on to discover how to check for HVAC coverage and where to apply for federal assistance.
Schedule an HVAC repair appointment now
Yes, please!
HVAC damage covered by warranty
When you purchased your heating and cooling equipment, it came with a warranty from the manufacturer. In most cases, you must register your system for complete warranty coverage.
If you didn’t keep the paperwork, you can look up your warranty information on the manufacturer’s website. You’ll likely need the unit’s serial number, which you can find printed on the equipment.
Typically, the manufacturer’s warranty on HVAC equipment only covers parts with normal wear-and-tear. It generally does not cover damage from Acts of God, like lightning strikes, storms, or fires. However, it never hurts to check.
HVAC damage covered by homeowners’ insurance
In many cases, this is your best bet for coverage of HVAC damage. Most homeowners’ insurance policies cover damage to home systems by natural disasters.
Homeowners’ insurance generally doesn’t cover damage to heating and cooling units caused by normal wear-and-tear or lack of maintenance.
In some areas, your homeowners’ insurance may require special coverage like flood or hurricane insurance. If you don’t have the appropriate coverage, you may be out of luck when filing a claim.
Note that homeowners’ insurance will only cover whole-home heating and cooling equipment, like central air. It will not protect portable systems like window air conditioners.
HVAC damage covered by home warranty
Home warranties provide reduced-cost repair and service visits necessitated by wear-and-tear and natural aging. They do not usually cover damage caused by natural disasters.
Depending on your required service, your home warranty may pay for labor related to your issue. However, it will not cover the physical repair or replacement of your damaged HVAC unit.
Federal funding for HVAC damage
If your insurance does not cover your damaged HVAC system or if you don’t have insurance, you may be able to apply for help from the Federal Emergency Management Agency (FEMA).
The president must declare the natural disaster in which your equipment was damaged an emergency to qualify for FEMA assistance. You can find a list of current FEMA disasters here.
Depending on the extent of the damage, FEMA may pay for:
Cleaning your HVAC equipment
Testing your equipment for damage
Repairing damaged equipment
Replacing destroyed HVAC systems
If your small business was affected by a natural disaster, check out the Small Business Administration (SBA)’s Disaster Assistance program.
🪪 Have proof of identification (e.g., valid driver’s license, passport, etc.)
🏠 Can provide proof of occupancy/ownership for the property impacted
☂️ Know your insurance policy numbers (if relevant)
✉️ Have an insurance determination letter (if insured)
👀 Can describe the damage to your property and list lost/damaged items
📷 Have photos of the damage to your property
💰 Know your annual household income
🏦 Can provide direct deposit information (bank, account number, routing number, etc.)
📱 Can list contact information (mailing address, phone number, etc.)
You may file an appeal for additional funds if you discover HVAC damage after you’ve received FEMA assistance that did not cover the system. To file an appeal, you need to send a letter requesting additional funds with a verifiable estimate or an itemized receipt from your contractor stating:
The actual cost paid or estimated cost
Proof that the repair or replacement was not an upgrade
Proof that the work was necessary to make the home habitable
Proof that the damage was related to a FEMA-approved disaster
If you need to repair your HVAC units following a natural disaster, we can help. Click below to connect with a top-rated local technician who can help you navigate the disaster recovery process.
A heat pump is a flexible, customizable option for cooling and heating your home. While heat pump installation can be expensive, the system is energy-efficient enough to promote lower utility bills within months.
Explore how unit size, ductwork and other factors contribute to heat pump cost. Already sold on a heat pump? Learn what to expect from your HVAC contractor before, during and after heat pump installation.
What is a heat pump?
A heat pump is an energy-efficient heating and cooling system that uses a refrigerant cycle to transfer thermal energy from one space to another. Unlike furnaces and other traditional heating systems, and contrary to its name, a heat pump doesn’t generate heat.
A heat pump system transfers warm thermal energy from one space to another, making indoor air more comfortable. Much like an air conditioner, a heat pump helps cool your home in the summer and add warmth in the winter.
Want more details on how heat pumps work? Browse our heat pump page .
Heat pump installation cost
The cost to install a heat pump depends on the type you want to install. The Inflation Reduction Act makes it possible for many homes to complete the heat pump installation process nearly cost-free. Heat pump pricing is below for the different models.
Air source heat pump installation cost
As the name suggests, air source heat pumps extract heat from outdoor air. Central heat pumps cost about $2,000 to $5,500 for the unit itself. Central air source heat pump installation starts at about $4,500 but can cost as much as $20,000 if your ductwork needs major repair.
A ductless heat pump is ideal for homes without ductwork. Ductless, or mini split, heat pump installation costs about $1,300-$2,000 per indoor unit. Multi-zone ductless units can cost $8,000 or more to install.
Geothermal heat pump installation cost
Geothermal heat pumps extract heat from the ground, about six feet below the Earth’s surface. The unit itself costs about $3,000 for smaller central systems and up to $6,000 for units supporting larger spaces.
Geothermal heat pump installation starts at about $6,000, but may cost $20,000 or more. The intense installation process, which we describe below, factors into the high price.
Solar heat pump installation cost
Solar heat pumps turn the sun’s energy into fuel. A solar heat pump costs about $18,000 to $34,000 to install, depending on the cost of solar panels and the unit size.
What factors impact heat pump cost?
Heat pumps are a great option for milder climates, but they aren’t a one-size-fits-all heating and cooling solution. Some models will operate below expected efficiency or shut down when it’s too cold outside.
Decide if a heat pump system is right for your home.
Climate
In areas with mild winters, air source heat pump systems can provide the heating you need. Backup heating systems generally aren’t needed in regions like the Southeast U.S.
We don’t recommend air source heat pumps as a standalone heat source in cold climates. Air source heat pumps only run efficiently when outdoor temperatures are above freezing.
Cold climate dwellers should consider installing a backup system, which takes over when temperatures reach freezing. Furnaces and hybrid dual-fuel systems are popular options.
Your heating technician can install controls that automatically shut down the heat pump when temperatures drop below freezing. The controls will call for the furnace to come on, providing efficient heat.
Geothermal heat pump systems are better suited for freezing winters. Even when air freezes, the ground retains enough heat to warm your home as desired.
Ductwork
If your home already has ductwork, you can likely reuse it for heat pump installation. We recommend checking your ductwork for leaks and cracks if you can safely do so.
Installing new ductwork costs about $4,000. If you do not already have ductwork installed in your home, the added expense may make a traditional heat pump cost-ineffective.
A ductless heat pump is a cost-effective alternative to traditional heat pumps. The indoor unit is mounted to the wall of one or more rooms and connects to an outdoor unit.
Ductless heat pumps are a great choice for customized, zoned cooling. Since each zone has a separate air handler, you can independently adjust the temperature and humidity of each room.
The customizable controls make ductless heat pumps a great fit in many applications.
🏠Homes with old ductwork (or none at all)
☀️Add-on spaces, such as sunrooms and bonus rooms
🌡️Housemates who disagree on thermostat settings
Unit size
Heat pump capacity is measured in tons. Most units range from 1 to 5 tons. When comparing two units from the same brand, high-capacity units tend to be more expensive than low-capacity units.
Always have a heating and cooling professional size your heat pump. Purchasing a unit based on square footage alone may leave you with an inefficient system. For example, a 1,600 square foot home in Tampa, FL may call for a 3.5 ton heat pump, but the same size home in Burlington, VT, may call for a less powerful unit.
Unit brand
Elite HVAC manufacturers, such as Trane, Carrier and Lennox, tend to charge the most for central heat pumps. Daikin and Mitsubishi are leaders in ductless heat pump technology.
Ultimately, the contractor you choose will have the biggest impact on the unit cost. Some contractors are affiliated with multiple manufacturers, while others have an exclusive deal to sell one HVAC manufacturer’s products.
Ask for three or more quotes in writing before choosing a contractor for the heat pump installation.
Heat pump installation: what to expect
Before installing a new heat pump, a contractor will inspect your property. The contractor will note the size of your home and ductwork (if you have it) and discuss your heating needs to find the right heat pump type and capacity.
Some contractors will book the inspection and installation as two separate appointments. Others combine both into a single appointment, moving straight from the inspection into the installation.
Step 1️⃣: Disconnect the circuit breaker before disassembling the indoor unit (air handler).
Step 2️⃣: Cut the wires and lines attached to the indoor unit.
Step 3️⃣: The contractor will repeat the process with the outdoor unit (condensing unit). They may not disassemble the outdoor unit.
After removing the outdoor unit, they’ll start the process of installing the new unit.
Air source heat pump installation
Contractors usually install the indoor unit first. If you’re getting a ducted (central) system installed, the contractor will find your ductwork and connect the indoor unit to the ducts.
For ductless heat pump installation, the contractor will tack a mounting plate onto the wall and attach the indoor unit to the mounting plate. They’ll repeat this step in other rooms if you chose a multi split, or zoned, system.
The contractor will have to drill a hole in your wall. The hole creates an access point, where the indoor and outdoor units connect through wires.
Next up is mounting the outdoor unit. Ducted outdoor units are usually placed on top of a level, concrete slab. Ductless units are smaller, so they often mount to the exterior of your home. If you live in a snowy climate, ask the installer to place the heat pump a few feet above ground.
Once both units are mounted, the contractor connects the two with refrigerant and condensate lines. Insulating the wires and attaching any loose wires to the exterior side of your home completes the installation.
Air source heat pumps are worth considering if you…
✅Have limited yard space
✅Don’t mind noise outside
✅Value budget and efficiency
Geothermal heat pump installation
Geothermal heat pumps require digging a trench in your backyard. The trench should be at least six feet deep and away from buried water or electrical lines.
The contractor will mold plastic pipes into a series of horizontal loops, or rings. They chain the loops together with zip ties.
Next, they lay the loops into the trench. The contractor connects the loops to a manifold, a plastic bar that’s connected directly to the heat pump unit.
The heat pump unit is installed inside the home, usually in a basement or garage. Geothermal heat pumps are worth considering if you…
✅Have a big backyard or a large plot of land
✅Value energy-efficiency
✅Don’t plan to move or want to increase your home’s value
Solar heat pump installation
Solar panels can integrate into an air source or geothermal heat pump system. The process of installing the heat pump itself is the same. It just adds an extra step, where the contractor attaches solar panels to your roof.
Flat plate collectors are most commonly used for this application. The 4’ X 8’ slabs collect heat and transfer it to the outdoor unit. However, they work best in direct sunlight.
If you’re in a gloomier climate, ask your installer about thermodynamic or hybrid solar panels. Both models perform better in cold and cloudy climates.
Solar heat pumps are worth considering if you…
✅Value renewable energy
✅Want lower utility bills
✅Don’t mind having panels on your roof
Can I install a heat pump myself?
We suggest hiring a licensed HVAC contractor for any central heat pump installation. A heat pump will not perform at its expected energy-efficiency if it’s not installed properly.
A heat pump should also be appropriately sized for your square footage, heating and cooling needs. An HVAC professional can complete an ACCA Manual J calculation and determine the right heat pump capacity for your space.
If you buy a ductless heat pump from a wholesale retailer like Amazon, you can mount the indoor and outdoor unit yourself. A contractor will still need to secure the refrigerant lines, since handling refrigerant requires an EPA certification.
Can I repair a heat pump myself?
Possibly, depending on which part needs repair. Our troubleshooting guide offers simple DIY solutions for common issues heat pump owners face.
A broken HVAC system can be scary! This Halloween, we hope your heating and cooling equipment delivers treats, not tricks!
If you’re still looking for unique costume and yard decoration ideas, look no further than the HVAC aisle of your local home improvement store for supplies and inspiration.
Resourceful robot
dukesandduchesses.com
Supplies:
Duct tape
Flexible ductwork
Dyer vent hose
Solo cup
2 cardboard boxes
Steps:
Using a foundation of cardboard boxes, cover the exterior in duct tape.
Cut two sections of flexible ductwork to your desired length and attach them to the sides of your robot body for the arms.
Cut two additional sections of flexible ductwork to wear over your legs.
Dress up your robot with more bells and whistles from the HVAC section and others; create robot master controls using switches or even a thermostat face plate. Knobs, tubes, and other odds and ends are great additions that will make your robot come to life on Halloween night!
Paint your flexible ductwork in colors of your choosing; the ductwork will become your monster’s tentacles.
As these pieces dry, create a base and skeleton to support the tentacles out of materials such as wood or PVC piping.
Once your tentacles have dried, slide them over the framework you have created and position as you’d like across your lawn.
To give your tentacle monster menacing suckers, cut pieces of foam piping insulation into one to two-inch pieces. Paint them your favorite color and once dry, glue them to the underside of each tentacle.
familyminded.com
Ceiling fans
Supplies:
T-shirt
Baseball cap
Iron-on transfer paper
Foam finger
Pom-poms
Steps:
Feeling punny? This is the perfect costume for you. Use iron-on transfer paper to customize your t-shirt and hat for your favorite team, the Ceilings!
HVAC technician
Supplies:
Hard hat
Work gloves
Tool belt
Safety goggles
Work boots
Steps:
Round up your supplies and put them on with some comfortable work clothes. This may be one of the easiest costumes ever!
Research tells us that our world is facing an environmental crisis. Climate change is evident in today’s rising temperatures and intensifying weather events – from wildfires to hurricanes.
Businesses across the globe are working to improve their sustainability practices and reduce their carbon footprints. One term that’s gaining a lot of traction around these efforts is “decarbonization.”
What does decarbonization mean?
Decarbonization refers to the reduction of carbon dioxide (CO₂) emissions by businesses, eventually achieving a CO₂-free global economy. The ultimate goal of decarbonization is to reach net zero, significantly reducing carbon emissions and compensating for those that can’t be eliminated.
Decarbonization is a priority for many companies because of its important role in limiting global warming. It underscores the 2015 Paris Agreement, where nearly 200 countries pledged to cut carbon emissions in half by 2030.
There are three central tenets to achieving carbon neutrality:
Optimize: Create products that are energy-efficient.
Electrify: Phase out non-electric products and appliances as we move towards a sustainable electric grid.
Decarbonize: Transition to zero-carbon energy sources like solar and wind.
The HVAC industry is adopting all three of these approaches.
Optimization in HVAC
Energy efficiency is a priority for HVAC manufacturers. In fact, the industry at large is adopting new HVAC efficiency standards in 2023.
Starting January 1, 2023, the minimum seasonal energy efficiency ratio (SEER) rating will rise one point across the U.S. SEER measures an air conditioner’s cooling output compared to the electricity it consumes.
In southern states, the minimum SEER will change from 14 to 15. In northern states, the minimum SEER will change from 13 to 14.
HVAC manufacturers continue to innovate and create systems with unprecedented efficiency levels. For example, Lennox’s SL28XCV air conditioner features an impressive SEER rating of 28.
Help me find the most energy-efficient HVAC system
Book an appointment
Additionally, smart thermostats are picking up traction with homeowners. Learning thermostats like the Google Nest monitor your habits and self-adjust to help save on electricity. Wi-Fi thermostats like the Honeywell T9 let you control the heating and cooling in your home remotely, so you never run your system unnecessarily.
These modern thermostats report on your home energy usage and provide suggestions for savings. They can even sense when you leave home or go to bed and adjust your HVAC automatically to reduce energy consumption.
Low- and mid-income families are eligible for significantly reduced (and sometimes even free) electric heat pumps as part of the program. Other homeowners will receive a compelling tax credit for purchasing an electric heat pump.
Get a quote for a new heat pump
Book an appointment
The Inflation Reduction Act also invests billions of dollars into creating clean energy sources, including solar and wind. Ultimately, this effort aims to shift homeowners from appliances that use non-renewable energy sources like gas and oil, towards those that use sustainable energy.
Some HVAC manufacturers like Trane and Mitsubishi have electrification initiatives to encourage the adoption of electric HVAC units in homes and businesses.
Decarbonization technology
Ultimately, decarbonization will occur when a sustainable energy grid powers new energy-efficient electric HVAC equipment. Until then, some green HVAC options exist.
Solar AC isn’t yet widely available. However, Lennox makes a SunSource line compatible with residential solar installations. HotSpot Energy sells solar-powered mini splits. Other brands are working on solar AC systems, but their presence in the U.S. is currently limited.
Evaporative cooling is another option that leverages the power of water to reduce energy usage. Evaporative coolers don’t use refrigerant and consume less than half the energy of traditional air conditioners.
Additionally, the HVAC industry is working to decrease carbon emissions by introducing new eco-friendly types of refrigerant. After eliminating the use of R22 freon, manufacturers are preparing to move to A2L refrigerants, which have a lower Global Warming Potential than alternatives but are also mildly flammable.
New heating and cooling equipment will feature innovations to safely accommodate A2L refrigerants, including automatic shutoff capabilities to minimize leaks.
Sustainable HVAC
The HVAC industry is poised to make a major impact on decarbonization. Homeowners have more choices than ever for environmentally friendly heating and cooling equipment.
As we approach 2030, the industry remains on track to significantly improve carbon emissions.
Searching for “AC repair near me” may get you a list of HVAC technicians, but what’s the next step? Asking the right questions will help you decide on the best HVAC contractor for your needs.
You’ve come to the right place – we’ve got your back! HVAC.com’s connected more than 100,000 homeowners with top-rated, local HVAC contractors. We recommend you ask the following questions when interviewing technicians.
Book an appointment with a local HVAC pro now 🧑🔧
Yes, please!
1. Are you licensed and insured?
Most states require that HVAC technicians earn a license before working. This shows a minimum knowledge of the skills needed to do the job.
In the 16 states listed below, there is no state-wide HVAC licensing requirement. However, these areas may have requirements at the county or city levels. In addition, states without a licensing department may require proof of apprenticeship or educational hours.
Colorado
Illinois
Indiana
Kansas
Maine
Massachusetts*
Minnesota
Missouri
Montana
Nebraska
New Hampshire^
New York
Pennsylvania
South Dakota
Vermont
Wyoming
*General HVAC contractors do not need a state license unless they handle refrigeration. ^General HVAC contractors do not need a state license unless they are a gas fitter.
When researching an HVAC tech, check their license number with the appropriate licensing board in your region.
Note that any HVAC professional who handles refrigerant requires special certification from the Environmental Protection Agency.
Also, ask about insurance. The company must possess both worker’s compensation and general liability insurance. These coverages address unexpected financial risks in case there’s an accident when working at your home.
Bonding is also important. It means the business has money set aside to respond to any claims against it. Some states may require HVAC technicians are bonded to pay for potential accidental damages to your home.
2. How much experience do you have in the industry?
Working in HVAC for a short time isn’t necessarily a dealbreaker, but it may help you choose the right contractor for your project. Depending on the complexity of your job, you may prefer a more experienced professional.
Watch out for “pop-up” businesses that request upfront payment to begin work and never complete the job. Ask for the address of their storefront to ensure they’re based locally. Check reviews online.
Additionally, ask if they have experience with the brand of equipment you need help with. Some HVAC companies have brand affiliations and only work on certain types of equipment.
3. Can you provide references from past customers?
Talking to past customers can give you valuable insights when hiring an HVAC technician. Trustworthy businesses should have a portfolio of references willing to vouch for the quality of their service.
Consider it a red flag if a business can’t provide a reference or challenges your request.
Connect with a top-rated local HVAC tech now.
Yes, please!
4. Can I have a written quote?
Getting the project scope and estimated cost in writing ensures you and your technician are on the same page. Don’t settle for an over-the-phone or online quote.
Don’t agree to engage with a technician until you’ve seen and signed a written quote. This will protect both parties from future misunderstandings and disputes.
When the job is complete, request a detailed invoice that lists precisely the work completed.
5. Do you guarantee your work?
If you’re purchasing a new system, it will likely come with a warranty from the manufacturer. Some HVAC technicians may offer an additional labor warranty. This covers any future work necessitated by improper installation.
If you’re hiring an HVAC contractor for a repair, ask if they guarantee their work. Companies that offer high-quality service should do this without an additional fee.
You may also want to inquire about refunds. Will the company refund you if you’re unsatisfied with the job? Or will they work with you to fix the problem?
6. When can you start and complete this job?
When you hire an HVAC technician, get a clear understanding of their timeline. Ask if they can start immediately or if you’ll need to schedule an appointment for the future. Also, ask how long they estimate the job will take. It’s important to have aligned expectations on timing.
Inquire about parts. Do they stock the necessary components for repairs? Do they need to order parts? Remember that supply chain issues may affect the HVAC industry, like many others today.
7. What methods of payment do you accept?
Don’t make assumptions regarding payment methods. Ask upfront and ensure you can deliver payment in the technician’s preferred style.
Some HVAC businesses may offer financing options on larger jobs. If this is something you need, inquire about it before selecting a contractor.
Book an appointment with a licensed HVAC technician now
Yes, please!
Hire an HVAC technician: FAQs
What is an HVAC contractor?
An HVAC contractor is an individual who installs, maintains, and repairs HVAC systems. Air conditioners, furnaces, heat pumps, air handlers, and ventilation systems are considered HVAC systems.
Job duties of an HVAC contractor may include: •Troubleshooting and repairing HVAC equipment •Inspecting homes for right-sized HVAC equipment •Installing new HVAC equipment •Providing maintenance service for existing HVAC equipment Most states require some formal education and apprenticeship to earn an HVAC technician’s license.
How to find a good HVAC contractor?
On HVAC.com, we provide referrals to top-rated local HVAC contractors.
Additionally, you may consider the following methods when hiring an HVAC technician: •Ask friends and neighbors for recommendations •Use social platforms like Nextdoor and Facebook to ask for referrals •Read online reviews for local HVAC companies
What is the difference between an HVAC technician and installer?
There is no formal difference between an HVAC technician and an installer. Within a business, certain team members may prefer or excel at one task over the other – repairing existing systems vs. installing new ones.
Do you tip HVAC installers?
No. There is no need to tip your HVAC installer or your HVAC technician. Of course, depending on how long they’re in your home, it may be nice to offer a bottled water or use of the restroom.
How to prepare for HVAC technicians?
Before your HVAC technician appointment, make sure you: •Clear a path, so your HVAC equipment is easily accessible. •Plan to be home during your scheduled appointment window. •If you want to purchase a new unit, research the best HVAC brands. •Secure pets in their kennel or a closed room. •Prepare to pay at the end of the appointment. During your appointment, your technician may: •Perform an overall systems check. •Conduct a safety evaluation. •Clean any parts that require it. •Perform necessary repairs. •Answer your questions. •Schedule a follow-up appointment if required. •Request payment. •Provide a written report/invoice.
Wireless thermostats allow you to control your home heating and cooling system via Wi-Fi.
The name is slightly misleading because wireless thermostats are still wired to your HVAC system. But they enable you to control the system wirelessly, usually via an app on your smartphone.
It’s easy to get confused between wireless, Wi-Fi, and smart thermostats. We define them as follows:
Term
Definition
Wireless thermostat
A thermostat you can control remotely, usually via Wi-Fi.
Wi-Fi thermostat
A thermostat you can control remotely via Wi-Fi.
Smart thermostat
A thermostat that learns your habits and can adjust itself accordingly. Most are also wireless.
Programmable thermostat
Any thermostat that lets you set a schedule. For example, you can program the heat to start when you get out of bed at 6:30 a.m. Most wireless thermostats are programmable.
So, one thermostat can actually be wireless, Wi-Fi, smart, and programmable.
If you’re in the market for a new wireless thermostat, consider the following elements:
💰 Cost
Wireless thermostats range in price from about $60 to $200+. You can get a high-quality system for around $100.
🚨 Room sensors
Some wireless thermostats use room sensors to create HVAC zones within your home. This enables more precise temperature control.
🤖 Home automation compatibility
Most wireless thermostats integrate with apps like Google Assistant and Apple Homekit. If you use one of these tools, ensure your thermostat supports it.
📱 App
Thermostat manufacturers typically have a brand-specific app that lets you control your thermostat remotely and access its data and reports.
💡 Smart capabilities
The most advanced Wi-Fi thermostats have learning capabilities. They can sense your habits and adjust themselves independently.
🔌 C-wire
A C-wire (also known as a common wire) delivers supplemental power to your thermostat. Most wireless thermostats require one, but not all. Some older homes do not have a C-wire. Learn more here.
Which is the best wireless thermostat?
We’ve conducted extensive research, combing through expert reviews and real customer feedback. Below are our top pics for the best wireless thermostats.
Best wireless thermostat overall
The Nest Learning Thermostat is our favorite smart and user-friendly option. Installation is simple, taking less than 30 minutes. After about a week in your home, the Nest Learning Thermostat essentially programs itself to reflect your family’s habits.
Of course, if you prefer to override the Nest’s automatic settings, you can do that easily on the Nest app. The Nest app also lets you use your phone as an HVAC remote control, turning the temperature up and down as needed.
This Nest model reports your HVAC system’s energy usage to your phone. You can use that information to alter its settings to be more eco-friendly and save money.
You can choose one of six available finishes that match your interior decor. The Nest Learning Thermostat pairs with up to six optional room sensors, which helps the device keep your home at a consistent temperature.
The Nest Thermostat is a more basic version of the Nest Learning Thermostat. It’s less expensive, coming in at just under $100. It doesn’t have all of the Learning version’s smart capabilities in exchange for the lower price.
We love this Nest thermostat for its sleek and modern design. It has unique color options, like sand, a rose gold shade. The display shows only the information you need: your setting and the current indoor temperature.
Though it’s not as smart as other Wi-Fi thermostat options, the Nest Thermostat creates reports and suggests energy-saving changes to help your HVAC system operate more efficiently.
It’s not compatible with home automation platforms, but the Nest Thermostat pairs with Amazon Echo for voice control.
Amazon makes its Smart Thermostat with Honeywell, one of the most popular thermostat manufacturers. It’s reliable, less than $60, and great looking – win, win, win!
If you’re not an Amazon Alexa user, this thermostat probably isn’t for you. You need the Alexa app to control the thermostat remotely and utilize its voice command features. You can also review your HVAC system’s energy usage via the Alexa app.
The Amazon Smart Thermostat can adjust itself to match your lifestyle. It senses when you leave home and when you’re sleeping. However, it does not have separate room sensors for whole-home data.
This thermostat is easy to program and install with prompts from the Alexa app.
The Ecobee Smart Thermostat is compatible with most home automation platforms and HVAC systems, new and old. Additionally, it pairs with up to 32 room sensors – ideal for a big house that needs precise temperature control.
The Ecobee Smart Thermostat is so smart it can sense when your windows are open and pause your HVAC system’s operation. It can also serve as a security system, monitoring windows and doors.
This programmable Wi-Fi thermostat has a built-in speaker that can answer voice commands and play music. The Ecobee Smart Thermostat is the only one on our list that can get your party jams pumpin’! You can even take a phone call on this super smart thermostat.
Best programmable Wi-Fi thermostat without a C-wire
The Emerson Sensi Smart Thermostat is a little dated looking. But it doesn’t require a C-wire, which simplifies installation if you have an older home or an HVAC system without a C-wire.
Its traditional-looking faceplate is helpful if you have loved ones at home who are more comfortable with a push-button thermostat. The Emerson Sensi offers a familiar interface with updated high-tech features.
This Wi-Fi thermostat is compatible with home automation systems by names like Apple, Amazon, and Google. However, integration isn’t necessary for thermostat control or usage monitoring. This is ideal for individuals who prioritize privacy and don’t wish for these big tech players to access their data.
The Sensi app provides system monitoring and energy-saving suggestions. It also delivers reminders about system maintenance, including alerts to change your air filter.
Wireless thermostat installation is a DIY-able job. Your thermostat comes with installation instructions.
First, remove your existing thermostat and mount the new one to the wall. Check out our helpful guide on thermostat wiring for more details.
Next, connect your wireless thermostat to your home Wi-Fi network. If your signal isn’t great, you may need to invest in a Wi-Fi extender. This portion of the set-up is usually automated via your thermostat’s app.
If you run into trouble along the way or prefer to steer clear of DIY projects, an HVAC professional can install your thermostat for you. HomeAdvisor says this costs about $175.
Help me install my wireless thermostat now
Yes, please!
Is a wireless thermostat worth it?
Wireless thermostats offer many benefits, including convenience and cost savings.
📱 Remote control
Whether you’re on your couch or on vacation, you can adjust your thermostat from your phone or another device.
💡 Energy savings
Smart thermostats report on energy usage and make suggestions to help you cut back.
💵 Money savings
Cutting back on energy usage also reduces your utility bills.
🤖 Automation
You can essentially “set it and forget it” with a smart thermostat. They learn your habits and adjust themselves accordingly.
🏠 Whole-home comfort
Some wireless thermostats use room sensors to ensure your home is consistently comfortable.
Wireless thermostats are ideal for:
Rental or vacation property owners who want to control the temperature when they’re not there.
Environmentalists looking for tips on how to cut back on energy consumption.
Budget-savvy individuals who appreciate suggestions on how to lower utility bills.
People who use home automation platforms for other appliances.
Tech enthusiasts who love having the latest and greatest tools at their fingertips.
Since most wireless thermostats cost under $200, we think they’re absolutely worth it – especially considering how much they’ll help you save on energy. In many cases, a wireless thermostat will pay for itself in less than a year.
If you need help choosing a wireless thermostat or just have questions about them, click below to connect with one of our local HVAC experts.
I want to talk to someone about wireless thermostats
A carbon monoxide leak at an Allentown, Penn., daycare recently sent 28 children and four adults to the hospital. The dangerous leak was caused by a faulty heater and blocked ventilation system.
Because carbon monoxide is odorless and colorless, it often goes undetected until those in the space are at extreme risk. With just a few quick steps, home and business owners can protect themselves against carbon monoxide poisoning.
What creates carbon monoxide in the home?
Carbon monoxide forms when materials burn. Homes with fuel-burning appliances have a greater likelihood of carbon monoxide leaks. Fuel-burning appliances include:
Cars, power tools, and lawn equipment also create carbon monoxide. If you store any of these items in an attached garage, proper storage is key to reducing the risk of the gas seeping into your home.
How to prevent carbon monoxide in your home
The good news is that carbon monoxide poisoning is easily preventable. We recommend scheduling a furnace tuneup annually in the fall to ensure your heating system is working as intended.
Schedule furnace maintenance today
Book now
In addition to checking your furnace function, an HVAC technician will make sure it’s ventilating properly.
We also recommend installing carbon monoxide detectors throughout your home. They should be placed outside of sleeping areas, so they’ll wake you if they alarm.
This Kidde Nighthawk model is one of our favorite carbon monoxide detectors and an Amazon top-seller. In addition to sensing carbon monoxide, it monitors other explosive gasses.
The estimated lifetime of a carbon monoxide detector is 5-7 years. If yours are getting old, consider replacing them.
If you use a gas-fueled space heater, make sure it’s vented correctly. Check out our picks for the safest space heaters if you’re in the market for a new one.
Never use a generator inside your home, basement, or garage. Generators should run outdoors, at least 20 feet away from doors, windows, and vents.
How much is too much carbon monoxide?
According to the Environmental Protection Agency, the average level of carbon monoxide in a home ranges 0.5-5 parts per million (ppm).
The amount of carbon monoxide considered dangerous depends on the length of exposure. For example, Kidde, a major manufacturer of carbon monoxide detectors, says its systems will alarm after just 8 minutes if they detect 400 ppm of carbon monoxide. But it will take 3.5 hours of exposure at 50 ppm to warrant an alarm.
If people are experiencing symptoms of carbon monoxide poisoning, any amount can be too much. The Centers for Disease Control (CDC) says symptoms of carbon monoxide poisoning are “flu-like” and can include:
Chest pain
Confusion
Dizziness
Headaches
Upset stomach
Vomiting
Weakness
What happens if there’s too much carbon monoxide in your home?
Inhaling too much carbon monoxide can lead to hospitalization, unconsciousness, and even death. Additionally, carbon monoxide is highly flammable, so a buildup creates a fire hazard.
According to the CDC, more than 400 Americans die yearly from carbon monoxide poisoning. 20,000+ visit the emergency room, and 4,000 people are hospitalized each year from inhaling the deadly gas.
While people with mild to moderate symptoms can recover from carbon monoxide poisoning, some may develop neurological impairment. Carbon monoxide poisoning in pregnant women may negatively affect the fetus.
Children are often more affected by carbon monoxide poisoning than adults. Infants, the elderly, and those with chronic conditions like heart disease, anemia, or breathing challenges are more prone to experience symptoms of carbon monoxide poisoning.
Carbon monoxide poisoning (and resulting death) can occur after only a few minutes of exposure to higher gas concentrations. It may take several hours if exposure is reduced.
What to do if you suspect a carbon monoxide leak
If you think there’s a carbon monoxide leak in your home, get people and pets out of the house and into the fresh air.
If people are experiencing symptoms, call 911. If not, contact your local fire department via a non-emergency line. The fire department has the equipment to measure gas leaks.
In fresh air, it takes 4-6 hours for a victim to clear about half of the carbon monoxide they’ve inhaled. The process can be accelerated with oxygen administered in a medical setting.
When it’s safe to do so, turn off the suspected gas appliance and open windows to ventilate the area. Don’t use the appliance again until it’s been inspected and serviced by a certified professional.
In all cases, you’re better safe than sorry when dealing with carbon monoxide. Enlist the help of a local professional to ensure your home heating system keeps your family safe and warm through the winter.
As temperatures drop this fall, you may use your window air conditioner less frequently. In fact, you may consider taking it out for the season and reclaiming your view.
But, is it necessary to remove a window AC in the winter? We dive into removing, cleaning, and storing your window AC when summer’s over.
Do I need to remove my window air conditioner in the winter?
We recommend removing your window AC before the first frost of the year to protect it from the elements.
We suggest you stop using your window AC for cooling once the outdoor temperature reaches 62℉. Most window ACs can’t operate in temperatures below 62℉.
If you have a window unit that cools and heats, you can continue to use it in the winter. However, check the specifications for your particular system. Some may not operate in below-freezing temperatures.
If removing your window AC is impractical, we suggest you take weather-proofing measures to protect it from the winter weather. You should also insulate around the unit to keep the cold air out. (Instructions here.)
How to remove your window air conditioner
1. Ask a friend to help you – window ACs can be 80+ lbs.
2. Place a towel on the floor in front of the window. Water may drip from the condensation pan.
3. Unplug the air conditioner.
4. Remove any insulation or other material used to fill gaps around the unit.
5. Unscrew the unit from the window (if applicable).
6. Raise the window and begin to tip the unit forward, shimmying it out of the window.
7. Once the AC is out of the window, rest it upright on the floor.
1. Brush off dust, dirt, and debris like spiderwebs outside the AC.
2. Remove the filter. If it’s disposable, throw it away and replace it. If it’s reusable, wash it.
3. Wash a reusable filter by running it under the faucet and lightly scrubbing it with a cleaning brush. Let it air dry.
4. Unscrew the metal cover behind the front body grill of the unit.
5. Affix a brush attachment to your vacuum. Gently vacuum the inside and outside, including the interior coils. If you don’t have a brush attachment, use a damp cloth.
6. When all parts are clean and dry, screw the cover back on.
Once your window AC is clean, pack it away into a box. Ideally, you’ve saved the box and foam padding it came in. If not, use an appropriately sized box. Secure your AC inside with old towels or packing material.
Most of us don’t have room to store an air conditioner box inside our homes. If you do, awesome! Find a safe place for it, and don’t pile heavy items on top. If not, store it in your garage, basement, or covered shed till the weather heats up again.
Make sure your AC stays upright while it’s in storage.
Winterizing your window air conditioner
If you can’t remove your window AC, do what you can to prepare it for the winter.
We recommend shielding your AC in a cover like this one. If that doesn’t work for you, purchase plastic sheeting and duct tape to wrap the outdoor portion of the unit.
Inside, cover your AC and window to ensure cold air isn’t sneaking in through any gaps. Consider using weatherstripping or other insulating material.
Unplug the system and do not use it when it’s covered.
Will rain damage a window air conditioner?
Rain will not damage your window AC. You can continue to operate it in wet weather. However, you may consider removing it during hurricanes or other powerful storms.
Will snow damage a window air conditioner?
Snow may damage your window AC. If it’s allowed to build up, snow can become heavy. This may cause parts to bend and warp.
Snow can also freeze the unit, causing cracks to the external casing and inner components like the condenser coils.
We don’t recommend running your window AC in snowy conditions – unless its manufacturer designed it to heat in temperatures below freezing. Check your user’s manual for specifics.
If you’re in the market for a new window AC, check out our top picks for the best window air conditioners of the year.
If your home needs a boost of steady airflow, a new air handler could be a worthy investment. A Goodman air handler may save hundreds of dollars upfront, but is the value brand reliable enough to last?
This guide includes product reviews, brand comparisons, and more. Learn all you need to know about Goodman air handlers and whether they’re the right option for your home.
Connect with a heating and air pro near me
Book now
Intro to Goodman air handlers
An air handler is the indoor component of a split HVAC system. The air handler pairs with an outdoor heat pump or air conditioner to bring you even and consistent airflow.
A Goodman air handler unit consists of four parts: a blower motor, a fan, a filter, and an indoor coil. For a more detailed look at how air handlers work, check out our best air handlers of 2022.
Goodman makes traditional air handler units, wall-mounted air handlers, and ceiling-mounted air handlers. Goodman has some of the most affordable pricing on the market, with many models coming in hundreds of dollars cheaper than competitors.
Traditional air handler units are rectangular boxes that resemble lockers or safes. Wall-mounted units are shorter and wider than traditional units. Ceiling units are the smallest of all, so they’re great for discreet hanging.
The Goodman air handler lineup consists of four traditional unit series, two series of wall mount models, and one ceiling mount series. Going with a Goodman brings you unmatched flexibility in the placement and appearance of your air handler.
Are Goodman air handlers good?
Affordability is the name of the game with Goodman products. Below, we discuss some key features of Goodman air handlers and how they compare to other brands.
Coil technology
Goodman uses both aluminum-only and mixed-metal evaporator coils. Many of the traditional Goodman air handler models have all-aluminum evaporator coils.
Aluminum coils are less expensive than copper coils, but they are easy to replace and regularly in stock. Plus, the industry is moving toward aluminum-only coils as the standard.
The wall mount and ceiling mount models have aluminum tubing, but they use a different metal for the fins. Mixing metals may lead to faster corrosion. Other brands, like Trane air handlers, use all-aluminum coils in every model. If longevity is a priority for your air handler, opt for a Goodman unit from the AVPEC, AVPTC, or ASPT lines.
Warranty
The Goodman air handler warranty is standard for the industry but quite good for a value brand. As long as you register your air handler within 60 days of purchase, your unit is covered under a Registered Additional Term Warranty for 10 years.
The warranty language is fairly straightforward, explaining covered issues for all Goodman air handlers. Brands like Lennox offer 10-year warranty coverage for only premium models, so the Goodman warranty is an added value.
Blower motor speeds
Goodman offers permanent split capacitor (PSC) and electronically communicated motor (ECM) technology. PSC motors can run only at one speed, but ECM motors can run on low and high speeds to maximize energy efficiency.
The basic Goodman options use PSC motors, and the premium options use multi-speed or variable-speed ECM motors. Competing brands like Carrier and Lennox do not use PSC motors anymore, and even the basic options come standard with multi-speed ECM motors.
Many consumers prefer ECMs to PSCs because they run at a much lower volume. Plus, ECMs’ improved energy usage leads many consumers to lower electricity bills than with PSCs.
If it’s within your budget, we recommend going with an ECM whenever you can. While the use of PSCs helps Goodman be more affordable than competing brands, the motors are also lower quality and shorter-lasting.
ComfortBridge™ Technology
The two premium air handler series are compatible with Goodman’s proprietary ComfortBridge™ Technology. This feature acts like a self-regulating thermostat, adjusting your air handler settings to optimize your energy usage and keep your bills low.
While many competitors offer similar technology, there is a unique perk to ComfortBridge™. You can use ComfortBridge™ with any single-stage thermostat, so you don’t have to bundle other products to use the technology.
Many HVAC brands design their proprietary technology to work only with brand-specific items. For example, the Carrier Infinity™ line only works with Carrier smart thermostats and outdoor heat pumps.
A Goodman air handler will respond to almost any single-stage thermostat. If you already have a Google Nest or Ecobee that you love, Goodman won’t force you to give it up.
The ability to choose a Goodman air handler and not have to change your thermostat is a major benefit that could save you a couple hundred dollars. Goodman makes it easy to mix and match with other brands, but you’ll want to ensure the HVAC brand you have at home allows the same.
Air handler sizes
Every Goodman air handler is available in multiple sizes. Air handler sizing is usually measured in tonnage.
Tonnage does not refer to the weight of the air handler itself. Tonnage is the capacity output of the air handler unit.
Sometimes, air handlers are sized by British Thermal Units rather than tons. 12,000 BTU/hour is equivalent to 1 ton of output.
Goodman air handlers range from 1.5 to 5 tons of output. Your local Goodman dealer can help you determine what size air handler you need. While the air handler size must match your outdoor unit, it’s best to have your HVAC pro complete a Manual J calculation of your home to ensure you’re buying the right size system.
Goodman air handler prices
Goodman makes four series of single-family air handler units. The AVPEC and AVPTC could be considered premium options. The ASPT is a mid-level option, and the ARUF is the most basic air handler unit series.
The AWUF/AWUT series includes all wall mount models. The ACNF series contains all the ceiling mount models. Goodman air handler prices fluctuate based on size, your location, and your chosen dealer.
Series
Motor Speed
Capacity
Cost (unit)
Dimensions (h X w X d)
AVPEC
Variable (ECM)
1.5-5
$785-$1,800
45” X 17.5” X 21”
AVPTC
Variable (ECM)
2-5
$785-$1,800
45” X 17.5” X 21”
ASPT
Multi-speed (ECM)
1.5-5
$730-$1,165
45” X 17.5” X 21”
ARUF
PSC
1.5-5
$595-935
45” X 17.5” X 21”
AWUF/AWUT
PSC/Multi-speed ECM
1.5-3
$435-685
36” X 20 ¼” X 16 ¼”
ACNF
PSC/Multi-speed ECM
1.5-2.5
$415-620
10” X 37 1/25” X 21”
AVPTC and AVPEC
The AVPTC and AVPEC series include the most premium, feature-rich Goodman air handlers. Every model in these series comes with a variable-speed motor.
If you’re interested in zoning or setting different temperature and humidity levels in different areas of your home, these series make a great pick. Here’s what you get exclusively with the AVPTC and AVPEC series.
ASPT and ARUF
The basic Goodman units are more budget-friendly than many competing options. One perk of these models is the SmartFrame design, which insulates the blower and keeps your home from getting noisy while your air handler runs.
The ASPT Series has a more advanced ECM motor, which can lead to higher energy ratings. The ARUF Series uses a less efficient PSC motor, so the air handlers are less advanced but more affordable than ASPT.
AWUF/AWUT
Goodman groups the AWUF and AWUT air handlers into one series of wall mount models. These air handlers are built for small applications like closets.
Some models in each series use standard PSC motors, while others use efficient ECM motors, Energy efficiency can be hit-or-miss with this series depending on the motor you choose.
Schedule maintenance for my air handler
Schedule now
ACNF
The Goodman ACNF series includes ceiling mounted models. This series is built for small applications with a discreet, flexible design.
This air handler has a standard PSC motor, so energy efficiency won’t be stellar. However, the multi-position build makes for easy installation and service.
Goodman air handlers vs. competitors
Goodman has a reputation for making affordable, no-frills systems. Here, we break down some of the main takeaways of going with a Goodman.
Pros
Wall and ceiling mount options
Components and systems are accessible and inexpensive
Compatible with third-party smart thermostats
Cons
Louder, less efficient motors in many models
Fewer tech features than competing brands
Must register air handler for warranty
Goodman air handlers vs. Lennox
Goodman is one of the least expensive brands on the market, whereas Lennox has a reputation for high prices. Lennox air handlers can be as much as a thousand dollars more expensive.
Goodman air handler parts are generic, so they’re easier to find and less expensive. Lennox uses proprietary parts that are more expensive and regularly go out of stock.
Still, Lennox air handlers get much better energy efficiency ratings than anything Goodman can offer.
If your top priority is energy efficiency or comfort, go with a Lennox. However, Goodman products are significantly more affordable.
Goodman air handlers vs. Carrier
Goodman and Carrier both use a mix of aluminum and copper materials in their evaporator coils. However, Carrier air handlers are more energy efficient and generally last consumers longer.
One major component goes in Goodman’s favor: price. The entry-level Carrier models start about $500 higher than Goodman air handlers.
We recommend Carrier if you’re debating between both brands. Still, Goodman offers some of the most competitive pricing in the industry.
Goodman air handlers vs. Rheem
Goodman and Rheem use similar evaporator coils, as both mix copper and aluminum. However, Goodman has more air handler models with aluminum-only coils, and this is the trend the industry is moving toward.
Also, both companies still sell both PSC and ECM motors. Competing brands are shifting away from PSC motors, but both Goodman and Rheem use them in many models.
As with many brands, one key difference is price. Goodman air handlers come in at hundreds of dollars less than Rheem models, for comparable energy efficiency ratings.
Goodman is a popular value brand that delivers industry-low prices. While Goodman air handlers are not the most energy efficient available, many models are made with durable and long-lasting components.
A Goodman air handler is a great value option backed by a solid warranty. The air handlers may not be ultra-quiet or tech-savvy, but they get the job done for less. For a look at how much you can expect to spend, check out our HVAC replacement cost calculator.
Goodman air handler units
Goodman has an impressive catalog of value to mid-range air handlers. Choose from a variety of options, from traditional air handlers to wall and ceiling mounts.
Dive into every Goodman air handler available now. Learn how each series differs and decide which model is right for your home.
AVPEC Series
The AVPTC series includes the most premium, feature-rich Goodman air handlers. Every model in these series comes with a variable-speed motor.
ComfortBridge™ Technology keeps you informed on how your machine uses energy. If you’re looking for smart technology that won’t break the bank, this series is a great match. The AVPEC series comes in at hundreds cheaper than brands like Trane or Lennox.
Plus, the fan-only operation is great for saving money in the summertime. If you’re in a warm climate, we’d recommend an AVPEC air handler.
Note that this series is compatible with heating or cooling systems with an electronic expansion valve (EEV). If your system uses a thermal expansion valve, go for the AVPTC series.
AVPTC Series
Like the AVPEC, the AVPTC is one of the two most advanced Goodman air handler series. These air handlers have premium features like a variable-speed motor.
You get many of the same perks and features available on the AVPEC, like improved humidity and temperature control with ComfortBridge™ technology.
There’s one key difference between the AVPEC and AVPTC series. While the AVPEC series uses an electronic expansion valve (EEV), the AVPTC uses an internal thermal expansion valve (TXV).
Because of this difference, the AVPTC series is compatible with products that use an inverter. This means that you can pair this air handler series with air conditioners with variable cooling speeds.
If you have a variable-speed AC that you’re happy with, consider an AVPTC air handler. You’ll get impressive energy efficiency for hundreds less than competing premium options.
ASPT Series
The ASPT is a mid-range option from Goodman, just a step above the ARUF Series. The AVPTC and AVPEC series have more advanced technological features, but the ARUF has a less sophisticated motor.
Every model in the ASPT series has a multi-speed ECM blower. With this welcome upgrade, you may notice lower electricity bills and a more peaceful operating sound.
Plus, you can easily integrate it with your pre-existing heating or cooling system. An electronic expansion valve makes this air handler compatible with heat pumps and air conditioners.
We love the value of the ASPT series, as you get a durable cabinet and an impressive motor for the price. It’s a major upgrade from the basic ARUF series without a dramatic jump in price.
ARUF Series
The basic Goodman units are more budget-friendly than many competing options. One perk of these models is the SmartFrame design, which insulates the blower and keeps your home from getting noisy while your air handler runs.
The ARUF series is also easy for contractors to service, with an included coil mounting track. For the price, you’re also getting a more customized heating or cooling experience than competing brands offer. This series mounts vertically or horizontally, so you can place it up high or down low.
While there is partial foil insulation to keep condensation down, a more complete insulation would keep noise levels under better control. Competing brands like Carrier offer fully insulated cabinets, which we would recommend if you’re sensitive to noise levels.
Plus, the ARUF series only uses PSC motors. While you’ll save money up-front with this option, your ears would likely be happier with a less noisy motor.
Find a trusted AC repair company near me
Book now
AWUF/AWUT Series
Goodman groups the AWUF and AWUT air handlers into one series of wall mount models. The AWUF series comes with a check flowrater, while the AWUT series uses a more sophisticated thermal expansion valve (TXV).
The wall mount series includes a mix of ECM and PSC motors. While the wide variety will please an indecisive shopper, we suggest avoiding PSC motors when you can.
The evaporator coils use a mix of metals, which can lead to quicker corrosion. While the AWUF/AWUT series makes a great budget option, premium brands tend to use higher quality and longer-lasting components.
ACNF Series
The ACNF series includes all ceiling mount air handlers from Goodman. Many competing brands don’t even offer ceiling mounts, so we appreciate Goodman’s attention to variety and creating something for every consumer.
The ACNF series hangs up and away on the ceiling. The air handler won’t take up valuable space in your home, measuring just over three feet wide.
Many competing brands limit their ceiling and wall mounts to apartment buildings, so we like the unique flexibility for single-family homes.
Plus, all the ACNF models work with ductless return systems. If you’re in the market for a ductless system or live in an apartment, this series is a perfect fit.
Goodman air handler installation: what to expect
When you get a Goodman air handler installed, most HVAC contractors should have an easy time with the parts. The parts are generic, so they tend to be inexpensive and most contractors should have them in stock.
We suggest avoiding a DIY installation and having a contractor come by. Improper installation can damage your system and void the warranty, plus it may violate your local electrical code.
According to Angi, you will likely pay between $1,200 and $1,800 for the installation. Factors like zip code, climate, and air handler size all contribute to the final cost.
If you’re replacing your whole heating or cooling system, ask your contractor to do an ACCA Manual J calculation before you buy an outdoor unit. This metric will make sure you’re getting the right size outdoor unit to match your air handler.
What’s available?
As with many brands, the more advanced models have better technology and special features. Here, we break down exactly what features are available with each model.
Keep in mind that some features are not available in every model in the series. We note where this applies.
All Goodman air handlers
Goodman air handlers may not have industry standard durability. Still, you’d be remiss to overlook the value brand entirely.
Here’s a look at the features that come standard with every Goodman air handler. Even the wall mount and ceiling mount options are included in the generous warranty.
Tool-free filter access
Horizontal or vertical configuration
Galvanized finish
10-year parts warranty (if registered within 90 days)
ASPT and ARUF
The ARUF is the most basic option, with a standard PSC motor. The ASPT takes it a step above, using a more advanced ECM motor. Below are some features that the ceiling and wall mounted series lack.
All-aluminum coils
Coil mounting track
SmartFrame design
ECM blower motor (ASPT only)
AVPTC and AVPEC
If you’re interested in zoning, or setting different temperature and humidity levels in different areas of your home, the AVPTC and AVPEC series make a great pick. Here’s what you get exclusively with these advanced series.
Variable-speed ECM motors
ComfortBridge™ technology compatibility
Fan-only setting
Goodman air handlers offer a wide variety that’s sure to please many homeowners. The options start in the value range, with the advanced options offering variable-speed motors and smart tech.
For homeowners seeking a budget-friendly option, any Goodman air handler series is a great choice. For proper sizing and installation of your air handler, reach out to your local Goodman dealer.
Generator sales are soaring following Hurricane Ian, according to ABC Consumer Reporter John Matarese. More than 2 million Florida residents were without power, some for up to a week.
As homeowners start to clean up and plan for the next weather event, they’re turning to generators as an alternate power source.
Choosing the right size generator is key to ensuring it works properly for your home. They’re sized by electrical output, measured in watts.
To calculate the generator size you require, add up the wattage of the appliances and systems you wish to power. You can typically find the wattage of small appliances like toasters or coffee pots printed on the bottom. Large systems like refrigerators or stoves usually have a metallic label on the back or side.
If you can’t find the exact wattage, below is a list of the average running wattage for some common household items.
Central AC: 2,000 – 4,000 watts
Clothes dryer: 1,800 – 5,000 watts
Clothes washer: 350 – 500 watts
Coffee maker: 900 – 1,200 watts
Dishwasher: 1,200 – 2,400 watts
Electric oven: 2,000 – 5,000 watts
Furnace: 5,000 – 25,000 watts
Hair dryer: 1,200 – 1,875 watts
Laptop: 50 watts
Microwave: 750 – 1,100 watts
Radio: 70-400 watts
Refrigerator: 725 watts
Space heater: 1,500 watts
TV: 120 watts
Vacuum: 1,000 – 1,440 watts
Water pump: 1,000 – 2,000 watts
Window AC: 600 – 1,500 watts
Large home appliances like your air conditioner and refrigerator also require starting wattage. Starting wattage is the extra power necessary for the first few seconds as the appliance starts up. You can usually multiply the running wattage times three to estimate starting wattage.
When calculating the size generator you’ll need, make sure to include the starting wattage and running wattage for the large home appliance you wish to power.
Starting wattage isn’t necessary for smaller appliances like a phone charger or a blender.
Why does generator size matter?
If you choose a generator too small for your needs, you may overload it. This will cause it to turn off or overheat. Overheating may damage the generator and the items plugged into it.
If your generator is too large, you’ll overpay for the unit and the fuel needed to run it.
What type of generator do I need?
There are two types of generators to consider for powering your AC: portable or standby.
A portable generator is small enough to be stored in a garage or shed until it’s needed. They’re often mounted on carts with wheels for easy moving.
Portable generators are best if you only want to power a few appliances in your home. One unit could likely keep your refrigerator and a few lights on during a power outage.
Standby generators are more of a permanent home fixture. They’re heavy because they have a large fuel tank.
Standby generators turn on automatically when a home loses power. They can power all home appliances and systems, including the AC, lights, and refrigerator.
Standby generators are usually more expensive than portable generators.
Generator fuel
Once you decide on a portable vs. standby generator, you’ll need to select the fuel type.
Most generators take gasoline, diesel or natural gas. Some are even solar-powered.
Fuel type
Benefits
Drawbacks
Gasoline
Inexpensive. Easy to access.
High emissions.
Diesel
Good for cold areas. Fuel efficient.
High emissions.
Natural gas
Low emissions.
Not good for cold climates. High cost.
Solar
Free, renewable energy.
Expensive to install.
How much do generators cost?
According to HomeAdvisor, generators cost an average of $4,776. Most range $1,439-8,125.
Whole-home standby generators are $5,000-25,000, including installation. Portable generators cost $1,500-6,000.
Best generators for air conditioners
Best small portable generator for AC
The Generac iQ3500 is one of our favorite generators. It’s ultra-quiet and durable. Plus, it includes USB ports to charge your phone and other personal devices.
It’s small and easily stored at 18” x 23.7” x 21.7”. Weighing 109.1 lbs., you’ll need a hand moving it around.
This generator is 3,500 watts, so it can power the AC of a smaller home. Or it can run a few appliances like your oven and a window air conditioner.
The DuroMax XP12000E is a great option for homeowners who need to run multiple large appliances via generator. It packs enough voltage to power a moderately sized house, including the air conditioner.
This generator is 200+ lbs. But it’s mounted on a rolling cart, so you can easily move it where it needs to be. At 30” x 29” x 26”, it’s an average-sized generator.
We’re impressed that the DuroMax XP12000E comes with everything you need to get it running. With an included toolset, oil funnel, and four types of outlets, this generator is easy to set up out of the box.
The Generac 70432 is a whole-home generator that will power everything you require in an emergency. Its tough all-aluminum enclosure protects your investment in all kinds of weather.
We love that this generator comes with an app that lets you monitor it remotely in real-time. Its TruePower Technology ensures no damaging power surges for sensitive electronics like your laptop.
The Generac 70432 runs on natural gas. It’s 48” x 25” x 29” and 500+ lbs., so it’s installed as a permanent fixture in your yard.
You’ll need a transfer switch to power your central AC via generator. A professional electrician or HVAC technician should install a transfer switch.
Book an appointment with a top-rated local HVAC pro now
Yes, please!
You can plug a portable or window AC with a standard electrical cord right into a generator. No professional installation required.
Generator safety tips
According to the Consumer Product Safety Commission, 85 people die annually from carbon monoxide poisoning. Portable generators are responsible for the majority of carbon monoxide poisoning deaths.
Using your generator safely is paramount. Especially in post-hurricane conditions. Consider these safety tips from The American Red Cross:
Always follow the instructions that come with your generator.
Keep the generator dry. Place it on a dry surface. Cover it with a canopy if it’s raining. Do not touch it with wet hands.
Operate the generator outside, away from windows, doors, and vents.
Turn the generator off and let it cool down before refueling. Fuel spilled on hot engine parts may ignite.
Store fuel in an approved safety can. Keep extra fuel in a well-ventilated garage or shed away from heat sources like your water heater or exhaust pipes. Look into local laws – there may be a limit on how much fuel you can store.
What’s better than one special sale for Amazon Prime members each year? Two!
Amazon will launch its Early Access sale for Prime members, October 11-12. Set to entice early holiday shoppers, the company promises bargains that rival its annual Prime Day sale in July.
We’ve taken a peek at all the deals. Below, we’ll share out picks for the best home comfort items on sale this week.
Levoit LV-H133 air purifier
Levoit is one of our favorite brands. Its products are sleek, dependable, and effective.
The Levoit LV-H133 is no different. This air purifier has a True HEPA filter, ensuring it removes pet dander, pollen, mold, dust, and smoke from the air.
Levoit claims the LV-H133 cleans the air in a 1,150-square-foot space in 30 minutes. It has three filter layers, including a nylon pre-filter and a high-efficiency activated carbon filter.
In addition to its stylish minimalist design, we appreciate the LV-H133’s light ring. It allows you to monitor your air quality and watch as this air purifier improves it.
Winter is on its way, bringing dry skin and stuffy noses. The Pure Enrichment MistAire humidifier is tried and true. We use it regularly in our homes.
At $39.99, this cool mist humidifier is a great value. It has a soothing blue night light and runs almost silently for up to 25 hours before requiring a tank refill.
The Pure Enrichment MistAire is made of BPA-free plastic. It has a sturdy base to eliminate potential tip-overs, as well as an automatic shut-off feature when the water runs low. You can’t go wrong with this easy-to-clean humidifier with a five-year warranty.
Carbon monoxide poisoning is an odorless danger. The risk is even greater in the winter when you may run portable heaters and gas fireplaces. The Kidde Nighthawk is our preferred carbon monoxide detector and an Amazon top-seller.
In addition to sensing carbon monoxide, the Kidde Nighthawk detects dangerous levels of other explosive gasses. It can plug into a wall outlet or run on batteries elsewhere in your home.
This carbon monoxide detector has a digital display that shows current carbon monoxide levels. It lets you compare to peak levels recorded in the home.
Don’t know what to get for that Secret Santa or White Elephant gift exchange? A carbon monoxide detector could save a life!
This little guy is 7” x 5.51” x 9.17”, fitting perfectly on top of or under your desk. It runs quietly, so it won’t disturb your coworkers.
With a built-in handle, tip-over protection, high-speed fan, and adjustable thermostat, this small space heater has an impressive array of features for the price.
Stock up on this one for holiday gifting. It’s an excellent present for friends and family who are frequently chilly!
The Lasko 5165 digital ceramic tower heater will keep you cozy through the fall and winter. At 1500W, it can heat a room up to about 150 square feet.
This portable heater has a remote control, so you can adjust its settings without leaving the couch. It features a digital display and intuitive controls.
The Lasko 5165 has an on/off timer and shuts off automatically after eight hours. It has a number of safety elements, such as cool-touch casing and overheat protection.
We appreciate that this space heater oscillates, spreading heat evenly throughout the room. You can customize your comfort with multiple heat settings and a built-in thermostat.
Amazon’s October Prime Day is loaded with home comfort savings. Stock up on small devices to make your own space more comfortable or grab a few gifts for others. Early Access deals can be viewed by Prime members now. The Amazon October sale lasts for 48 hours, through October 11 and 12.
The AMACOOL 500 MAH evaporative air cooler is ideal for a small tailgate. You fill it with ice and water, and it blows cool air.
It’s small and lightweight, so it’s easy to transport. Best of all, it runs on rechargeable batteries, so you won’t have to worry about plugging it in.
This JISULIFE portable neck fan is our choice for tailgating because it leaves your hands free. Now you don’t have to choose between your fan, your beer, and your hot dog.
We love that this neck fan comes in various colors so you can show your team spirit and coordinate with your outfit. It runs on batteries for up to 16 hours, so you can even wear it into the game.
The Mr. Heater F232000 is one of our favorites. It has a sturdy handle for easy carrying and a rugged build for durability.
The F232000 uses a 1-pound propane cylinder to heat for up to five hours. It has notable safety features like automatic tip-over shutoff and a protective grill to prevent burns – great for a crowded tailgate atmosphere.
A small propane tank fuels the Campy Portable Heater and Stove. In addition to keeping you warm, it gives you a cooktop to grill burgers or warm hot chocolate.
We love that this $60 device does double duty. It’s compact and super-portable, plus it includes a durable carrying case.
To top it off, you can support your team with orange, blue, green, and grey color options.
The Outland Living Firebowl is a no-mess fire pit fueled by propane. It comes with a “cover and carry kit,” making it easy to transport.
This portable fire kit has an adjustable flame, so you can control the warmth it gives off. Since it doesn’t use wood, you can still use it during campfire bans and Spare the Air days.
Just add marshmallows for a warm and cozy tailgate experience!
This Dr. Prepare Heated Vest is the ultimate fashion accessory for chilly tailgates. It’s machine-washable (in the included mesh bag) and has three customizable heating levels.
Don’t obscure your team apparel with a bulky winter coat – try this stylish vest instead. Be sure to add a portable battery pack to stay warm during the tailgate and the big game.
If you want to level up your RV tailgate, check out our recommendations for quiet RV generators. With a generator as a power source, you’ll be able to run your Crockpot, a TV, and more.
You can even power a full-size portable AC in warmer months to keep your tailgate guests cool. You can plug in a safe space heater to warm the crow when it’s cold.
No matter what the season, don’t let the weather ruin your tailgate. Keep the party going with these top-rated heating and cooling items!
When investing in a high-ticket item like an HVAC system, warranties are important. HVAC equipment generally comes with a manufacturer’s warranty.
Before installation, ask your HVAC technician about the company’s labor warranty. For further protection, you may want to protect your system with a home warranty.
A home warranty is a contract between a homeowner and the warranty company. It provides discounted service, repair, or replacement of specified home systems and appliances.
We’ve reviewed 10 popular home warranty companies to determine the best home warranty for HVAC.
Need your HVAC system repaired? We can help.
Get a quote
Types of HVAC warranty
⚙️ Standard parts warranty
When a piece of HVAC equipment is new, it usually comes with a limited warranty from the manufacturer. This means the manufacturer will pay for parts that break within a certain time.
Most standard parts warranties cover 5-10 years. They usually only apply to the original owner of the equipment. If you buy a home from someone else, the HVAC equipment is no longer covered, even if it’s still within the warranty period.
Our warranty guide can help you determine if your HVAC system is still under warranty.
🗓️ Extended warranty
At the time of purchase, you may be able to pay an additional fee for a longer parts warranty. This is called an extended warranty. Some extended warranties last up to 20 years.
⚒️ Labor warranty
The dealer who installs your HVAC equipment may offer a labor warranty. This means the dealer won’t charge for future service or will offer a discount on services within a set time.
Some dealers include a labor warranty with all their installations. Others may charge a fee.
🌳 Home warranty
A home warranty is a supplemental type of coverage that provides low-cost repair or replacement of specific home systems and appliances, including your heating and cooling systems.
Often, homeowners initiate a home warranty at the time of a home sale. However, you can purchase a home warranty anytime for any reason.
🏠 What about homeowner’s insurance? 🏠
Homeowner’s insurance generally extends to your whole-home HVAC equipment. A standard policy covers damage to the system due to “peril or disaster.”
Your homeowner’s policy does not protect against HVAC issues from general wear and tear, lack of maintenance, or age.
The likelihood that your HVAC equipment will malfunction due to peril or disaster is comparatively low. So, many homeowners turn to different types of warranty to protect these systems.
Best home warranty for HVAC
We shopped 10 of the most popular home warranty companies. Our research showed that Select Home Warranty offers the best value for HVAC.
The table below lists the annual price for covering heating and cooling systems with each company plus the cost of one service call. We provide more details on our methodology below.
Select Home Warranty offers the best HVAC value, in our opinion. The company’s Gold Care and Platinum Care plans cover air conditioning and heating equipment.
Both plans require $75 for a service call. They cost $479.99 and $524.99, respectively.
Though the price is slightly higher, we like the Platinum Care plan. It includes coverage for ceiling fans and ductwork.
We do not recommend Select Home Warranty’s Bronze Care plan. It costs nearly the same as the Gold Care plan but excludes HVAC, plumbing, water, and electrical systems coverage.
First Premier Home Warranty review
First Premier Home Warranty is a straightforward home warranty for HVAC. Its Platinum plan includes AC and heating systems coverage, which costs $499 annually. Service visits cost $75.
We do not recommend the Premier plan, which won’t cover your HVAC equipment.
American Residential Warranty review
American Residential Warranty has three plans that vary significantly in price. Its $599.90 Platinum Premier plan includes most aspects of your HVAC system, including ductwork.
However, if you experience an issue with your AC refrigerant or coils, only the company’s 4-in-1 bundle will cover it. That plan is significantly more expensive at $1,424.99 a year. But it includes coverage for electronics like laptops, TVs, and gaming systems, a truly unique offering.
Liberty Home Guard review
If you live in Washington or Wisconsin, you’re out of luck, as Liberty Home Guard does not provide coverage in those two states. But the company has a solid offering if you’re in one of the other 48 U.S. states.
Liberty Home Guard’s Systems Guard and Total Home Guard plans cover your complete central HVAC system for $549.99 and $599.99, respectively. However, there are some caveats in the plan surrounding non-ducted systems. If you have mini splits, read the terms before signing up.
Deductibles vary between $80-125 depending on the service required.
We especially like Liberty Home Guard because it’s easy to download the “fine print” for its plans on its website. We appreciate this level of transparency.
America’s First Choice Home Club review
America’s First Choice Home Club is unique because it lets you choose your service technician rather than assigning someone from its network. It requires the technician to be licensed and insured. Beyond that, the choice is yours.
The company’s Gold, System, and Platinum plans cover your heating and cooling systems for $522, $611, and $670 annually. Service fees vary $75-125. If you want to include your ductwork, go with the Gold or Platinum plan.
America’s First Choice takes service requests 24×7. It also warranties all repairs for the lifetime of the plan. Plus, the company offers credit monitoring and discounts on related services like home security as part of its plans.
The Home Service Club review
Both of The Home Service Club’s Standard and Comprehensive plans include AC, heating systems, and ceiling fans coverage. If you want your ductwork covered as well, choose the Comprehensive.
The company’s plans are $649.95 for Standard and $799.95 for Comprehensive. Service visits are $75, including all parts and labor.
American Home Shield review
American Home Shield has three plan tiers, all of which include coverage for your heating and cooling systems. Its ShieldPlatinum offering has a free annual HVAC tuneup. However, we don’t think it’s worth it, as that plan costs about $600 more per year, far less than a tuneup will run you!
American Home Shield prices its plans monthly. With a $100 service visit fee, its plans cost $69.99, $89.99, and $119.99 each month.
Choice Home Warranty review
Choice Home Warranty has two plans: Basic and Total. Basic only includes your heating system and ductwork. Total extends coverage to your AC as well. The plans are $560 and $660 annually, respectively.
With an $85 service visit fee, Choice Home Warranty claims its trusted technicians are pre-screened and available 24×7.
We are impressed by the company’s more than 5,000 five-star ratings on Trustpilot.
Cinch Home Services review
Cinch Home Services covers your AC, heating system, ceiling fans, and ductwork with its Built-in Systems and Complete Home plans. With a $100 deductible, these plans cost $56.99 and $66.99 monthly.
The company gives members a $25 credit towards new air filters – a nice gesture, but considering the high cost of Cinch’s warranties, it’s a drop in the bucket.
Cinch offers a 180-day workmanship guarantee on labor. It specifies that some equipment replacements are builder-grade, which isn’t great for owners with upgraded home systems.
First American Home Warranty review
First American Home Warranty offers two plans: Basic and Premier. They cost $444 and $594 annually. Premier includes your heating system, but neither plan includes AC. You must pay an additional $108 yearly to cover your central air conditioning.
Service visits are $85, but an annual HVAC tuneup is $24.
Home warranty for HVAC checklist
When shopping for the best home warranty for HVAC, consider the following elements. They may impact which plan is the best for your unique situation.
🏠 Type of property
The size and type of your home will affect the coverage price. For example, more bathrooms = more potential water leaks. So, the cost of your warranty may be higher.
🧑🔧 Provider coverage
Each warranty has a network of service providers who they contract to perform repairs. Some networks may have better coverage in some regions of the country. That will impact how quickly your issue gets fixed.
☔ Existing warranty
Your HVAC system may still be under warranty with the manufacturer or original installer. If that’s the case, your warranty won’t cover repairs.
🔨 Labor guarantee
Some home warranties back labor for the plan’s lifetime. Others guarantee it for a set period. Some don’t guarantee work at all – in which case, service visit costs may add up.
💰 Cost of service visit
The cost of service visits varies by plan, averaging about $85. Some plans allow you to choose your service fee. In most cases, paying a higher annual price for a lower service fee doesn’t make financial sense.
💵 Price of plan
Most warranties charge a yearly fee of about $650. They often have different plan tiers that cover select home systems and appliances.
💥 Special offers
Home warranty companies often offer special pricing and even sales. Always call the company before signing up, as they may be willing to negotiate on price.
🎁 Perks
Some plans come with unique benefits like free credit monitoring or a stipend for an annual HVAC tune-up. These can be beneficial, but don’t be fooled! Sometimes the cost of the perk is insignificant compared to the price of the plan.
Our methodology
We used the same address in a suburb of Charlotte, North Carolina, when requesting quotes from each home warranty provider. It’s a single-family home of around 3,000 square feet.
Some companies allow you to pick your service visit fee, which impacts the plan’s overall cost. When we were allowed to choose, we opted for a $100 service visit fee.
To arrive at the prices listed in the chart above, we used each provider’s annual fee for the lowest-priced plan that included heating and cooling systems. We did not account for any sales or specials the warranty companies were offering at the time.
To the annual fee, we added the cost of one service visit. We assumed that most consumers would not require more than one HVAC-related service visit annually.
Home warranty denied claim
It’s important to note that all home warranty companies have a “review” process of your claim. Ultimately, the company gets the final say in whether to approve the service provider’s suggested repair or not.
Some companies do offer a resolution center if your home warranty denies the claim. You’ll have an opportunity to ask questions or state why the repair should be made. The resolution specialists, however, are often employed by the warranty company.
We recommend you ask your potential home warranty company for their percentage of approved HVAC repair claims. This will give you an idea of what to expect from the company if you sign on for their coverage.
HVAC warranty FAQs
What do home warranties for HVAC cover?
Home warranties only cover repairs necessitated by normal wear and tear. They do not cover any issues caused by improper installation, DIY fixes, or acts of God.
Your home warranty will replace your equipment or appliance only if it is experiencing issues beyond repair.
Which is the best home warranty for HVAC?
Select Home Warranty offers the best value for HVAC, in our opinion. We also like America’s First Choice Home Club because it allows you to choose any licensed and insured technician.
Which HVAC system has the best warranty?
Major HVAC brands like Trane and Lennox have parts warranties that extend up to 20 years on some products. We appreciate that Trane allows you to transfer your warranty to the new owner when you sell your home.
Is a home warranty for HVAC worth it?
We think a home warranty for HVAC is worth it if the manufacturer’s warranty on your HVAC equipment has recently expired, you just purchased a new home with an older HVAC system (7 or more years old), or you just purchased a new home and the inspector flagged potential issues with your AC or furnace
Green air conditioning options and other ways to make AC more eco-friendly could have a positive impact on our environment.
Why isn’t AC eco-friendly?
Air conditioners use a lot of electricity to operate. Electricity production emits carbon dioxide into the atmosphere. Carbon dioxide is considered a greenhouse gas. And, at high levels, can contribute to global warming.
Additionally, air conditioners use refrigerant. Refrigerant is a compound that removes heat from the air as it cycles through the AC. Used properly, it’s safe for the environment. But if it starts leaking or is prohibited, like R22, refrigerant contaminates the atmosphere and causes a warming effect.
Is there green air conditioning?
Currently, 100% green air conditioning hasn’t been developed. But some manufacturers offer solutions that make AC more environmentally friendly.
Renewable energy
One way to diminish the negative environmental impact of an air conditioner is to reduce its electricity consumption.
Renewable energy like solar provides a solution. There are some solar air conditioning options available today. For example, Lennox builds its SunSource line to easily integrate within a home already utilizing solar energy.
HotSpot Energy makes a mini split that will keep you cool and completely off the grid energy-wise.
🌞 I want solar AC! 🌞
Get a quote
R-410A refrigerant
Most air conditioners built in the last five years employ R-410A refrigerant. This is a preferable option compared to R-22 (Freon), which used to be the refrigerant of choice across the industry.
R-410A (also called Puron) is less damaging to the environment and human health. It doesn’t harm the ozone layer.
If you’re not in the market for a new system, you can hire an HVAC tech to update an older air conditioner to use R-410A instead of R-22. However, retrofitting an aging unit may not be a desirable financial move compared to investing in a more energy-efficient model.
Soon, we may see a new class of refrigerants called A2L take over. They’re even more eco-friendly than R-410A. Plus, they’re less toxic.
Evaporative cooling
Evaporative cooling is an alternative to a traditional air conditioner. This method doesn’t use refrigerant and consumes less than half the energy of traditional air conditioners.
These systems work by pulling outdoor air in, where it passes over water-saturated pads. The water evaporates into the air, which causes it to cool. Then the cooler directs the cool air into your home.
An evaporative cooler may work for you if you live in an area that doesn’t get too hot and has low humidity. Since these systems push hot air out of your home through open windows, they aren’t for all lifestyles.
Enhanced energy efficiency
The energy efficiency of an air conditioner is measured using the Seasonal Energy Efficiency Rating (SEER). A higher number signifies a more efficient unit.
Most modern ACs have a SEER of at least 13, but 2023 HVAC regulations call for a change. The top green air conditioning options will have a SEER of around 26. Lennox claims its SL28XCV is the most efficient AC on the market, with a SEER of 28.
While high-SEER air conditioners are generally more expensive than lower-SEER alternatives, they will save you money long-term on your utility bills.
An AC with a SEER of 15 or higher can earn the ENERGY STAR certification. Purchasing ENERGY STAR products may earn you additional rebates and tax credits.
Help me choose an energy-efficient air conditioner!
Connect with a local expert
Tips for green air conditioning
Not all of us can afford to upgrade our AC. And if your existing system is working just fine, ditching it for something newer and greener may not be the most environmentally sound option.
Consider these suggestions for operating your existing AC in a more eco-friendly manner.
Consider installing a mini split AC rather than cooling the whole house if you want one room cooler than others.
Close your window coverings to keep sunlight from heating up your home.
Avoid using appliances and electronics that produce heat, including your oven, lamps, and clothes dryer, when it’s especially hot out.
I want to schedule my annual AC maintenance appointment
Book now
The future of green air conditioning
Industry advancements and regulation changes suggest there’s a promising future for eco-friendly air conditioning. Many big-name brands and independent researchers are heavily invested in lessening the environmental impact of AC.
Some are focused on new evaporative cooling methods. Others are innovating environmentally safe refrigerant compounds. And more are building renewable energy sources to power HVAC systems.
Though completely green air conditioning doesn’t exist today, the future looks promising.
Falling leaves, pumpkin spice lattes, and air filters?
The first day of fall is September 22. We recommend replacing your air filter quarterly, so the change of seasons is a great reminder to check that task off your to-do list.
Choosing an air filter can be a bit daunting. In this piece, we’ll help you select the best type to meet the needs of your family.
First, you’ll need to know which size to buy. There are several standard sizes for air filters. If your existing filter isn’t labeled, our informative guide will help you determine the size you need.
MERV rating
MERV stands for minimum efficiency reporting value. It measures an air filter’s effectiveness at reducing airborne particles and contaminants.
MERV ratings range from 1 to 20, with 20 being the most effective. MERV 8 is considered the minimum required to filter particles like dust and mold from your home.
HVAC system
Not all HVAC systems are designed for a high MERV filter. If your owner’s manual doesn’t specify what rating your filter should be, contact a technician. Using a MERV rating that’s too high for your system will cause airflow issues.
Material
Different types of filters have varying benefits and drawbacks. Below, we’ve outlined some of the most common kinds of air filters.
Polyester, fiberglass, and other synthetic fibers
These filters are disposable and inexpensive. They capture about 80% of large particles like dust and lint.
Synthetic filters protect your HVAC system from dust and dirt buildup. They’re not the best option if you want to protect your indoor air quality as well.
Electrostatic
These furnace filters employ self-charging fibers to attract harmful particles from the air. They are more effective and durable than synthetic filters, and also more expensive.
Electrostatic filters come in both disposable and reusable varieties. While reusable filters last longer, they also require regular cleaning.
Pleated
Pleated filters are usually disposable or recyclable. Because of their pleats, they have a larger surface area to catch more particles.
This type of filter offers solid value, effectively eliminating small and large pollutants from the air in your home.
🤷 Can I get a HEPA filter for my HVAC system?
True HEPA filters are the most effective around – they can filter particles as small as viruses! But HEPA filters won’t work in your central HVAC system. They’re so powerful, they’ll restrict airflow to and from your equipment. Instead of a HEPA filter, consider investing in one with a MERV rating of 11 or 13. That’s the closest you can get to HEPA while still letting the air circulate properly.
The best air filters
Following are the specific air filters we recommend for various lifestyle needs. Make sure to select the right size for your system when ordering.
Best air filter for pets
We suggest pet owners buy a filter with a minimum MERV score of 11. These Filtrete Allergen Defense filters fit the bill, capturing pet dander, pollen and dust.
We love that they’re both pleated and electrostatic, attracting contaminants on a large scale. They come in a variety of sizes to fit most HVAC systems.
Another brand markets its colorful air filters specifically to pet owners. It’s worth mentioning that those filters are rated a MERV 8, which may not be sufficient for pet-friendly homes.
If someone in your home smokes, we recommend these Filtrete Allergen Defense Odor Reduction filters. They feature an active carbon layer that eliminates smells like smoke and mildew.
This electrostatically charged filter claims to be 25 times more effective at removing odors from the air than other brands on the market. It’s rated MERV 11, so it also captures lint, dust, and pollen spores.
These Filtrete filters are a little more expensive than others. But we think they’re well worth it to preserve the quality of air in your home.
The Filtrete Healthy Living Ultrafine Particle Reduction filters are the best for keeping out minuscule particles like those from car exhaust and smog, plus other inhalable particulate matter associated with pollution.
With a MERV 14 rating, these electrostatic filters are highly effective. They are pricier than alternatives. But we feel you get what you pay for with these filters.
To save some money (and a trip to the store), consider enrolling in a “subscribe and save” program to ensure you never run out of filters.
This electrostatic filter also features mini pleats to trap more particles. It’s built sturdy and resistant to moisture and extreme heat.
We appreciate that Filterbuy makes its filters in the U.S. with materials from U.S.-based suppliers. Bonus: you can recycle your Filterbuy filters when you’re done with them.
To supplement your air filters, consider a separate air purifier if your area is particularly prone to wildfires.
If you’re looking for an air filter that gets it done at the lowest price, we recommend the Simply by Merv Filters MERV 8 filter. They cost about $6 each and have great reviews.
MERV 8 is as low as we recommend going in your home to protect your HVAC equipment. These pleated filters made of fiberglass keep out dust, dirt, and mold.
Made in the U.S.A. with a frame of high-quality beverage board, these filters are sturdy and easy to install.
Zoning is the latest trend in the HVAC industry. Traditional central HVAC heats and cools your entire home equally at the same time. Zoning lets you customize the temperature in different rooms or areas of your home.
This article will help you decide if a zoned HVAC system is right for you. It will also explain how HVAC zoning is achieved and whether it’s a DIY project or one for the pros.
Get a quote for zoned HVAC
Book an appointment
What is HVAC zoning?
HVAC zoning breaks your home into zoned areas that can be heated or cooled to different specifications. A zone can be a cluster of several rooms or a single room.
In a traditional central HVAC system, you set the temperature for your entire home on a single thermostat. Your AC/furnace or heat pump turns on and off based on the temperature sensors in the thermostat.
But sometimes, temperatures vary across your home. Maybe the rooms in the front of your house are usually hotter because they get more sunlight during the day. Or perhaps your bedroom is always cold in the winter because it’s the farthest room from your furnace.
HVAC zoning allows you to heat or cool each zone in your home differently, depending on that zone’s unique needs. Zoning involves using multiple central HVAC systems, mini splits, or a smart thermostat with room sensors and duct dampers.
🤷 Can I zone an existing HVAC system?
Absolutely! But you will probably have to purchase some new equipment.
Your options range from revamping your entire AC system to adding a mini split for supplemental heating and cooling.
It’s up to you to weigh your comfort needs versus your budget. Learn more about your options here.
Pros and cons of zoned HVAC systems
✅ Pros of zoned HVAC
❌ Cons of zoned HVAC
Individualized comfort for each zone
Investing in new equipment can be costly upfront
Increased energy efficiency
Having work done in your home is disruptive
Utility savings as you only heat or cool where you need it
It may not be worth it in small homes
As with any home improvement, you’ll need to consider the benefits against the cost of installing a zoned HVAC system.
Pros of zoned HVAC
Most obviously, zoned HVAC keeps each area of your home comfortable. If your kitchen can’t stay cool in the summer, you don’t have to freeze the rest of the house. You can set a zone for that room alone and adjust the thermostat accordingly.
This, in turn, helps you reduce electricity consumption. By heating and cooling each zone individually, you won’t waste energy. Additionally, if you don’t frequent certain areas of your home, you don’t have to heat or cool them when they’re not in use.
A subsequent benefit is that your utility bills will be lower. No more wasting energy on heating and cooling your whole home at once. With zones, you only use what you need.
Cons of zoned HVAC
If you’re starting from scratch with a new build or a completely re-vamped HVAC system, it’s worth it to create zones. However, turning a traditional central HVAC system into a zoned one takes some expense and effort.
Depending on the type of system you choose, you could spend tens of thousands of dollars to create HVAC zones. Not to mention the inconvenience of having technicians working in your home. You may have to engage multiple types of contractors, including an electrician and a drywall specialist.
Finally, zoned HVAC is not suitable for certain homes. If you have a smaller house and don’t experience any especially hot or cold spots, installing a zoned system may not be worth the hassle.
Different types of zoned HVAC
Multiple systems
If you have a multi-story home, you may already have a rudimentary zoned system. Homes with more than one story often use two AC condensers for cooling.
Since heat rises, it’s notably warmer upstairs in some houses. Homes with two ACs, each controlled by a dedicated thermostat, can stay more consistently cool.
In this example, the upstairs AC works harder, while the downstairs AC has an easier job. In the long run, you’ll save electricity and likely preserve the life of your HVAC system since it’s not constantly working to keep up with the high temperatures upstairs.
You don’t need a multi-story home to benefit from dual HVAC systems. If you have a large one-story house, you may be able to zone your system this way. It can be especially useful if one wing of your home includes bedrooms that are uninhabited during the day.
Mini splits
Mini splits enable whole-home heating and cooling without ductwork.
Each mini split comprises an outdoor heat pump and an indoor air handler connected by electrical wiring and refrigerant lines. In a zoned system, you can have multiple air handlers throughout your home, which you can adjust individually.
Instead of using a central thermostat, a mini split’s air handler typically has a remote control. You can turn it on and off, choose the temperature, and select the fan speed. Or you can set it up to run automatically on a schedule.
Mini splits are perfect for older homes that don’t have existing ductwork. They’re also great if you have specific areas of your home that tend to stay hotter or cooler than the rest.
For example, if your central AC just can’t keep a particularly sunny bedroom cool, you can install a mini split. This will create a new zone that offers supplemental cooling.
Tell me more about mini splits
Yes, please!
Central HVAC zones
Zoning your existing central HVAC system is possible but difficult. It’s much easier if you’re starting from scratch with a new home build or a completely refreshed HVAC system.
Your equipment needs to be dual-stage or modulating to zone your existing system. You’ll need to purchase a new AC condenser and furnace/heat pump if you have single-stage equipment.
Additionally, your ductwork needs to be sized and connected properly for the system. If it’s not, it may require some updating. Altering ductwork can be a headache since your technician may have to cut through walls.
Your HVAC contractor will install a smart thermostat with sensors in a zoned central HVAC system. They’ll also add dampers to your ductwork. These dampers open and close to direct air where it’s needed.
Can I DIY a zoned HVAC system?
Installing a zoned HVAC system is not a DIY job.
If you want an inexpensive DIY option, we recommend a smart thermostat with room sensors like this one.
While not a true zoned system, a smart thermostat with sensors will help your home stay more consistently comfortable in each area with a sensor.
How much does a zoned HVAC system cost?
The cost of a zoned HVAC system depends on which approach you decide to take.
If you opt to install multiple systems, like in a multi-story home, a new unit will cost about $7,000, according to HomeAdvisor.
HomeAdvisor says installing a mini split with one air handler costs about $3,000. Additional air handlers for zoning cost $400-2,000 each.
Zoning a central HVAC system costs many thousands of dollars. The average cost to replace ductwork is $1,181. Installing new ductwork ranges $3,000-7,500. Each automated duct damper costs about $200 – the number you’ll need depends on the size of your home. Smart thermostats cost between $100-300. Some may require an ongoing monthly subscription to manage.
Get a quote for zoned HVAC now
Yes, please!
The bottom line on zoned HVAC
We think zoned HVAC is a smart choice. Not only does it let you customize your home comfort, but it potentially saves energy.
However, zoning an existing central HVAC system is costly and a lot of work. Instead of overhauling everything, we recommend installing a zoned mini split to provide supplemental heating and cooling in rooms that need it.
If you’re starting from scratch with a new build or a remodel, zoned HVAC is the way to go!
The World Meteorological Organization predicts the U.S. will experience a “Triple-dip” La Niña in 2023 for the first time this century. The phenomenon will bring unusual fall weather to many areas.
Wondering how the Triple-dip La Niña will affect you? We’ll explain below and share how to keep your home as comfortable as possible amid fluctuating weather conditions.
What is Triple-dip La Niña?
La Niña is a weather pattern that occurs in the Pacific Ocean, causing the water near the equator to cool a few degrees. This small change impacts weather all over the world.
The cooler temperatures in the eastern Pacific cause fewer rain clouds to form there. In turn, places like the southwestern U.S. have a drier than usual year.
La Niña can also promote more lightning along the Gulf Coast and more tropical storms in the Caribbean.
The term Triple-dip La Niña indicates that this will be the third consecutive year of La Niña conditions. It will likely amplify the typical effects of La Niña, which climate change has already exacerbated.
While reports vary, Bloomberg forecasts the world will experience $1 trillion in weather-related damages by the end of 2023, including harm from floods, droughts, storms, and fires. Experts predict negative impacts on crops, energy supply, shipping, and inflation.
🌧️ What’s the difference between La Niña and El Niño?
With El Niño, the eastern Pacific temperatures rise rather than fall. This causes moisture to increase in the air, bringing rainstorms. Generally, the Northwestern U.S. has a warmer, drier winter in an El Niño year, while the Southeast experiences increased rainfall.
In many ways, El Niño causes the opposite of La Niña.
How will Triple-dip La Niña impact my local weather?
Heat and drought
According to predictions from the National Oceanic and Atmospheric Administration, fall 2022 will be hotter than usual. Every state except for the northernmost regions of Washington, Idaho, Montana, North Dakota, and Minnesota will likely see above-average temperatures through November.
Existing droughts across the west will continue, severely impairing farms in the region. The country’s southern half will see less rain and snow for the remainder of 2022.
Hurricanes
La Niña’s weather patterns cut off wind shear in the Caribbean and elsewhere. This means tropical storms and hurricanes in the Atlantic grow stronger and more frequent.
Into the winter, the northern U.S. and New England will see colder-than-average temperatures. Additionally, snowfall will be above-normal in these regions.
Staying comfortable in La Niña weather
A warmer fall means an extended cooling season. With your AC working overtime, preventative maintenance will keep it in good health. This includes:
Cleaning debris like fallen leaves from in and around your condenser
Scheduling a twice-annual HVAC system checkup
Book your HVAC maintenance appointment now
Yes, please!
Since the weather tends to fluctuate at this time of year with cooler mornings and warmer afternoons, you may prefer to open your windows and use a fan to keep comfortable. Our favorite fans include this tower fan by Honeywell and this energy-efficient box fan by Hurricane.
If you live in a coastal region, check out our piece on prepping your AC for hurricanes. It includes tips to prevent damage from high winds and power surges.
And, if you’re in the northern U.S. and New England, make sure you schedule an appointment for furnace maintenance this fall. You’ll want yours to heat effectively when winter brings cold temps and heavy snow.
In 2023, the HVAC industry will make big strides toward sustainability. While the new 2023 HVAC regulations may not have an immediate impact on your home, it’s good to know what to expect.
Heightened energy efficiency and eco-minded refrigerant requirements will soon take effect. We’ll fill you in on everything you need to know.
SEER regulations
SEER stands for seasonal energy efficiency ratio. It measures an air conditioner’s cooling output compared to the electrical energy it consumes. The higher the SEER rating, the more efficient the AC.
Beginning January 1, 2023, there will be two SEER-related changes. First, the minimum SEER rating will increase on HVAC equipment.
Currently, new air conditioners must have a minimum SEER of 13 in northern states and 14 in southern states. In 2023, this will change to 14 and 15, respectively.
Additionally, the industry will adopt the SEER 2 standard. SEER 2 is similar to its predecessor in that it measures the total heat removed from a specific space versus how much energy it uses in the process. The required testing conditions will change to better mirror real-life circumstances.
In 2023, HVAC equipment, including AC condensers and heat pumps, will have to display their SEER 2 rating on their packaging.
This change won’t necessarily impact consumers beyond giving you a slightly better estimate of your potential energy usage when shopping for new HVAC equipment.
AC refrigerant regulations
Recently, the industry moved away from R-22 (Freon) towards R-410 (Puron) refrigerant. It’s less damaging to the environment and human health and doesn’t harm the ozone layer.
Next year, the Environmental Protection Agency is likely to require another move to a class of refrigerants called A2L by 2025. A2L has a lower Global Warming Potential (GWP) than alternatives, but it’s also mildly flammable.
HVAC manufacturers are already designing new technology to accommodate A2L. This includes new technology to store and transport systems with A2L and equipment with automatic shutoff capabilities in case of a leak.
What are the benefits of these new HVAC regulations?
Pros
Cons
🌎 Positive environmental impact
🔧 More difficult to find replacement parts for older systems
💰 Reduced utility bills
📦 Initial inventory challenges
Most HVAC equipment, including central air conditioners and gas furnaces, require a lot of electricity to operate. This creates carbon dioxide emissions, which contribute to global warming.
As the world experiences extreme temperatures due to climate change, we rely on our HVAC systems to stay comfortable more than ever. If we don’t develop new eco-friendly standards and technologies, global warming will only intensify.
Most industry changes, including the 2023 HVAC regulations, move towards more energy-efficient, green products. These will not only positively impact the environment, but you’ll likely see a reduction in your utility bills.
Is there any downside to the 2023 HVAC regulations?
While the impact of the 2023 HVAC regulations is positive overall, they may create minor inconveniences for individuals.
For example, you may need to wait a little longer for parts or replacement units. Local dealers may initially experience challenges obtaining inventory that meets the new requirements.
Additionally, if your older system needs repair, your technician may not be able to access compatible parts easily, as the industry phases out dated technologies.
Should I upgrade my old HVAC system?
If your HVAC equipment is in good condition and fulfilling your heating and cooling needs, there’s no need to buy a new one that meets the new industry standards. Make sure you’re scheduling spring and fall maintenance appointments to keep your system running at its most efficient.
As your system ages, it may be harder to find compatible parts, as dealers stock items that satisfy the new regulations.
When your system’s reached the end of its useful life or the cost of a repair exceeds the cost of a replacement, it’s time to consider new equipment that meets the current standards.
The hot, humid summer conditions that make you want to crank the air conditioner also create the ideal conditions for thunderstorms. Operating your air conditioner during a thunderstorm can lead to some damage to your unit, but the chances are slim.
If you want to be super-cautious, you can turn your air conditioner off at the breaker box during a thunderstorm. Luckily, humidity and temperature drop when storms roll in, so you’ll get some relief even though your air conditioner is not in use.
Why consider turning off your air conditioner during a thunderstorm?
Lightning strikes. While lightning strikes to the home are rare, they are a possibility during a storm. The electrical service drop, where your utility lines connect to the house on the roof, is a very vulnerable point for lightning strikes. If lightning strikes at this point, it can cause a significant power surge through your home’s electrical system. As much as 5 billion joules of energy can be sent through your home’s wiring before the breakers are triggered to trip. In a fraction of a second, the surge can cause serious damage to your air conditioner if it is operating.
Air conditioner damage. The damage caused by a lightning strike can render your air conditioner unusable. It can melt the plug to your unit. The air conditioner’s control panel is full of sensitive electrical circuitry which can be damaged, requiring an extensive repair or even replacement of the entire unit. The system’s controls can be corrupted to the entire heating and cooling system if a lightning strike occurs when the system is operating.
Can lightning strike a window air conditioner?
Yes, lightning can strike a window air conditioner, particularly if you live in an apartment building or highrise and are further from the ground. However, this is highly unlikely. Lightning strikes are statistically very rare and it is generally safe to leave your window AC unit plugged in. Air conditioners are electrically insulated to remain safe in the event of a surge. The refrigerant inside the unit is nonflammable, so you aren’t in danger of an explosion.
A power surge could melt the plug and power port on your unit, and damage the circuitry in your control panel. That can be a costly repair, and you may end up needing an entirely new window unit which can cost up to $600 to purchase and install.
If you want to take extra precautions, you can unplug your window unit during the storm and plug it back in once it passes.
How do I protect my air conditioner in a thunderstorm?
If you happen to live in an area with a high occurrence of lightning strikes, you can protect your air conditioner by installing a protection system. Using lightning rods, conductors, and ground rods, you’ll create an alternate path for lightning to reach the ground, avoiding your home’s electrical system.
For help stormproofing your AC, click below to schedule an appointment with one of our HVAC experts near you.
Connect me with an HVAC pro 👨🔧
Book an appointment
Can I use my AC in a rain storm?
It’s perfectly safe to run your AC during a rain storm. Rain will not interfere with the outdoor unit’s ability to function correctly. In fact, using your AC on warm, rainy days can keep your home more comfortable — your indoor evaporator coils extract moisture and lower humidity levels, which improves comfort levels indoors.
If rain storms result in flooding and you have standing water around your unit, you should stop using the system, and turn off power at your home’s electrical panel to prevent damage. Have your unit inspected by an HVAC professional before using it after flooding.
Hurricane season lasts June 1 to November 30, with September as the most active month for hurricanes in the Atlantic. The National Oceanic and Atmospheric Association (NOAA) forecasted an above-average hurricane season this year.
NOAA predicts 14-21 tropical storms in the 2022 season, most of which will occur between mid-August and mid-October. Typically, there are 14 tropical storms per season, which peaks around September 10.
With tropical cyclones becoming more frequent and intense due to climate change, consider adding a few steps to your hurricane prep to protect your HVAC equipment.
How to prepare your AC for a hurricane
Window AC
If you have a window air conditioner, it’s best to unplug it and remove it as a hurricane approaches. Strong winds can blow a window AC out of place, damaging the unit, your window, and anything in and around your home.
If removing your window air conditioner isn’t possible, purchase a cover with straps like this one to protect it during extreme weather.
Portable AC
If you have a portable AC inside your home, we recommend running it until the storm arrives. This will cool your home as much as possible before a potential power outage. When the storm hits, unplug the AC to avoid damage due to power surges.
Central AC
Defending your central AC against a hurricane is a little more complex. Follow these steps to keep your AC safe and your home comfortable.
In hurricane-prone areas, you should mount your AC on a concrete slab. If yours is not high enough to protect from potential flood waters, engage a contractor to make it taller.
🔩 Check the anchor bolts
Tighten the bolts that anchor your compressor to the concrete slab. Yours should be able to withstand 160 MPH winds at a minimum.
❄️ Cool your home
Drop the temperature on your thermostat to cool your home before the storm arrives. Close all windows and doors. This will help keep you comfortable if the power goes out.
⚡ Shut the power off
Turn your AC off at the breaker box as the storm approaches. This will protect it from power surges.
🔌 Consider a surge protector
An HVAC pro can install a surge protector designed to protect your compressor if you live in an area prone to power outages or lightning strikes.
🔒 Secure outdoor objects
Put away patio furniture and other large items that may blow into your AC compressor, causing damage. Make sure to trim large tree branches.
Once the storm passes and power restored, go outside and check your compressor for visible damage. Clean out any debris that’s become stuck in the unit. If everything looks OK, turn the power back on and start your AC.
Contact an HVAC professional if you need help getting your AC prepped for hurricane season, or if you suspect a hurricane has damaged your AC.
Contact an HVAC expert now!
Book an appointment
Best air conditioners for coastal homes
Several manufacturers make HVAC equipment specially designed to withstand the unique challenges of coastal climates. When you’re ready to upgrade your system, consider one of these options.
Carrier coastal ACs
Carrier’s Comfort and Infinity lines of central AC compressors and heat pumps have coastal-specific models. These units feature the company’s WeatherShield protection, which eliminates corrosion from salt air.
Since most coastal areas experience more temperate climates, we recommend installing a heat pump rather than an AC compressor. Heat pumps have a number of advantages, including improved energy efficiency, cost savings, and the ability to provide both heating and cooling.
Carrier recommends its coastal systems for homeowners who live within 10 miles of the shoreline.
Bryant coastal ACs
Bryant is a sister brand of Carrier. Many of its models are the same as Carrier’s, but they’re often priced more affordably.
Bryant’s Legacy and Evolution lines of air conditioners and heat pumps have coastal models designed to withstand corrosion from salt air. They also have DuraGuard Plus protection, including a steel coil guard and baked-on powder coating.
Trane coastal ACs
Trane doesn’t offer coastal-specific models. However, its ACs and heat pumps include aluminum coils and a painted finish that resist corrosion and rust.
I need a coastal AC!
Connect with a dealer
Though you should still perform the prep tips above when a hurricane is on its way, purchasing an AC or heat pump intended for coastal environments can extend the life of your investment.
As with most home appliances, your furnace is likely to run stronger and longer with routine maintenance. A fall furnace tuneup is the easiest way to keep yours running optimally, especially as the temperature drops.
Fall is the perfect time to schedule your annual furnace maintenance in between heating and cooling seasons. In fact, many HVAC professionals offer fall tuneup specials.
Book your furnace tuneup now.
Yes, please!
What is included in furnace maintenance?
A furnace maintenance appointment is like an annual checkup for your furnace. An HVAC technician comes to your home and ensures your heating equipment is working properly.
During the appointment, your technician tests the furnace’s components. They adjust, clean, and lubricate parts as needed. If the technician detects any potential issues, they’ll recommend repairs.
Furnace maintenance checklist
Typically, an HVAC technician includes the following in a furnace tune up checklist:
Test the ignitor
Inspect and adjust the flue
Check and adjust the pilot and burners
Check and adjust the gas pressure and the air mix
Check and clean/replace the air filter
Check the electrical components
Check and adjust the blower speed
Inspect and clean the AC coil
Inspect the heat exchanger and ductwork
Calibrate the thermostat
Furnace maintenance cost
According to HomeAdvisor, most furnace tuneup appointments cost between $50-100. If you subscribe to a particular HVAC company’s maintenance plan, they should cover these appointments for a free or reduced cost.
If your technician identifies an issue with the system, you will have to pay for that in addition to the maintenance appointment. Check out our research on average furnace repair costs.
How to prepare for furnace maintenance
Book an appointment window that allows you to be home for up to 90 minutes. While most furnace tuneups take less than an hour, you’ll want additional time in case repairs are needed.
Clear furniture and other clutter from around your furnace, thermostat, air register, and air vents. Your tech will need to access these spaces.
Secure pets, as your technician may be in and out of your home. Keep pets in their crate or in a closed room.
Ask about costs and payment methods when you schedule the appointment. Be prepared to pay at the conclusion of the appointment.
Ready to schedule your fall furnace tuneup? Click below.
Book a furnace maintenance appointment now.
Yes, please!
How often do I need to get furnace maintenance?
You should schedule furnace maintenance annually. It’s best to book it in the early fall before the weather cools down enough to turn your furnace on.
Getting your furnace checked before heating season will ensure its efficient and safe operation throughout the winter. It will help you proactively address any potential problems that may cause a breakdown during the coldest months.
While you’re using your furnace, there are some DIY maintenance tasks you can do every month or so to ensure it continues to run at its best.
DIY furnace maintenance tips
In between professional furnace tune-ups, there are a few DIY steps you should take to keep your system heating comfortably through the winter months.
Most furnaces last for 15-20 years. With proper maintenance and gentle usage, some furnaces may live for up to 40 years. However, they likely won’t function at their most efficient in the later years.
Why do I need furnace maintenance?
Furnace maintenance is important for a number of reasons:
🌲 It can extend your furnace’s useful life.
🌎 It can improve energy efficiency.
⚠️ It can postpone larger-scale repairs.
❄️ It can mitigate breakdowns in the coldest parts of the year.
🛟 It can keep your family safe by detecting and eliminating fire or carbon monoxide hazards.
Keep your home safe and comfortable this winter by scheduling your furnace maintenance appointment this fall.
If your mini-split isn’t working right, these Lennox mini split troubleshooting tips might help you fix it yourself. Of course, if you aren’t comfortable performing these tasks, call a certified HVAC pro. They can help you get your mini split back in shape.
Connect me with an HVAC repair technician now 👩🔧
Yes, please!
Lennox mini split is dripping water or not draining properly
First, check your air filters. You should clean these every few months. Dusty filters can cause a host of issues with your HVAC system because of reduced airflow.
Open your evaporator (the indoor cabinet) and remove the air filter. You can rinse it in the sink, or vacuum it with a hose attachment. When it’s clean, return it to the evaporator.
Mini splits remove moisture from the air, so there may be some condensation at your heat pump. But if it’s making a puddle, you have a problem. Some models do have a drain pan under the heat pump that collects condensation. It may be overflowing because of mold or debris.
Turn the power to your heat pump off at the circuit breaker. Clean out the drain pan with an old towel. Open the unit (you may need to unscrew the cover with a screwdriver). Look for clear tubing inside. If you see a visible clog or mold in the tube, use a shop vac to suck it out. Alternatively, you can remove the tubing and use your garden hose to clean it out before replacing it.
If these Lennox mini split troubleshooting tips don’t work, call a technician. Your issue requires professional attention.
Lennox mini split is not heating or cooling
Check your thermostat. Set it at your desired temperature. Choose “cool” if you want AC or “heat” if you want heat. Put it on “auto” instead of “on.” If you choose “on,” the mini split will blow air when it’s not actively heating or cooling.
Go around your home and feel for air leaks. If you feel a draft, especially near a window or door, seal it with weatherstripping tape. Your mini split may be working but unable to keep up if the cool/warm air is escaping.
Check the air filters. They may be dirty, blocking cool/warm air from entering the home. Open your indoor evaporator and remove the air filter. Vacuum it with your hose attachment or rinse it in the sink. You can purchase a replacement on Amazon – just be sure it’s the right size and compatible with your model.
Call a professional if these Lennox mini split troubleshooting tips don’t help. It’s likely your refrigerant is leaking. If this is the case, the coils (metal tubing that zigzags inside your heat pump) may appear frozen.
Lennox mini-split is making unusual noises
Identify where the noise is coming from.
If you hear popping or clicking coming from your evaporator (indoor cabinet), it may just be the plastic cabinet expanding during use. No need to troubleshoot – this is normal.
Check the air filter if you hear a whistling sound coming from the evaporator. Pop it out and clean it. Vacuum it with a hose attachment or rinse it in the sink. Make sure you dry it thoroughly before putting it back.
If you hear gurgling or crackling coming from the heat pump (outdoor unit), it may be turning on defrost mode. This is part of its normal operation.
If you hear clanking or jangling from the heat pump, turn off the power and remove the cover. You may need to unscrew it with a screwdriver. Check inside for any loose debris. If sticks, rocks, or leaves are inside, clean them out. Check for screws or bolts that have fallen inside. Make sure any visible screws are tight and holding the components in place.
If these tasks don’t alleviate the noise, or if you hear a more jarring noise like screeching or banging, call a professional for help.
Book an appointment with a technician now.
Yes, please!
Lennox mini-split has a strange smell
If your home smells of mildew, it’s possible the cause is your mini split. If mini splits aren’t cleaned regularly, they may not drain condensation properly. This excess moisture causes mold. The Environmental Protection Agency suggests calling an HVAC professional to handle mold removal properly. Check your owner’s manual for cleaning instructions.
You may have a refrigerant leak if you detect a smell like vinegar or nail polish remover coming from your mini split. Call a technician. They can repair the leak and refill the refrigerant.
If you smell burning or an “electrical” scent coming from your unit, you may have wiring issues or a failing motor. This isn’t a DIY job – call an HVAC pro.
With any of these smells, it’s best to turn your mini split off until you can give it proper attention. You don’t want a mold odor spreading through your home. And you don’t want to further damage your system.
Lennox mini split troubleshooting resources
Lennox has a troubleshooting tool to help identify and fix issues with your system. Its site also has a product literature lookup, where you can find the owner’s manual for your model. These Lennox mini split troubleshooting resources may help you identify parts and determine whether you need to call a pro to fix your issue.
If you’ve tried our Lennox mini split troubleshooting suggestions and still need help, reach out to a certified HVAC professional. A technician can also perform troubleshooting for you if you prefer not to do it yourself.
Click below to connect with a top-rated local HVAC technician who can get your Lennox mini split back up and running!
According to HomeAdvisor, it costs an average of $376 to have your air ducts professionally cleaned. The price may vary based on elements like accessibility and lifestyle factors (e.g., if you have pets or smokers in the house).
DIY air duct cleaning will save you money since it involves tools that most homeowners already have. It can also help prolong the life of your air conditioner and furnace. It eliminates dust in the home and may improve air quality for your family.
Is duct cleaning a waste of money?
Professional duct cleaning is worthwhile. Experts have tools that can reach deep into your ductwork. You won’t be able to access all of your ducts with DIY cleaning.
Additionally, duct cleaning companies can identify and remedy potential issues in your ductwork, including leaks or blockages.
Duct leaks and obstructions can damage your overall HVAC system without immediate attention. They may also result in increased utility bills.
Cleaning your air ducts yourself is also beneficial. You can do a DIY cleaning between professional cleanings to keep your system running smoothly.
Connect me with an HVAC pro to clean my ducts.
Yes, please!
Air duct cleaning: do it yourself
Cleaning your air ducts yourself is a simple process involving tools you probably own already. The job may take several hours, depending on the size of your home and the number of air registers.
Tools for DIY air duct cleaning
Before you begin, gather the necessary tools. These include:
If you have visible ductwork (in your attic or crawlspace, for example), lightly tap the outside with the handle of your cleaning brush. This will help loosen up dust and dirt.
Turn your thermostat to “fan” and “on.” Let it run this way for a few minutes. The air will push any dust closer to the registers where you can reach it for cleaning.
2. Turn off your HVAC system
The simplest way to make sure everything is off is via your electrical box. Turn off the breakers associated with your HVAC equipment, including the furnace and AC condenser.
Switch your thermostat to “off” as well.
3. Remove your vent grates
They may simply pop out. Or you may have to unscrew them first. Once the grates are off, cover the vent opening with a paper towel. If you have vents on a ceiling or a wall, you can use painter’s tape to secure the paper towel.
Covering the vent opening with a paper towel will prevent dust and debris from entering your rooms as you clean.
If you have different size grates, use a Sharpie to mark the inside with a number. Write the same number somewhere you can see it within the vent. This way, you’ll be able to easily match the grate to the correct vent later on.
Make sure you also remove and clean the grate on your air return. It’s typically larger than the other grates around your home.
4. Clean your vent grates
If your grates are plastic or metal, load them all into your dishwasher (top shelf for plastic) and clean them that way. Ensure they’re completely dry before replacing them.
If your grates are wooden or another material that’s not dishwasher safe, clean them in the sink. Run cold water over them and scrub the dirt and dust off. Dry them immediately to prevent warping.
5. Clean your vents
Start with one vent in your home. Remove the paper towel cover.
Insert your cleaning brush and jiggle it around to knock off anything stuck to the insides of the vent like spiderwebs or dust bunnies. We recommend using a toilet brush because of its long brush handle. But devote the brush to vent cleaning only. Don’t use a brush you’ve already used to clean the toilet (😬).
Insert your vacuum wand into the vent as deep as it will go. Vacuum out all debris.
Using a dampened rag or paper towel, wipe out the inside of the vent as far as you can reach. You can use tap water or your favorite multipurpose cleaner.
Re-cover the vent with a paper towel when you finish. Continue this step until you’ve cleaned all the vents in your house.
6. Clean your air return
Take out the filter in your air return. Throw it away.
Use your cleaning brush, vacuum, and paper towels to clean out the air return. Only go as far as you can safely reach.
Replace the filter with a fresh new one.
7. Return your grates
Once your grates are clean and dry, remove the paper towel covering each vent. Replace the grates. You may need to use a screwdriver to secure them.
8. Clean your furnace blower compartment
Lots of dust accumulates in this area. To access it, remove the cover on your furnace. You may need to unscrew it with a screwdriver.
Take the furnace filter out and dispose of it. Use your cleaning brush to remove cobwebs and other stuck-on dirt from the compartment.
Vacuum out the blower compartment with your hose attachment. Then clean it out with a damp paper towel. Again, you can use plain water or your favorite multipurpose cleaner. If you can reach the furnace fan, clean that as well.
Replace the filter with a new one. Close and secure the furnace cover.
Sound like too much work? You can always call a pro to get your ductwork spic-and-span.
Connect me with a local HVAC expert.
Yes, please!
Benefits of clean air ducts
Fewer allergens
Keeping your air ducts clean reduces the number of allergens circulating in your home. This includes pet dander, pollen, and dust.
Unattractive to animals
Sometimes, rodents and birds can make their way into your ductwork. Dust and debris provide good nest-building materials for them. Clean air ducts are inhospitable – those pests will leave and find shelter elsewhere.
Additionally, air ducts can host insect infestations. These are much less likely to happen when your ducts are clean and dry.
Mold prevention
Clean, sealed ductwork keeps mold out. If your ducts are dirty with leaky joints, mold can flourish.
Mold inhalation is a potential health hazard. And it smells bad.
Don’t attempt to clean your air ducts yourself if you suspect mold growing in your ductwork. The Environmental Protection Agency recommends hiring a professional for HVAC mold removal.
Lower utility bills
Clogged ducts make your HVAC equipment work harder than it needs to. Your system can function at max performance with clean air ducts, thus reducing your utility bills.
You may also save money by proactively finding and fixing potential furnace and AC repair issues in the cleaning process.
Prolonged HVAC system life
Maintenance is necessary to keep your HVAC system at its best. Duct cleaning should be part of your regular AC maintenance.
Be sure to schedule HVAC system checkups every year. We recommend having your ductwork cleaned professionally every 3-5 years. Between those appointments, clean your air ducts yourself to ensure your HVAC equipment lasts as long as possible.
Bought a new thermostat and wondering if you can install it yourself? For some, thermostat wiring is a DIY job, but we won’t blame you if you opt for a local pro to handle the work.
We’ll give you all the information you need to successfully install your new thermostat below. Plus, we’ll explain the thermostat color code.
Tools you need for thermostat wiring
Before you get started, make sure you have all the tools you need to complete the task. To install a thermostat, you’ll require:
If your new thermostat is a different shape and size than your existing one, you may also need spackle to patch holes and paint to match your current wall color. If you don’t have any leftover wall paint, have your wall color matched at the paint store before you begin.
Keep your cell phone nearby. Its camera will come in handy once you get started.
How to install a thermostat
1. Turn the power off
Go to your breaker box and switch off the power to your HVAC system, including the thermostat.
2. Remove the existing thermostat
Detach the cover by gently pulling it away from the base. If it doesn’t come off easily, check if there’s a screw or latch to release it.
You will see several colorful wires inserted into terminals. Use your phone to photograph the thermostat wiring. Doing so will help you remember which wire goes in which terminal. Alternatively, some new thermostats come with stickers to label the wires. (See our thermostat color code chart below to learn more about each wire’s purpose.)
Once you’ve recorded your thermostat wiring, disconnect each wire from its terminal. You’ll likely need to loosen each terminal screw to free the wiring. Next, remove the screws holding the thermostat base to the wall.
Carefully take the thermostat base off the wall. Hold the wires securely while doing this, so they don’t slip into the wall.
If your thermostat is more than 20 years old, it may contain mercury. Don’t just throw it away. Follow the mercury disposal guidelines for your area.
3. Find the common wire
The common wire is also known as the C-wire because it connects to the C terminal of the thermostat. It’s generally blue, but it may also be brown, black, or purple.
The common wire is necessary for modern thermostats – especially smart and programmable thermostats. Your old thermostat might not have used the common wire.
If you don’t see the common wire, look inside the hole where the other thermostat wiring is coming out. Carefully pull out any wires you find tucked inside the wall.
If you still can’t find it, contact an HVAC technician for help. Or choose a thermostat model that doesn’t require one.
4. Repair the wall
Now is the perfect time to fix your wall. Ensure the thermostat wiring is secure by taping or clamping the wires together – you don’t want them to slide back into the wall.
Fill any holes your old thermostat left behind with spackle. Touch up the wall with your current paint color.
Leave the hole with the thermostat wires open. Wait for the spackle and paint to dry before moving on to the next step.
5. Install your new thermostat
Place your new thermostat’s backplate on the wall. Make sure it’s level, and screw it into place. If it requires drywall anchors, use a drill to make your holes in advance.
Using a wire stripper, ensure about ⅜-inch of the wire is exposed. Then insert each wire into the corresponding terminal, referring to the photo you took or the labels you placed earlier.
Once you insert the wires, tighten the terminal screws. Attach the thermostat’s faceplate.
6. Turn the power on and complete the installation
Turn the power back on at your breaker box.
Complete the installation instructions for your specific thermostat model. For smart thermostat installation, that will likely include connecting to your home WiFi network.
Programming the thermostat is the final step. You’ll need some technical understanding to complete this portion, and we recommend following your installation manual step-by-step. If the programming isn’t completed successfully, your system won’t operate optimally.
Sound like too much work? Hire one of our licensed HVAC pros to install your thermostat.
Book now
Thermostat color code
In most cases, thermostat wires have a universal purpose. Each color usually corresponds with the same terminal regardless of the thermostat model.
There are occasional outliers. But for the most part, HVAC systems use the thermostat color code below.
Wire color
Purpose
Terminal
Red
Power
Rc and Rh
Orange
Heat pump
O
Yellow
Cooling
Y
Green
Fan
G
Blue
Common
C
White
Heat
W
If your thermostat controls both your heating and cooling systems (e.g., your air conditioner and furnace), you will have two red wires. The Rc terminal connects to the cooling system, and the Rh terminal connects to the heating system.
Depending on your unique HVAC system, you might not have all of these wires.
Thermostat wiring: the bottom line
Installing a thermostat is a DIY job that requires some basic knowledge and tools. If wires aren’t how you prefer to spend a Saturday afternoon (and we certainly don’t blame you), hire an HVAC professional to handle your thermostat installation.
Propane tanks aren’t just for grilling. There are many uses for propane gas, including heating your whole home.
Considering buying a new propane tank and not sure what size you need? We’ll give you the lowdown on propane tank sizes below.
We’ve got you covered whether you need a propane tank for your space heater or your whole-home heating system. Want the short version? Check out our propane tank size chart.
Propane tank sizes for homes and commercial use
Larger propane tanks are typically buried underground near your home. When they’re nearing empty, you can pay a propane delivery company to refill the tank.
120-gallon propane tank uses
A 120-gallon propane tank is typically used to power multiple gas appliances in a home. This can include things like a clothes dryer or water heater.
250-gallon propane tank uses
Like a 120-gallon tank, a 250-gallon propane tank can fuel several home appliances.
350-gallon propane tank uses
A 350-gallon propane tank can power the heating system for a home smaller than 2,500 square feet. It’s the most common size for this use. Alternatively, you can use it for multiple large gas appliances.
500-gallon propane tank uses
500-gallon propane tanks are usually for mid-size and larger homes (2,500-4,500 square feet) and are the most popular for residential use. They can fuel the home’s heating system plus several gas appliances.
A 500-gallon propane tank can also be used commercially by businesses like restaurants or dry cleaners that rely on multiple large gas appliances.
1,000-gallon propane tank uses
A 1,000-gallon tank is used for heating and appliances in extremely large homes (more than 4,500 square feet). They’re also used for commercial and agricultural installations with high-volume gas needs.
Not sure what size propane tank you need? Connect with an HVAC expert who can help.
Yes, please!
Propane tank sizes for grilling and other small appliances
Smaller propane tanks are typically sold by weight. But a 20 lb. propane tank actually weighs more like 37 lbs.
When you buy a 20 lb. propane tank, you’re buying 20 lbs. of propane. The tank itself weighs an additional 17-ish lbs.
These smaller propane tanks are typically portable. You can exchange them for a new full tank when they’re empty.
20 lb. propane tank uses
This is the size propane tank you’ll see at the gas station or in front of the grocery store. It’s commonly used for things like:
100 lb. propane may seem heavy, but they’re considered portable. They can be picked up and exchanged for a new tank when they’re empty. They’re not usually buried underground like some larger tanks.
100 lb. propane tanks fuel a single home appliance, such as a:
Clothes dryer
Kitchen stove
Fireplace
Water heater
Generator
Pool heater
Propane tank size chart
Tank size
Common uses
20 lbs. (4.5 gallons)
Grilling, patio heaters
30 lbs. (7 gallons)
RV appliances, space heaters
33 lbs. (7.8 gallons)
Forklifts
40 lbs. (9.4 gallons)
Commercial grills, construction heaters
100 lbs. (25 gallons)
Single home appliance (e.g., clothes dryer)
120 gallons
Multiple home appliances
250 gallons
Multiple home appliances
350 gallons
Heating system for a small home or multiple home appliances
500 gallons
Heating system for a large home plus home appliances or small commercial uses (e.g., restaurant)
1,000 gallons
Large commercial or agricultural installations
Confused? Talk to one of our gas heating experts now.
The Consumer Product Safety Commission estimates that portable electric heaters cause about 1,200 fires per year. But most of these fires could have been easily prevented with proper usage.
The National Fire Protection Association (NFPA) recommends you follow some basic space heater safety tips if you choose to use one in your home.
Space heater safety tips
Keep your heater at least 3 feet away from flammable materials, including curtains and blankets.
Place your heater on a flat, stable surface.
Ensure your heater is in a low-traffic area that isn’t blocking an exit.
Don’t operate your heater near water. (Except if you’re using a waterproof bathroom space heater.)
Plug your heater directly into the wall outlet – do not use an extension cord.
Don’t run your heater’s cord under a rug or carpet. It may become damaged.
Don’t operate a heater you know is damaged.
If you have a fuel-burning space heater, make sure your room is ventilated properly.
Never leave your heater unattended. Turn it off when you go to sleep.
Space heater safety features
In addition to following the space heater safety tips above, make sure the space heater you choose has built-in safety features such as:
Space heaters are typically powered by either gas or electricity.
Gas vs. electric space heaters
Gas-fueled space heaters usually use propane, kerosene, or another fuel to create heat. Their pilot light burns the gas as fuel to warm the room. Electric space heaters plug into a standard electrical wall socket.
In addition to the general hazards of using a space heater, portable gas heaters can create deadly carbon monoxide if your room isn’t ventilated properly. They employ an open flame and flammable gas, so many are not a great choice for safe indoor warmth.
Companies label their heaters for indoor, outdoor, or multi-purpose use. Follow all manufacturer guidelines when it comes to safe use.
Electric space heaters are generally the safer and more practical option compared to gas heaters. However, gas heaters are usually less expensive to run and more energy-efficient.
📌 Pro tip: We recommend using carbon monoxide detectors and smoke detectors in your home. Whether you’re using a space heater or not, these products provide peace of mind. The NFPA has tips on installation of both carbon monoxide and smoke detectors. Test them regularly to ensure they’re operating properly.
When purchasing a space heater, there are a few common styles to choose from: convection, radiant, and conductive.
Convection space heaters
Convection space heaters produce heat as air passes over a heating element. They slowly create long-lasting heat. Convection heaters offer quiet operation and may have a fan to circulate heat.
Radiant space heaters
Radiant space heaters pass liquid through a system of pipes to generate warmth. They are a great option for quick heating.
Conductive space heaters
Conductive space heaters use electricity to produce heat via heating elements (usually metal coils). They create warmth by having direct contact with another object or person. For example, heated seats in a vehicle are conductive heat.
The safest space heaters
We’ve combed through expert and customer reviews to choose the following space heaters with notable safety features.
Safest space heater overall
The Vornado MVH Vortex heats your room safely and efficiently. It has a number of safety features, including a cool-touch exterior and automatic shut-off for overheating and tip-overs.
The MVH Vortex has three heat settings and a built-in thermostat. You can consistently keep your room at the temperature most comfortable for you.
Vornado products use “vortex action” to spread heat throughout a space. That’s how this relatively small space heater packs enough power to warm a whole room.
We appreciate this safe space heater’s five-year warranty. The Vornado customer service team is based in the United States, so any service needs can be addressed rapidly and without hassle.
The Dr. Infrared DR988 is our pick for safely heating a large room. It has overheat and tip-over protection. It’s cool to touch and UL-certified for safety testing.
In addition to its safety features, the Dr. Infrared DR988 has a number of other useful elements. It operates as a humidifier and a fan in addition to its heating capabilities. It comes with a remote control for convenience. And it has a timer for automatic shut-off.
We like that this space heater has low and high heat settings in addition to eco and sleep modes. Its internal thermostat allows you to precisely choose the temperature you desire.
The DR988 operates quietly. Though it’s large compared to other space heaters, it’s easy to move with rolling casters.
The Mr. Heater F232000 is a propane heater designed for safe indoor and outdoor use. If you choose to use it indoors, ensure your room is ventilated and use a carbon monoxide detector.
Many people prefer to use propane heaters because they heat more efficiently than their electric counterparts. Overall, propane heat is less expensive and burns cleaner, leaving less of an impact on the environment.
We like the heavy-duty grill on the F232000, protecting the heating mechanism. This propane heater will automatically shut off if it detects low oxygen levels, its pilot light goes out, or it tips over.
This Mr. Heater space heater is lightweight and easy to move, with a sturdy handle. It’s an especially good option for construction sites or rustic locations lacking electricity.
The Honeywell UberHeat is an attractive and safe space heater designed for small spaces. This little heater produces a surprising amount of heat for its size.
From a safety perspective, it has solid features, including a cool-touch exterior, automatic overheat shutoff, a tip-over switch, and non-slip rubber feet.
The UberHeat has two heat modes and a programmable thermostat, allowing you to keep your space at the precise temperature of your choice.
This space heater has a simple, modern look that fits well with many decor styles. However, it is a bit noisier than other comparable heaters, so it’s not ideal for bedroom use.
The De’Longhi Mica Thermic Panel Heater is perfect for pet owners. Its slim form can mount to the wall, so you won’t need to worry about your pets knocking it over or brushing against it. If you prefer to use it on the floor, it comes with a rolling stand.
This De’Longhi space heater has a thermal cut-off to prevent overheating and an internal tip-over switch in case its mount becomes unstable. It also has caution indicator lights to notify you of potential safety issues.
With two settings, you can choose the level of heat required in your space. Additionally, this heater has anti-freeze capabilities, which turn on automatically to prevent your pipes from freezing.
Though the De’Longhi Mica puts out a powerful stream of heat, the front doesn’t become too hot to touch (though it does get warm). You can let your fur babies gather around it for a nap to warm up on cold days without any safety concerns.
27” x 10” x 22” inches (thinner with casters removed for wall mount)
Type
Electric, radiant
Price
$195
Safest space heaters for a baby’s room
Maintaining a safe temperature in your baby’s room is important. Babies can’t effectively regulate their body temperatures, and overheating is linked to sudden infant death syndrome (SIDS).
Experts say the ideal temperature for a baby’s room is between 68℉ and 72℉. If you can’t maintain that temperature in your home, consult your pediatrician for advice on the best safe space heater for your baby’s room.
The bottom line on space heater safety
Before investing in a space heater, make sure it has safety features such as overheat protection and a tip-over switch.
Always follow the directions and refer to any safety notices or warning labels on the heater itself.
With proper usage, any high-quality space heater should safely heat your space throughout the winter.
President Joe Biden signed the Inflation Reduction Act of 2022 (IRA) into law on August 16. The IRA aims to alleviate inflation by lowering prescription drug prices, reducing the deficit, and halting global warming.
The largest ever federal legislation addressing climate change, the IRA invests $369 billion in clean energy sources and technologies that improve energy efficiency. Part of this includes offering significant rebates and tax incentives to homeowners who purchase heat pumps.
In fact, many Americans will be eligible for a free heat pump to cool and heat their home in 2023. Wondering if you qualify? Click here to skip ahead!
I’m ready for my new heat pump!
Connect with a pro
What’s a heat pump?
A heat pump is an appliance that warms and cools your home. It’s a more energy-efficient alternative to a furnace and AC compressor.
In the warmer months, a heat pump pulls heat from the inside of your home and moves it outside. In the colder months, it does the opposite, collecting heat from the outdoor air and moving it indoors.
Heat pumps are most popular in the Southern states. In North Carolina and South Carolina, for example, more than 40% of homes have heat pumps.
Older heat pump models could not heat well in frigid temperatures. So, they are generally not as popular in colder areas of the country. But new technologies let modern heat pumps operate effectively in temperatures of -10℉ and below.
Since electricity powers heat pumps, they’ve been slow to catch on in areas with mostly older homes with gas hookups. Generally, gas is less expensive than electricity, so people with access to a gas utility often prefer to use it for their heating needs.
Why heat pumps?
Part of the IFA funds the development of renewable energy sources, including solar, wind, and hydro. Energy made by these means produces no carbon emissions, so it’s considered “clean.”
The government seeks to ultimately move away from energy sources that burn fossil fuels, including gas, towards clean electricity sources. The first step in that direction is for homeowners to upgrade to energy-efficient electric appliances. Next, the IFA will support an infrastructure that eventually swaps out traditional energy for a cleaner variety.
Besides the enhanced energy efficiency, heat pumps have several advantages over traditional heating equipment, like a furnace:
📏 Space savings
Heat pumps do the job of an air conditioner and a furnace, reducing the amount of bulky equipment in and around your home.
💰 Cost savings
An AC and heater combined, you’ll only need to purchase one unit instead of two.
✉️ Lower utility bills
Heat pumps run more efficiently than traditional furnaces. That’s good for the environment and your monthly bills.
💨 Better air quality
Many heat pumps have dehumidifying and air filtering capabilities, improving your home’s air quality while heating or cooling.
🛟 Improved safety
Heat pumps don’t have potential gas leaks or tip-over dangers associated with other types of heaters.
👂 Less noise
Heat pumps run more quietly than a traditional furnace or AC compressor.
One of the biggest benefits is that buying one could net you hefty savings thanks to the IFA.
What is the HEEHRA?
The IFA offers rebates or tax deductions to homeowners that purchase a heat pump.
The High Efficiency Electric Home Rebate Act (HEEHRA) is the official name of the IFA’s heat pump incentive program. It offers point-of-sale rebates on any heat pump for home heating and cooling up to $8,000. “Point-of-sale” means the rebate amount is automatically deducted from the price at the time of sale – no need to send in for a refund.
The HEEHRA rebates are available for low- and moderate-income households. The amount of each rebate depends on your household income and the heat pump you choose.
Inflation Reduction Act heat pump rebate
If your household income is 80% below your area’s median income, you receive the maximum rebate, covering your new heat pump at 100% up to $8,000. If your household income is 81-150% of your area’s median income, you’ll receive up to 50% of the heat pump’s cost.
To look up your area’s median income, use this tool from Fannie Mae.
You’re not out of luck if your household income exceeds 150% of your area’s median income. These homeowners receive a 30% tax credit of up to $2,000 on new heat pumps.
The HEERHA heat pump rebates are significant for low-income homeowners. According to HomeAdvisor, heat pumps cost an average of $5,792. In most cases, low-income households will get a new heat pump for free.
Middle-income households will save an average of $2,896 on a new heat pump. And above-middle-income households will get an average tax credit of $1,737.60.
How to get a heat pump rebate
State governments will execute the HEEHRA rebates. The Department of Energy will likely issue guidelines to the states in late 2022. The heat pump rebates will presumably apply to equipment purchased after January 1, 2023.
The IRA heat pump tax credits will likely also go into effect in 2023. To receive your tax credit, save your receipt and declare it on your tax return. If you can’t wait until 2023, there is currently a lesser $300 tax credit for heat pumps that meet the Consortium for Energy Efficiency (CEE)’s top-tier efficiency standards.
Will a heat pump work in my area?
Heat pumps can work in temperatures below 0℉ and colder. Some manufacturers design special models that perform better in more extreme climates.
However, heat pumps do not perform at their most efficient when the temperature reaches freezing. Many homeowners in cold areas supplement their heat pump with a furnace. Doing this can still reduce energy consumption and net you IRA incentives.
Similarly, your heat pump might not deliver peak cooling performance at temperatures above 100℉. Consider ceiling fans or portable air conditioners to keep comfortable if you live in an area that experiences excessive heat regularly.
Click below to connect with an HVAC professional who can help you choose the right heat pump for your home.
The best time of year for an air conditioner inspection tune-up is in the spring. Your HVAC pro is more likely to catch a small issue before it becomes a major problem when temperatures rise.
Schedule AC maintenance with a local pro
Book now
It’s best to schedule routine HVAC maintenance with a local pro twice a year. In between those visits, however, you can complete DIY AC inspections. Our HVAC Maintenance Guide walks you through a monthly air conditioner inspection checklist.
AC inspection checklist
What is an air conditioning inspection? During your preventative maintenance tune-up, your technician thoroughly inspects your cooling system. All components are examined to ensure they are in good working order.
Then, maintenance is performed to undo the damaging effects of seasonal wear and tear. Cleaning each area, tightening bolts, and lubricating parts can prevent major malfunctions.
This twice-yearly maintenance helps your AC perform at its best. Better performance enhances comfort inside the home with reliable cooling and more consistent temperatures. You’ll benefit from lower energy consumption (which supports lower utility bills!) and an extended lifespan of the system.
What’s on the air conditioner checklist?
Your air conditioner inspection includes the following checks and maintenance tasks:
Refrigerant level testing and adjustment if needed to ensure your system has the proper amount of refrigerant for efficient operation
Blower component testing and adjustment to deliver proper airflow through the cooling system
Thermostat inspection to ensure proper communication with your air conditioner
Electrical connection inspection and tightening to ensure motor voltage and current are correct, and secure electrical connections that improve safety and protect system components from damage
Lubrication of moving parts in the blower motor to reduce friction, lowering electricity consumption
Condensate drain inspection to ensure your drip pan and condensate drain lines are undamaged and draining properly to prevent water damage and excess humidity in the home
System control check to make sure your cooling system safely runs and that the cooling cycle stages are accurate
Homeowner DIY AC inspection
In addition to professional air conditioner maintenance, a homeowner’s air conditioning inspection checklist includes steps you need to take throughout the summer to ensure your air conditioner works at its best.
Check furnace filters monthly. It’s easy for your furnace filter to become clogged with contaminants over the summer, because your system is in frequent use. Take a look at the filter each month to determine if an early change is necessary.
Improve airflow through the home. Inspect all registers. Ensure louvers are set to open. Keep all furniture, rugs, and other household items from blocking the registers to allow proper airflow through your cooling system and home.
Clean your condenser. The outdoor unit is exposed to lawn debris, leaves, twigs, and more. Every time you mow, brush away any buildup that has accumulated. Clear away any vegetation growing against your outdoor air conditioning unit.
Though Labor Day signals the end of summer for many, California weather shows no signs of cooling. Meteorologists expect temperatures to hit triple digits across the state throughout the holiday weekend and into next week.
On Wednesday, temperatures reached 112℉ in the San Fernando Valley and 123℉ in Death Valley. Anaheim sizzled at 106℉, breaking a record for August heat.
The National Weather Service issued an excessive heat watch for coastal areas and an excessive heat warning for inland regions through Wednesday, September 7. This prompted Governor Newsom to declare a State of Emergency in California.
Flex Alert solicits conservation
What’s expected to be a record heat wave will likely cause a surge in power use as Californians turn up their air conditioning for some relief. The California Independent System Operator (ISO), which oversees electric utilities across the state, issued a Flex Alert this week requesting voluntary energy conservation to avoid potential blackouts as the system bears a heavy load.
In an interview with NBC, Elliot Mainzer, president and CEO of the California ISO, said rolling blackouts “are a possibility but not an inevitability” in the days ahead. Still, many fear a repeat of the 2020 heatwave that prompted multiple days of rolling blackouts across the state, impairing businesses and inconveniencing residents.
How to cut back on energy consumption
To help support the Flex Alert and avoid overtaxing the power grid this weekend, consider taking the following measures:
🔥 Avoid using major appliances like your stove, dishwasher, or clothes dryer
🌡️ Keep your thermostat at 78℉
🔌 Unplug electrical devices you’re not using
💨 Use fans instead of your air conditioner if possible (this is one of our favorites)
☀️ Close window treatments to keep the sun out
💡 Turn off lights in rooms you’re not using
Prep for rolling blackouts
Even if you cut back on energy use, it’s a smart idea to prepare for rolling blackouts.
Typically, rolling blackouts last for 1-2 hours. Your electricity provider will likely notify you via text or phone just before the outage.
You can check the status of outages here for Southern California Edison and here for Los Angeles Water and Power. It’s a good idea to bookmark these pages on your phone.
We recommend spending some time preparing for these power outages by doing the following:
📱 Charge your phone, medical devices, and other essential electronics
🔋 Buy a portable charger to make emergency calls if your phone dies
🛍️ Stock up on essentials like ice, water, snacks, and medications; local businesses will likely close
⚡ Unplug appliances to prevent damage from power surges
🎽 Wear lightweight clothing and plan to rest during the hottest hours of the day
🐱 Look out for pets and vulnerable family members
If it simply gets too hot to take, visit a nearby cooling center for relief. Bookmark this map of California cooling centers on your phone.
Do generators work in rolling blackouts?
Generators are an option to keep your power on during rolling blackouts. You can invest in a pricey generator to keep your central AC pumping. Or you may choose a smaller one to power a portable AC and a few appliances (like your fridge, so your food doesn’t go bad!)
If you opt for a smaller generator, we recommend this Generac model. It’s quiet and durable. Plus, it includes USB charging ports for your phone.
To keep your central AC running, we like this heavy-duty DuroMax generator. It rolls for easy movement and packs significant power.
Note that you’ll need to keep fuel on hand (usually propane or gasoline, depending on the generator) to power your generator during a rolling blackout.
Reducing strain on the electrical grid
While these solutions will keep you cool in the short term, it’s evident that more sustainable solutions are necessary for the future.
As Governor Newsom stated on Wednesday, “All of us have been trying to outrun Mother Nature, but it’s pretty clear Mother Nature has outrun us. The reality is we’re living in an era of extremes: extreme heat, extreme drought – and with the flooding we’re experiencing around the globe.”
Several studies recently underscored this sentiment, suggesting that global warming has caused record-breaking nighttime temperatures and the development of an extreme heat belt in the central U.S.
Solar AC and other green air conditioning technologies will be imperative to staying healthy and comfortable while caring for the Earth. Consider these or other more energy-efficient AC options if you’re in the market for a new air conditioner.
Small window AC units are ideal for renters with compact rooms. They allow you to cool off without making a major investment in your living space.
Below, we’re sharing our top picks for small window ACs. Whether value or energy efficiency is your priority, we’ve got the ideal unit for you.
Note: These small window ACs are for traditional double-hung windows that slide up and down. If you have casement windows or left-to-right sliding windows, check out our article on the best casement window air conditioners.
Before you start shopping for a small window AC, you need to know what size AC you’ll need.
Physical size
First, check the size of your window. Measure the width and height of the opening within the window frame. Don’t purchase a unit that exceeds these dimensions. Most ACs list the maximum window size on the box.
It doesn’t matter if the unit is smaller than the width of your window. Most window air conditioners come with kits to seal off the extra space.
Cooling capacity
British Thermal Units (BTU) is the measure for air conditioner capacity. The Environmental Protection Agency recommends at least 20 BTU for every one square foot of living space.
To determine the BTU you’ll need to cool your space, multiply your square footage by 20. For example, if your room is 150 square feet, you need a small window AC unit with at least 3,000 BTU.
Square footage
Recommended minimum BTU
100
2,000
150
3,000
200
4,000
300
6,000
400
8,000
600
12,000
800
16,000
Electrical voltage
Ensure the small window AC unit you choose runs on standard residential circuits (between 115 and 125 volts). Most ACs with cooling capacities of 15,000 BTUs and below will operate on a standard circuit. But if you need a more powerful system, check the voltage requirements.
The best small window ACs
Check out our top picks for small window ACs below. We’ve included specifications for the lowest BTU model version of each.
SEER stands for Seasonal Energy Efficiency Rating. The higher the SEER, the more energy-efficient the air conditioner. Decibels refers to the noise level. The higher the number, the louder the unit.
Best overall small window AC
The Midea Easy Cool fits in windows 23-36 inches wide and at least 13 inches high. It has adjustable accordion panels on both sides to seal extra space.
Installation is simple. The unit comes with all the equipment you need for mounting, except a screwdriver. (If you don’t already have one, we recommend this set.)
We like the Midea Easy Cool because it’s affordable (under $200 for lower BTU models) and effective. The controls are simple to understand, and the system operates fairly quietly.
With a reusable, easy to clean filter, you’ll save money and keep disposable filters out of the landfill. Plus, you’ll improve the air quality of your room.
The Midea Easy Cool is available on Amazon in 5,000-, 6,000-, 8,000-, 10,000-, and 12,000-BTU models.
The Frigidaire FFRA is the least expensive of our small window AC picks. It provides solid efficiency at an affordable price point.
We appreciate the Frigidaire FFRA’s extra-long electrical cord and straightforward control panel.
This air conditioner is intended for windows 23-36 inches wide and at least 13.25 inches high. It comes with a mounting kit and adjustable side panels to seal extra window space.
The Frigidaire FFRA is the most lightweight of the ACs we reviewed, at just 35 lbs. That’s less than half the weight of some of the other window ACs on our list. If you’re concerned about heavy lifting, this is the AC for you.
This Frigidaire window AC is available on Amazon in 5,000-, 6,000-, 8,000-, 10,000-, 12,000-, and 15,100-BTU models.
The Soleus Air Exclusive fits over your window sill. So, unlike the other models on our list, it doesn’t block your view. And it allows you to continue to open and close your window if and when you need to.
Since the compressor piece of this AC sits outdoors, it’s whisper quiet. Plus, it’s simple to install right out of the box, requiring no tools or mounting equipment. However, it weighs 80 lbs., so you may need a friend to help lift it into place.
The Soleus Air Exclusive has many premium features like an automatic temperature sensor and voice control via Alexa and Google Assistant. You can control this small window AC from your phone using the SoleusAir app. These conveniences come at a cost – the Soleus Air Exclusive is more than double the price of some of the other picks on our list.
The one bummer about this unit is that you have to empty its water reservoir regularly to keep it running.
The Soleus Air Exclusive fits windows 24-48 inches wide. It will mount on window sills up to 11 inches wide. Though it doesn’t sit in the window, it requires an opening of at least 16 inches tall for installation.
The Midea U Inverter air conditioner is ultra-quiet because, like the Soleus Air Exclusive, the condenser portion of the unit sits outside the window. However, this U-shaped model mounts within the window rather than on the sill. Its unique form allows you to continue to open and close your window as needed.
This small window AC is the most powerful of those we reviewed, making it ideal for open concept spaces like a studio apartment. It’s also the most energy-efficient. In fact, it won the Energy Star “Most Efficient” certification in 2022.
You can control this Midea AC from your phone using the MideaAir app. It’s also compatible with Alexa and Google Assistant for voice commands.
The Midea U Inverter fits windows 22-36 inches wide and at least 13.75 high. It comes with a window bracket for mounting and remote control. You’ll need a screwdriver, level, and measuring tape to install it.
This small window AC comes in 8,000-, 10,000-, and 12,000-BTU models.
This LG window air conditioner is the top-selling small window AC on Amazon. It’s highly rated by customers and often goes on sale, making its low price even more attractive.
This small window AC fits windows 21-25 inches wide. It requires a height clearance of 12 inches. It’s the smallest of all the small ACs on our list.
We like that LG offers a line with many options. For example, you can choose a less expensive unit with a knob to control the temperature if you just want something simple. Or you can pay a little bit more for digital controls.
We also appreciate that this AC comes with an installation kit that helps you lift this 40 lb. system into the window.
Amazon sells 5,000-, 6,000-, 8,000-, 10,000-, 12,000-, 18,000-, and 25,000-BTU models of this LG window AC.
Small window ACs are an inexpensive way to make your place more comfortable. And many are quite energy-efficient so they won’t boost your electric bill significantly.
Even though they’re affordable, they’re effective. Window ACs can quickly cool a room.
Plus, you don’t have to sacrifice your view with some of the ACs on our list. Over-the-sill and U-shaped models let you continue to open and close your window as needed.
If your place has small windows, you can still enjoy all the benefits of a window AC with one of the models on our top small window AC list!
If you need to cool a space that has casement windows, this list is for you! Our vetted list of best casement window air conditioners will bring a breeze of fresh air.
Many reputable brands manufacture casement window air conditioners designed especially for hinged windows. In general, these specialized ACs stand vertically (as opposed to traditional window ACs that are horizontal in design).
What is a casement window?
A casement window opens to the right or left via a hinge, similar to a door. They are occasionally called crank windows, because you must turn a handle that cranks the window open.
Casement window ACs usually come equipped with a window air conditioner installation kit that enables mounting. Traditional window ACs use the window sash for stability. Since casement windows don’t have a sash, they require a more involved installation process.
Following, we’ll share our top casement window air conditioner picks. After that, we’ll detail the steps for installation.
Before you start shopping for a casement window air conditioner, calculate what size you need. ACs use the measurement British Thermal Units (BTUs) to signify a unit’s power.
A good rule of thumb is to multiply the square footage of your space by 20 to determine how many BTUs your AC requires. For example, a 400-square-foot room needs an AC with at least 8,000 BTUs to cool it.
Space size
Size AC required
Up to 250 square feet
5,000 BTU casement window air conditioner
Up to 400 square feet
8,000 BTU casement window air conditioner
Up to 500 square feet
10,000 BTU casement window air conditioner
Up to 600 square feet
12,000 BTU casement window air conditioner
Up to 700 square feet
14,000 BTU casement window air conditioner
Many of our top picks come with varied options for BTU. Make sure you select the correct BTU output when you place your order.
Best overall casement window air conditioner
Frigidaire FFRS line
The Frigidaire FFRS casement window AC is not only our favorite but the most affordable of our picks. We love that it has adjustable side panels so you can make it fit your window perfectly.
It operates quietly at 48.4 decibels – about the volume of a soft conversation in a library. And you can control it via remote. So, this window AC is perfect for literally chilling out at home!
We also like the cooling options the Frigidaire FFRS line offers. You can use its 24-hour timer and sleep mode to automatically change the temperature. These features also help conserve energy.
The washable air filter is another plus. You can maintain healthy air quality and save money on filter replacements.
This Frigidaire casement window air conditioner is available on Amazon in 6,000-, 8,000-, 25,000-, and 28,000-BTU models. It’s ideal for both small and large spaces.
Keystone’s casement window air conditioner weights about half of the other models on our list at 34 lbs. If you’ll be installing the AC yourself or have concerns about your window supporting 70-ish pounds, this model is for you.
We like that this Keystone allows you to control the airflow direction for ultimate comfort. Additionally, it has three fan speeds plus dehumidifier and sleep settings. Its dust filter is helpful for allergy sufferers.
This model only comes in a 10,000 BTU version. So, if your room is significantly larger or smaller than 500 square feet, the Keystone casement window air conditioner won’t work for you.
The Koldfront CAC line of air conditioners comes with an impressive array of features to enhance your comfort. We appreciate the built-in dehumidifier and three fan modes for the perfect breeze.
Though many casement ACs require you to purchase a separate window air conditioner installation kit, the Koldfront CAC has everything you need. This includes a weatherproof cover to seal any open portions of your window.
Koldfront’s CAC models are decently energy-efficient. They feature a digital temperature display and remote control. We think this is a solid AC, but many users report it runs louder than expected.
The Koldfront CAC line is available on Amazon in 8,000- and 10,000-BTU models, ideal for spaces between 250 and 500 square feet.
Perfectaire offers many window AC options, but this is its sole model designed specifically for casement windows. It’s only available in a 10,000 BTU version.
What we like best about this system is its Seasonal Energy Efficiency (SEER) rating of 13, higher than the other casement window air conditioners on our list. Its Eco Mode automatically turns the AC on when the temperature exceeds your set limit.
If you live in an extremely hot climate (e.g., the Arizona desert), the Perfectaire PASC may not be powerful enough to cool your space. In more temperate regions, it will get the job done.
This is not the quietest window AC we’ve reviewed, so choose another option if you’re cooling your bedroom.
If having to lift and install a casement window air conditioner seems like too much work for you, there’s another option: purchase a portable air conditioner and a venting kit for vertical windows (this one’s our favorite).
Most portable ACs come pre-assembled and easily roll into place right out of the box. Window venting kits are simple to install and customize for your window size. This solution obscures less of your window and is more aesthetically pleasing from the outside of your home.
Note that except for the Keystone AC we reviewed above, most casement window air conditioners weigh about 70 lbs. You’ll probably need to enlist the help of a friend to lift your AC into your window.
If your unit doesn’t come with a window air conditioner installation kit, make sure you purchase one separately. These typically include a mounting bracket and window seals.
Review the instructions before you get started. Gather all the necessary tools beforehand, which may include a screwdriver, measuring tape, and a ladder.
Step 1: Install a support
Seventy pounds is a lot of weight for your window sill to carry. A bracketed mount will help distribute the load.
Follow the instructions for your support bracket. It will screw into the side of your home. You may have to set up a ladder outdoors if you can’t reach from inside the window.
If your crank mechanism or hinge is in the way, take it apart and remove it. Put it somewhere safe to reinstall it once the weather cools down, and you want to take the AC out.
Step 2 : Position the AC
Once the support is ready, lift the air conditioner into place, resting it on the bracketed mount. Make sure the AC is flush with the window frame.
Close the window on the other side of the AC as far as you can. If you have a sliding window, position the window sash in the slot for it on the side of the AC.
Step 3: Seal the window
Follow the directions on your window AC installation kit to cover the gaps left in your window. The panels used to do this usually match the color of the AC unit.
Alternatively, visit a hardware store and have a piece of plexiglass cut to size. This will fit above the casement window air conditioner, so you keep some visibility from the top of your window.
Though installing a casement window air conditioner is generally a DIY job, you can pay an HVAC expert to help set you up. The job should be fairly inexpensive compared to the cost of installing a central AC.
Help me install my new air conditioner!
Get a quote
The bottom line on casement window air conditioners
Casement window air conditioners can help you cool rooms with narrow windows, whether they crank open or slide. Using our chart above, choose one with the right BTU for your square footage.
There are some effective and affordable casement window air conditioning units on Amazon. Our favorites have good energy efficiency and run quietly.
Casement window AC installation is something you can do yourself if you choose a smaller device. For units that way around 70 pounds, we recommend you ask a friend to help you lift the unit into your window.
Turns out “Endless Summer Nights” is more than just a catchy ‘80s pop ballad. The National Oceanic and Atmospheric Administration (NOAA) recently reported that nighttime temperatures reached an all-time high in July.
These warmer nights aren’t just a temporary summer thing. The NOAA says the overnight low in the U.S. has increased an average of 2.1℉ over the last 30 years. And these rising temps show no sign of stopping.
Hotter nighttime temperatures can negatively impact your sleep quality and overall health. Not to mention your utility bill, as your AC works harder to compensate for the warmer nights.
Unprecedented daytime temperatures impact the night
The national average low temperature in July was 63.6℉, the hottest nightly average in the 128 years since NOAA began tracking it.
In an interview with NPR, NOAA Climatologist Karin Gleason explained that overnight temperatures increase faster than daytime temperatures. Because daytime warming makes the air hold moisture, it traps heat at night.
July 2022 was the sixth hottest July on record in the United States. In some cases, Texas, Louisiana, and Arkansas saw record-breaking temperatures of more than 112℉.
This tracks with a recent study by the nonprofit First Street Foundation, which found evidence of an “extreme heat belt” developing from Texas to Illinois. In this region, temperatures will likely reach 125℉ at least once a year by 2053.
Air conditioning’s role in climate change
In both studies, scientists tie the rising temperatures to global warming, provoked by increased greenhouse gas emissions. Most greenhouse gases result from burning fossil fuels for energy.
People naturally rely on their air conditioners to keep them comfortable when the weather heats up. But this causes a paradox, as the energy used to operate an AC contributes to further global warming.
More sustainable ways to keep cool at night
In her NPR interview, Gleason explained, “When you have daytime temperatures that are at or near record high temperatures, and you don’t have that recovery overnight with temperatures cooling off, it does place a lot of stress on plants, on animals, and on humans.”
A study in the Journal of Physiological Anthropology underscores this, concluding that the room’s temperature is one of the most crucial elements for quality sleep. An article in Science Advances proved that people are more likely to experience abnormal sleeping patterns in the summer when it’s more challenging to keep bedrooms adequately cooled.
So, how do we keep cool at night to stay healthy without harming the planet? There are a number of approaches to consider.
Invest in breathable linens
Updating your bedding can go a long way toward keeping you cool at night. These top-selling sheets are breathable, cooling, and certified Climate Pledge Friendly, indicating the facility that makes them has a reduced environmental impact.
This lightweight blanket is made of bamboo and comes in an array of neutral colors.
Bamboo is considered more sustainable than cotton, plus it’s more breathable and absorbent. It gives you the coziness of a blanket without the heat.
Become a fan of fans
Using a fan in tandem with your air conditioner can help it cool more effectively. Plus, it’s more energy efficient than lowering your thermostat.
Check out this article for info on some of our favorite ceiling fans. If you prefer a portable fan, our favorites include this powerful box fan and this sleek tower fan.
Schedule an HVAC checkup
Preventative maintenance can keep your central air conditioner running efficiently. It can also help prevent a breakdown at the hottest time of the year.
If there are zones in your home that are frequently unused, you may want to consider a mini split system when it’s time to replace your air conditioner. These are more efficient than a central AC system, and they allow you to cool individual rooms at custom levels.
Take care of yourself
Stay hydrated! Make sure you’re drinking enough water. Your body cools itself by sweating, so it’s important to replenish with plenty of water. The exact amount of water you need may vary based on your circumstances.
Taking a cold shower or bath before bedtime can help cool your internal temperature. These cooling towels placed on your neck or chest can also work.
The future for air conditioning
As we move towards the future, many HVAC manufacturers are making positive changes to their systems to have less of a negative impact on the environment.
With temperatures on the rise, it’s critical to consider efficiency, longevity, and performance when it comes time to replace your current air conditioner.
Alternative energy sources
Some manufacturers are already building air conditioners that utilize renewable energy sources like solar. Lennox is currently leading the pack with its SunSource line. As the popularity of solar AC grows, we hope more companies will jump on board.
New refrigerants
AC manufacturers are constantly innovating when it comes to refrigerant. Presently, most air conditioners use R-410A, which is significantly better than Freon in terms of the environmental and human health damage it causes. Even if you’re not in the market for a new AC, you can hire a technician to change your refrigerant from Freon to R-410A.
Enhanced efficiency
The efficiency standards for air conditioners are constantly improving. For example, the Department of Energy’s minimum Seasonal Energy Efficiency Rating (SEER) for air conditioners will increase from 14 to 15 in 2023.
Though 14 is the minimum SEER, some systems on the market today have SEERs of up to 28. ACs with high SEERs are usually more expensive, but they will reduce your utility bills and help the environment.
Keep cool, but do it responsibly
Climate change is becoming difficult to ignore, with record-breaking temperatures impacting us all. The need for air conditioning is greater than ever for our health and comfort.
Consider sustainable alternatives like breathable bedding or fans to stay comfortable at night. And when it comes time to replace your existing air conditioner, invest in an efficient system that uses eco-friendly refrigerant and energy sources.
Do you have a stuffy space you need to cool? A small portable air conditioner cools effectively without drastically increasing your energy bill.
In this piece, we’ve done the hard work for you by finding and reviewing the smallest portable air conditioners. Check out our picks and choose the one that best meets your needs.
Some of the units we highlight in this piece are portable air conditioners while others are air coolers.
Air conditioners use a refrigerant or chemical coolant to cool the air. Air coolers use water and ice to do the same.
Air conditioners require ventilation to run. They collect hot air and move it outdoors. Air coolers circulate the air in the room.
Air conditioners are generally more powerful and can cool a larger space. Air coolers use less power. They can even run on batteries.
Choosing the best small portable air conditioner
Weigh the following factors when picking the best small portable air conditioner for your space:
📏 Size
Check the dimensions to ensure the AC fits your space. And consider the weight if you’ll be moving it frequently.
💨 Output
Traditional air conditioners measure their output in BTUs. Check out our piece on AC size to learn how many BTUs you need. Other coolers will likely indicate how much square footage they’re intended to cool.
🔌 Power source
Some portable ACs and coolers plug into a standard electrical outlet. Others run on batteries. Some may take a charge. Consider how you’re planning to use your unit and choose accordingly.
🪟 Ventilation
Traditional air conditioners require window ventilation. Chillers do not. If you aren’t permitted to block your window (or just prefer not to), a chiller is for you.
💰 Cost
Prices vary widely. One of the units we’ve reviewed below costs about $20, while another is around $600. Budget is an important consideration when choosing a small portable AC unit.
Small portable air conditioner reviews
Smallest portable air conditioner on the market
The Arctos Portable Air Conditioner Fan is the smallest portable air conditioner we’ve reviewed. It’s diminutive at about 6.5 inches wide and 9 inches high.
This system isn’t technically an AC – it’s an air chiller. That means you must fill it with ice and water before each use.
We like that this chiller runs quietly and has a calming, pleasant LED light. It’s battery-powered, so you can put it anywhere independent of outlet placement.
Best small portable air conditioner for apartments
The BLACK + DECKER portable air conditioner is one of our favorites. It comes in 7,500-, 8,500-, 10,000-, 12,000-, 12,500-, and 14,000-BTU models, so you can choose the one that best fills your space. Some models provide heating in addition to cooling. The 14,000-BTU model is one of the highest BTU portable air conditioners.
We love that this small portable air conditioner comes on wheels, allowing you to easily move it from room to room. It also comes with an easy-to-install window venting kit.
This BLACK + DECKER system works to dehumidify your space. You can use it as a fan if you don’t need full AC cooling.
The BLACK + DECKER portable AC features a remote control that acts as a thermostat. It has three fan speeds, sleep mode, and a 24-hour timer.
Most college dormitories won’t allow you to install a window air conditioner or a portable AC that requires ventilation. We think this AOLOS evaporative cooler is a better bet.
First, it’s just over $100, perfect for a student’s budget. It’s about 14 lbs., so you’ll have no problem carrying it upstairs. It’s slim and compact, fitting in the smallest dorm room.
The ice cartridges used in this system need to be re-frozen frequently. So, only purchase this unit if you have a mini-fridge or access to a communal fridge.
Without ice, the AOLOS cooler works as a fan, circulating air in your room. It comes with a remote control for convenience. And it’s mounted on wheels, so you can easily wheel it down the hall to share some cool air with friends!
Best small portable air conditioner for your office
The Evapolar evaCHILL is a small portable air cooler that fits on your desk. It’s perfect for an office environment because it’s quiet and discrete.
While many small air coolers like this require ice to function, the evaCHILL only needs water. If you don’t have access to a freezer at your workplace, this system is ideal.
This Evapolar chiller plugs into a USB. No awkward cords cluttering your workspace – you can plug this into your laptop.
The evaCHILL won’t cool a large space. But it’s effective for cooling you while you’re sitting at your desk. And it looks cute doing it!
We don’t recommend using a portable air conditioner in your car. Traditional models are too big and require more power than your car can provide. Coolers need water and ice, which can easily spill in your car.
If you need to supplement your car’s existing AC, we suggest the Xool dashboard fan. It mounts to your dash and plugs into your car’s cigarette lighter. (If your car doesn’t have a cigarette lighter, you can use this adapter.)
The Xool dashboard fan doesn’t provide cooling. It’s just a fan that will help circulate air in your car.
The company also makes a backseat model that clips onto the front headrests. This is ideal for cars that only have AC vents up front. Especially if you have kids or pets who frequently ride with you.
If you’re looking specifically for an RV air conditioner, check out our reviews of the best air conditioners for RVs.
The Frigidaire FGPC1044U1 is a compact AC that packs a powerful punch. Its streamlined design is modern and attractive.
We appreciate the 360° airflow that reaches all corners of your room. In addition to its sleek control panel, you can adjust this AC’s settings via the Frigidaire app on your phone from anywhere.
The Frigidaire FGPC1044U1 is ENERGY STAR certified for efficiency. It has filtration capabilities to improve air quality as well.
Though this AC is considered small and portable, it’s heavy. It weighs 80 lbs., so you may need to enlist the help of a friend to move it into place in your home.
Not sure if you need a portable or window AC? There are benefits and drawbacks to both. Choosing the right one depends on your space and cooling needs.
Both types of AC work well for renters and dorm dwellers since you can take them with you when you move out. They’re a relatively inexpensive investment that can make a big improvement in your space.
If you think a window air conditioner better meets your needs, check out our reviews of small window ACs.
The final word on small portable AC units
There are many options when purchasing an air conditioner. Do your homework and choose the best unit for your personal needs.
Window AC
Pros
Cons
Doesn’t take up valuable floor space
Blocks the view from your window
Comparably inexpensive
Heavy to lift into place
U-shaped and over-the-sill models run quietly
Can be challenging to install and remove
Portable AC
Pros
Cons
Little to no installation required
Takes up floor space
Can easily move to other rooms or spaces
Generally more expensive than alternatives
Air cooler models don’t require venting; some don’t need electricity either
Air cooler models need ice cartridges re-frozen daily
If you’re considering a whole-home system, reach out to our HVAC experts by clicking below.
How to choose the best air purifier for large rooms
There are several factors to consider when determining which is the best air purifier for your large room.
📦 Coverage
First, make sure the air purifier is intended for use in a large room. Most air purifiers note the square footage they cover on their box or website. Read our piece on air purifier coverage for more information.
📏 Size
Where do you plan to place your air purifier? On the floor in a corner? On the counter? Check that the dimensions (including the weight) of the air filter meet the requirements of your space.
👂 Noise level
Depending on where you want to use your air purifier, its noise level is important. Sound is measured in decibels (dB). We consider air purifiers below 50 dB quiet.
⛔ Filtration type
We think the best air purifiers use three types of filtration. True HEPA filters remove the most allergens and impurities from the air. “Pre-filters” catch large particles. And a carbon filter removes smoke, odors, and gasses.
💨 CADR
CADR stands for clean air delivery rate. It signifies how quickly an air purifier can remove contaminants from the air. The higher the CADR, the faster the system.
Some air purifiers have additional features that may impact your purchasing decision. These may include:
Traditional remote control
WiFi remote control via app
Variable fan speeds
Wheels for easy moving
Air quality indicator
ENERGY STAR certification
The best large room air purifiers
Best overall air purifier for a large room
The Levoit Core 400S is an affordable large room air purifier (up to 1,005 square feet) that delivers solid performance. It traps 99.7% of airborne particles, completely cleaning the air in your room at least twice per hour.
This Levoit air purifier is whisper-quiet. It’s modern-looking and energy-efficient with three levels of filtration. It has multiple fan speeds and a sleep mode.
The Levoit Core 400S is WiFi-enabled. So, you can control the air purifier via the Versync app, which includes insights into air quality levels, system usage, and filter life. It’s also compatible with tools like Amazon Alexa for voice commands.
Levoit is a U.S.-based woman-owned company offering discounts for teachers, first responders, medical personnel, and veterans.
The Honeywell HPA300 is a powerful air purifier in a compact package. It’s affordably priced and easy to lift.
This large room air purifier uses a HEPA filter and a pre-filter to remove large and microscopic airborne particles, including dust, pollen, and pet dander. It has four cleaning speeds, but the HPA300 is noisier than most competitors when operating at high and turbo speeds.
This Honeywell air purifier is ENERGY STAR certified. It’s durable and long-lasting with easily replaceable filters.
We like the intuitive buttons to change settings. Its timer options and dimmer settings are also helpful.
The IQAir HealthPro is our favorite medical-grade large room air purifier. It uses a “HyperHEPA” filter that it claims is more effective at capturing ultrafine particles smaller than 0.1 microns, including viruses.
We like that this system comes with a remote control and offers programmable schedule options. It monitors filter life and notifies you with a light when it needs a change.
The IQAir HealthPro has a quiet, resilient fan motor that uses minimal electricity. You can adjust its speed depending on your preferences. This large room air filter delivers clean air from almost all directions (320°).
One of the unique features of the IQAir HealthPro is its 10-year warranty. Though it’s more expensive than alternative options, this lengthy guarantee may be worth the expense if you have severe allergies, COPD, or other long-term health issues.
The Blueair Blue Pure 211+ is one of the most beautifully-designed large room air purifiers we’ve seen. Its sleek form blends into any interior.
This system has a streamlined one-button control, making it extremely easy to use. Its prefilters come in multiple colors, so you can customize this air purifier to match your decor.
We like that the Blue Pure 211+’s filters are reusable. You can wash them in your sink or dishwasher. We also appreciate that it’s energy-efficient.
This Blueair air purifier is quieter than a whisper on its lowest setting. It efficiently cleans the air with three-phase filtration at 360°, so it easily reaches all the air in your large room.
The Conway Airmega 400 has an impressive range of smart technology features. For example, it can sense when a room goes dark and automatically put itself in sleep mode.
This large room air purifier can turn itself on when it detects impurities in the air, and then turn itself off once it’s done cleaning. It has a timer feature and a light that displays the air quality level, so you can watch as it improves.
The Conway Airmega 400 uses three-stage filtration, including a true HEPA filter. The company says it captures 99.99% of particles down to 0.01 microns.
The WiFi-enabled version of this purifier works with the Airmega IoCare app, where you can set schedules, control the unit remotely, and monitor indoor and outdoor air quality. The Airmega is compatible with Amazon Alexa for voice commands. It can even order its own filter replacements!
Our picks for the best air purifier for large rooms are: 1. Levoit Core 400S 2. Conway Airmega 400 3. Blueair Blue Pure 211+
4. IQAir HealthPro
5. RabbitAir MinusA2
6. Honeywell HPA300
Do air purifiers kill COVID?
Though many air purifier manufacturers claim their products help prevent COVID, the Environmental Protection Agency says air purifiers alone do not protect against COVID.
If your mini split is acting strange, give these instructions a try. Your unit may just need a good dusting or a fresh air filter. These DIY Carrier mini split troubleshooting tips may save you the hassle and expense of a service visit.
Carrier mini split is inconsistently running
This problem may signal poor communication between the indoor unit and the outdoor compressor.
Try resetting the mini split by turning the power off and on. If this doesn’t help, you may need an HVAC technician to examine the wiring between the indoor and outdoor components.
Carrier mini split’s outdoor unit turns on, but indoor unit does not
Does the indoor unit have power? Check your electrical box to ensure a breaker didn’t trip or a fuse blow. Make sure the switch it’s connected to is on. If that doesn’t do the trick, consult a technician.
Alternatively, a jammed condenser coil may cause this to happen. An HVAC contractor should handle that repair.
Carrier mini split cannot maintain temperature
Make sure the indoor components are clean. Your sensors may not be able to read the temperature correctly. Open the cabinet and dust the inside with canned air or a soft rag. Change your air filters if it’s time to do so.
Several factors can cause this issue – from a refrigerant leak to a clogged drain line. Consult a technician if dusting and freshening the filter don’t solve the problem.
Carrier mini split is making loud or unusual noises
A rattling sound may indicate something is loose and needs tightening. Check your units for loose bolts and screws.
Other noises like buzzing, screeching, or hissing require the attention of a professional. If the noise isn’t consistent, record it on your phone to play for your tech.
Carrier mini split troubleshooting: model lookup
Carrier’s website and the manual that came with your system feature additional Carrier mini split troubleshooting information related to your specific model.
We’ve linked to the product documentation for Carrier’s mini split line below.
Contact an HVAC technician when you’ve tried the Carrier mini split troubleshooting tips above and still can’t solve the problem. And if you prefer a pro to handle the troubleshooting, that’s fine too!
Click the button below to connect with an HVAC tech who can get your mini-split working in no time!
A heat pump does the job of a heater and an air conditioner. Since it’s working most of the year, you may find yourself troubleshooting your heat pump more frequently.
Give these Carrier heat pump troubleshooting tips a try before calling a professional for service. They may save you some time and money.
Carrier heat pump is not heating or cooling
There are several things to check before calling a technician:
🌡️Is the thermostat set correctly?
🧼Is the thermostat dirty? (Dust inside with canned air or a soft cloth.)
🔌Are all components receiving power? (Check the circuit breaker, fuses, switches, etc.)
🪟Is the air filter dirty? (Change it.)
💦Is a duct leaking? (If you can’t access your ducts to check, professionals have special equipment that can.)
❄️Is your compressor frozen, dirty, or blocked by debris? (Clear away debris. Run a defrost cycle if you have that capability.)
If none of these actions remedy the situation, call an HVAC pro for service.
Carrier heat pump making loud or unusual noises
Clicking or rattling noises in the outdoor compressor could be loose screws or debris. If you’re comfortable doing so, turn the power off to the unit and remove the cabinet cover. Check that the screws inside are tight. Clear out any leaves, sticks, or other debris.
Hissing sounds in the home may be a duct leak. If you can access your ducts, identify the leak and seal it with duct tape.
If you hear whistling inside, it might be time to change your air filter.
Contact a trusted HVAC contractor if you’re not confident doing these tasks yourself. Have a pro look into other noises like squealing or rattling. It’s likely a more serious issue.
Carrier heat pump is irregularly turning on and off
Change your air filter. If this doesn’t fix the problem, it could be an installation error or leaky refrigerant. Call a pro to take a look.
Carrier heat pump is leaking moisture
It’s normal for your outdoor compressor to create some condensation. Most Carrier heat pumps have a drain pan to collect this. If debris or mold clogs the drain, you may find moisture around the unit.
The drain pan is under your heat pump. Turn off the power to your heat pump before you attempt to examine it.
If there’s excess water in the drain pan, soak it up with an old towel or a shop vac. Then clean the pan with a rag, soap, and water.
Potential clogs in the drain tube should be cleared by a professional.
Carrier heat pump troubleshooting: model lookup
For additional Carrier troubleshooting information related to your specific heat pump model, check out Carrier’s website or your owner’s manual.
We’ve provided links to Carrier’s current heat pump line documentation to get you started.
Call an HVAC technician when you’ve tried the Carrier heat pump troubleshooting tips above and still can’t solve the problem. It may be a common heat pump problem simply fixed by a pro.
And if you’re uncomfortable performing any of the troubleshooting tasks, an HVAC tech can help you pinpoint the issue.
If your thermostat isn’t working properly, try these Carrier thermostat troubleshooting tricks. They may save you the trouble and expense of calling a pro for help.
Carrier thermostat won’t turn on
If your thermostat has a blank screen, it’s likely due to a power issue. Check your electrical box and reset the circuit breaker. If you have a fuse box and the fuse has blown, replace it.
Check the switches connected to your thermostat, furnace, and air conditioner. If you can pinpoint the issue to a switch, you’ll need an electrician (not an HVAC technician) for repair.
If your thermostat takes batteries, replace them.
Room temperature doesn’t match Carrier thermostat setting
Your thermostat may be dirty inside. A dirty thermostat can’t accurately read the room temperature.
Remove the cover and dust inside with a soft cloth or canned air.
Carrier Infinity thermostat can’t connect to indoor or outdoor units
If your Carrier Infinity thermostat displays “Indoor Unit Not Found,” recheck the wiring to the ABCD connector. Make sure the colors match at every terminal. Press the button on the left side and try to connect again.
If that doesn’t work, disconnect everything from the ABCD connector. Add devices one at a time to determine if the issue exists with a certain device or terminal.
If the display reads, “Outdoor Unit Not Found,” recheck the wiring between the ABCD connector and the outdoor unit. Make sure the colors match at every terminal. You may need to enlist an HVAC technician to check for correct voltage between the terminals.
Carrier thermostat troubleshooting: model lookup
For more Carrier thermostat troubleshooting information related to your specific model, check out Carrier’s website or the owner’s manual for your system.
Below are links to the product documentation for Carrier’s current thermostat lineup to get you started.
Consult an HVAC pro when you’ve tried the Carrier thermostat troubleshooting tips above and still can’t solve the problem. Or, if you’re unsure how to complete some of the steps, a certified technician can handle it for you.
Click the button below to get in touch with a local HVAC professional who can help.
If your Carrier furnace is giving you trouble, fixing the problem may be as simple as updating your thermostat settings. Or you may need a hand from a local HVAC pro. Before you pay a service fee, give these Carrier furnace troubleshooting tips a try.
Carrier furnace is not heating or not blowing hot air
Check the air filter; it may be dirty. It’s time to change your filter if it’s gray with a dusty buildup.
Dirty filters are the most common cause of furnace cycling issues. Per the instructions above, replace your furnace filter if it’s dirty.
Next, check your thermostat. Turn it off and restart it. Try changing the batteries if it takes them.
Finally, make sure your windows and doors are properly sealed and not leaking air. The Department of Energy has good information on how to detect air leaks.
Carrier furnace is starting and stopping
Set the thermostat to “heat” and either “on” or “auto.” See if the air filter is clean. You may need to replace it with a fresh one.
If the furnace is still not working correctly, make sure all the vents in your home are open and unobstructed.
Carrier furnace is leaking water
In most cases, furnaces leak water because of a clogged condensation drain. This (and any other furnace water leak causes) is best repaired by a professional.
When you notice water leaking from your furnace, turn off the heat via the thermostat. Then turn off the power switch and electrical breaker connected to the furnace. Water plus electricity is a dangerous combination. If you have a gas furnace, turn off the gas line.
Mop up the excess water to avoid water damage and call a certified HVAC technician for repair.
Carrier furnace troubleshooting codes
Your system may be able to help you diagnose the problem when you’re Carrier furnace troubleshooting. Some standard Carrier furnace error codes follow.
Carrier furnace error code
What it means
Blinking yellow 3
Stuck in high fire mode
Blinking green 4
Stuck in low fire mode
11
No faults in recent history
12
Blower calibration lockout
13
Limit switch lockout
14
Ignition lockout
21
Invalid model selection
22
Setup error
23
Invalid blower airflow selection
24
Secondary voltage fuse is open
31
High-pressure switch fault
32
Low-pressure switch fault
33
Limit switch fault
34
Ignition proving fault
41
Blower outside valid speed range
42
Inducer outside valid speed range
43
Pressure switch calibration fault
44
Blower calibration fault
Check the error code so you know what to expect before calling a professional for service.
Carrier furnace troubleshooting: model lookup
For additional Carrier furnace troubleshooting information related to your specific model, check out Carrier’s website or the manual that came with your system.
We’ve provided links to the product documentation for Carrier’s current furnace lineup to get you started.
Mini split HVAC systems are growing in popularity. Common in Europe, they’re starting to catch on in the United States.
Mini splits are an affordable heating and cooling solution for older homes built without ducts. They can also supplement existing systems that leave certain rooms colder or warmer than desired. Plus, they’re more attractive than eyesore window units.
This guide will help you decide if a Carrier mini split system is right for you.
What to know before shopping for a mini split
Before you read our Carrier mini split reviews, there are a few important things to understand. These elements will help you choose the ideal mini split for your home.
Unit type: Mini splits consist of an outdoor unit (usually a heat pump or AC compressor) and at least one indoor cabinet. They are connected via electrical wires and tubing.
When you purchase a mini split from Carrier, you can choose your outdoor unit and indoor cabinets separately. Some dealers may offer packages.
If you need more than one indoor cabinet, it’s called a multi-zone system. Only certain outdoor units can support multi-zone systems.
Generally, mini-splits with a heat pump support both heating and cooling. Mini-splits with an AC compressor only provide air conditioning.
SEER: SEER stands for Seasonal Energy Efficiency Ratio. It’s how the energy efficiency of air conditioners is measured. The higher the number, the more efficient.
Modern air conditioners must have a minimum SEER of 13. The top SEER is 26.
HSPF:HSPF stands for Heating Seasonal Performance Factor. It measures the energy efficiency of heat pumps.
The higher the HSPF, the more efficient. For a heat pump to be ENERGY STAR certified, it must have an HSPF of 8.2.
Sound level: Noise is measured in decibels. A unit that runs at 50-60 decibels is considered quiet. 80 decibels is about as loud as a garbage disposal. 40 decibels is the noise level of a library.
Need help choosing a mini split?
Connect with an HVAC expert now
Carrier mini split models
Carrier is a well-known HVAC brand that makes three tiers of mini split systems.
Carrier Infinity mini splits
Infinity is the premium line of Carrier mini splits. They’re ultra-quiet, and they incorporate cutting-edge technology.
Infinity mini splits are the most energy-efficient of Carrier’s offerings. They’re also the most expensive.
In general, ductless mini splits cost between $875 to $6,000 (including installation), according to HomeAdvisor. Mini splits with a heat pump cost more than those that only offer air conditioning. Single-zone systems are less expensive than multi-zone systems.
Carrier’s mini split prices fall within the middle to high end. Prices vary based on your location and the dealer you work with. Estimated Carrier mini split prices follow for a single-zone system follow.
Carrier Infinity
~$3,600
Carrier Performance
~$3,000
Carrier Comfort
~$2,600
Tell me more about Carrier mini splits!
Get a quote
Carrier mini split pros and cons
As with any purchase, there are benefits and drawbacks to buying a Carrier mini split. Consider these points along with information from our Carrier mini split reviews.
Carrier mini split pros
Cost-effective way to heat or cool a space without air ducts.
More energy-efficient than ducted systems.
Simple installation compared to ducted systems.
Easily zoned, so different rooms can be kept at different temperatures.
Can supplement existing systems that don’t heat or cool evenly.
Carrier brand name is well-known and respected.
Carrier mini split cons
If not installed correctly, there may be leaks that waste energy.
Some people don’t like the look – they’re more noticeable than air registers.
There may be a learning curve for people used to ducted heat and air.
High price compared to alternative solutions like window units.
Carrier vs. competitors
Wondering about Carrier mini split reviews? Here’s how they measure up against the competition.
Mitsubishi vs. Carrier
Mitsubishi HVAC systems are distributed by the same company that owns Trane and American Standard.
Mitsubishi mini splits are known to perform well in colder climates. They’re durable and more environmentally friendly than alternatives.
Daikin vs. Carrier
Daikin is a Japanese company with manufacturing facilities in the United States. Carrier is an American brand that’s made in the U.S.A.
Daikin has an especially good reputation when it comes to air conditioners and mini splits. Its systems are a bit more expensive than Carrier mini split prices, but they are generally better rated. Additionally, Daikin has more variety and options in its mini split line than Carrier.
Lennox vs. Carrier
Compared to Carrier, Lennox does not offer a good warranty. However, it says its prices are more competitive because of this. Still, Lennox systems are on the higher end price-wise.
Lennox has a bad rap when it comes to parts. If you need a replacement, you have to use Lennox – generic won’t do. Lennox parts are often difficult to get and might take a while to order. This can be really annoying if your AC goes out in the middle of a heatwave.
Carrier Performance mini splits provide good value with moderate features. The Performance line offers a range of heat pump and cabinet options. Customers can create a fully customized HVAC system.
This range delivers the most flexibility. You can choose a Carrier ductless heat pump for single- and multi-zone configurations. There are also indoor units with different mounting styles.
This Carrier ductless heat pump pairs with a variety of indoor units. It’s one of the most flexible outdoor systems Carrier offers for a single indoor zone.
We like that this heat pump is ENERGY STAR certified. It helps users save money via rebates and decreased utility bills. It’s a great option for homeowners who want to supplement their existing heating or cooling systems without breaking the bank. Reference the Carrier Performance 38MAR brochure for specifics about this model, like the cooling operating range.
The 38MBR runs quietly and efficiently. It supports single-zone installations where the heat pump and indoor unit are far apart.
This Carrier ductless heat pump is compact, making it a great solution for tight outdoor spaces. Explore the 38MBR brochure to decide which model is best for your needs.
The Performance 38MARB is extremely energy efficient and quiet. It will make a big difference for homeowners updating older HVAC systems.
This Carrier ductless heat pump is designed for single-zone installations. Its compressor works quickly to rapidly heat or cool a room. Learn more about this model’s enhanced features in the Carrier Performance 38MARB brochure.
The single-zone Carrier Performance 38MBRB provides value for homeowners. It’s affordable and helps reduce utility bills in the long term.
This moderately priced Carrier ductless heat pump operates well in extreme temperatures – from -22℉ to 122℉. No matter what the weather outside, the 38MBRB will keep you comfortable indoors. Learn more about the unit’s energy efficiency in the Carrier Performance 38MBRB brochure.
The 38MGR Carrier ductless heat pump supports multi-zone systems with up to five indoor cabinets. It’s compatible with a number of indoor units, so you can choose the best type for each room in your home.
This is a perfect outdoor unit for ductless homes that are ready to upgrade their heating and cooling. It runs quietly and is especially effective at removing indoor humidity in the summer. View the complete list of product lines in the Carrier Performance 38MGR brochure.
This indoor mini split cabinet can be part of single- or multi-zone installations. Its efficiency ratings depend on the outdoor heat pump it’s paired with.
The 40MAQ mounts high on the wall, so it’s ideal for families with pets or children. It’s unobtrusive and blends well with any furniture and decor. Reference the Carrier Performance 40MAQ owner’s manual for information about remote control functionality.
The 40MBCQ ceiling cassette requires overhead installation, laying nearly flush with your ceiling. It’s best to incorporate this unit into a remodel or new build.
This Carrier Performance product provides ultimate comfort with three fan speeds and a handheld remote. It can be used in single- or multi-zone systems. The 40MBCQ owner’s manual supports you with keeping the system clean.
The 40MBDQ looks like the heat registers used in some ducted HVAC systems. It can be installed in the ceiling, floor, or vertically within a wall. Because of this, it’s best for remodels or new builds.
This “ducted mount” unit can work in single- and multi-zone systems. You can control temperature and fan speed via remote. Complete remote instructions can be found in the Carrier Performance 40MBDQ owner’s manual.
This is a larger unit that sits on the floor, making installation a breeze. It’s powerful, heating or cooling a space efficiently.
You can adjust the 40MBFQ floor cabinet’s settings with a handheld remote. It’s compatible with single- or multi-zone Carrier mini split systems. Learn how to adjust the louvers with the 40MBFQ owner’s manual.
Other Carrier mini split options
Carrier makes two other mini split lines. Its Infinity mini splits are high-end, incorporating the latest technology and comfort features.
Carrier’s Comfort line provides budget-friendly mini splits, including the company’s only ductless AC system.
Carrier mini split prices
HomeAdvisor says mini splits cost about $875-6,000, including installation. Carrier systems are usually considered mid-range to high-end.
Our research shows that a single-zone Carrier mini split from the Performance line (one indoor and one outdoor unit) costs about $3,000. Prices vary based on your location and dealer.
Carrier mini split warranty
Typically, Carrier mini splits have a 10-year limited parts warranty. Your HVAC dealer may offer an additional labor warranty.
If you already own a Carrier Performance mini split, you can look up the warranty for your system here.
Purchasing a Carrier mini split
Ready to buy a mini split? Click below to connect with a dealer who can help you find the system that will meet your heating and cooling needs.
The Carrier Infinity mini split line is the company’s high-end range of mini split systems. If you’re looking for the ultimate efficiency and comfort, the Infinity series is a good match.
Though many consider these products to be the best Carrier mini splits, they may not be right for everyone. For example, the Infinity line only includes a wall-mounted cabinet, while the Preferred line has four mounting styles. Additionally, the Infinity line does not include a heat pump for multi-zone systems.
The Carrier Infinity 38MPRA is the brand’s top-of-the-line outdoor heat pump. It’s ENERGY STAR certified, which can score you rebates and lower utility bills.
This 38MPRA runs quietly. It heats and cools efficiently in temperatures as low as -22℉ and as high as 122℉.
The Carrier Infinity 38MPRA is designed for single-zone installation only. If you require multiple indoor cabinets, this system isn’t for you. View the Carrier Infinity 38MPRA brochure for more details about this model.
The Carrier Infinity 40MPHA is whisper-quiet, armed with the latest technology to enhance indoor comfort. For example, it has built-in Wi-Fi, so you can control the temperature remotely from anywhere.
This wall-mount Carrier mini split cabinet is unobtrusive in your space. We love that it senses where people are in the room and blows air away from them.
The Carrier Infinity 40MPHA can be used as part of a single- or multi-zone system. Homeowners with this model can reference the Carrier Infinity 40MPHA owner’s manual for maintenance guidance.
I need help choosing an air conditioner!
Connect with one of our pros now
Other Carrier mini split options
Carrier makes two other lines of mini splits. The Performance line is considered mid-range. It has the most flexible array of indoor cabinets and outdoor heat pumps.
Carrier’s Comfort line is more affordable. It has fewer options but does offer the company’s only ductless AC-only equipment.
Check out these other products to determine the best Carrier mini split for you.
Carrier Infinity mini split prices
According to HomeAdvisor, mini splits cost between $875 and $6,000, including installation. Carrier mini splits are considered mid-range to high-end compared to competitors.
Our research shows that a single-zone Carrier Infinity mini split costs about $3,600. Prices vary based on your location and your Carrier dealer.
Carrier mini split warranty
Carrier offers a 10-year limited parts warranty on its mini splits (for the original owner). Your Carrier dealer may offer a supplemental labor warranty.
If you already own a Carrier Infinity mini split, you can look up the warranty for your model here.
Buying a Carrier mini split
Ready to purchase a mini split? Click below to connect with a dealer who can help you find the best Carrier mini split for your needs.
Indoor comfort isn’t as simple as the air conditioner outside your home. Rheem indoor air handlers have the widest variety of comfort-elevating options on the market.
Our guide to Rheem air handlers offers a look at the brand reputation, air handler dimensions, specs, brand comparisons, and more. Learn if a Rheem air handler is right for you.
Are Rheem air handlers good?
Rheem is a big name in the HVAC space, and for good reason. It’s delivered reliable, high-quality products since the 1920s.
The brand first emerged in the home comfort space by producing quality water heaters and boilers. Today, Rheem takes that same technology and quality and creates one of the most unique lines of air handlers on the market.
Most air handlers Rheem sells are for electric cooling, and the traditional models have optional electric heating attachments for heat pumps. However, the brand is especially known for its hydronic heaters. These tankless systems work with water-heating options like boilers.
One hydronic series is compatible with almost every HVAC system Rheem sells, from air conditioners to heat pumps and water heaters. The hydronic series are somewhat pricey, but they are powerful and designed to run quietly.
Rheem air handlers offer a wide variety of motor technology and speeds. The brand sells low-, mid-, and high-efficiency models with a bit of something for everyone.
Rheem caters to a wider variety of consumers than premium brands like Trane or Lennox, while also having more electronically commutated motors (ECM) and features than a value brand like Goodman. It’s a great mid- to high-level brand with a wide inventory and reputation for durability.
Skip the search. Talk with an HVAC pro about the best air handlers.
Yes, please!
Coil technology
All but three Rheem air handler models have all-aluminum evaporator coils. Manufacturers are slowly shifting from mixed-metal to all-aluminum coils, but Rheem was ahead of the trend when introducing its new coil in 2015.
Keep in mind that the cabinet-height model (RBHP) and some of the wall mount models (RHAL/RHBL) still have mixed-metal coils. They use copper tubing and aluminum fins.
Blower motor speeds
Rheem air handler blower motors, like nearly all other brands, come in two types: an electronically commutated motor (ECM) and permanent split capacitor (PSC).
The biggest difference between an ECM and PSC blower motor is the level of power used to blow conditioned air through your home. A PSC runs at 100% power every time it turns on. This makes the blower motor less energy efficient and often creates a shorter lifespan for the motor.
An ECM offers multiple levels of power to only blow as hard as needed to maintain the desired thermostat setting. The ECM rarely operates at 100%, making it much more energy efficient with the ability to keep your home more comfortable.
All Rheem cabinet height and wall mount air handlers use a PSC motor, but the traditional air handlers offer both options, depending on the model.
While the RH1V and RH2V both have variable-speed blower motors, they are designed for two-stage outdoor units. Only the RHMV series is compatible with variable-speed or modulating outdoor units. Premium brands like Trane, Lennox, and Carrier offer a bigger selection of variable-speed air handlers.
If, however, you have a single-stage air conditioner, Rheem offers an unmatched selection.
Smart technology
Two Rheem air handler series, RHMV and RH2T, come with EcoNet® communicating technology. This system senses your humidity and temperature levels, then makes adjustments that optimize your comfort level while minimizing energy usage.
Plus, you can control the airflow from the Rheem EcoNet® app. The app is also compatible with Amazon Alexa, so you can change the settings hands-free.
Note that EcoNet® requires a Rheem smart thermostat and a Rheem outdoor air conditioner unit. If you aren’t looking to revamp your whole system, standalone technology like Goodman ComfortBridge is a better option.
Air handler sizes
Every Rheem air handler is available in multiple sizes. Air handler sizing is usually measured in tons.
Tonnage is not the weight of the air handler itself. Tonnage is the power output, or capacity, of the air handler unit. Sometimes, air handler capacity is listed in British Thermal Units (BTU) rather than tons. 12,000 BTU/hour is equivalent to 1 ton of output.
Most air handlers range from 1.5 to 5 tons of output, but Rheem has a higher-capacity unit than many competitors. The RWMV ranges from 3 ⅓ to 8 ⅓ tons, making it a great fit for larger homes.
Your local Rheem contractor can help you determine what size air handler you need. It depends on the size of your outdoor unit and your climate region, among other factors.
Rheem air handler product overview
Unlike most competing brands, Rheem does not divide its air handler series into official price or performance tiers. Here’s a comprehensive look at dimensions, blower motor speeds, and more.
Rheem air handler model
System type
Blower motor type and speed
Capacity (tons)
Dimensions (D x H x W)
RWMV
Variable, electric or hydronic
Variable/constant CFM (ECM)
3 ⅓ – 8 ⅓
20.5” X 34” X 22”
RHMV
Variable, electric
Variable/constant CFM (ECM)
1.5-5
25.31” X 42.75” X 24”
RH2T
Two-stage
Constant torque (ECM)
1.5-5
25.31”X 42.75” X 24”
RW1T
Single-stage, hydronic
Constant torque (ECM)
2-5
22” X 34” X 14”
RH2V
Two-stage
Variable/constant CFM (ECM)
1.5-5
21.69” X 42.5” X 21”
RH1V
Single-stage
Constant torque (ECM)
1.5-5
21.69” X 57” X 21”
RH1T
Single-stage
Constant torque (ECM)
1.5-5
21.69” X 42.5” X 17.5”
RF1P
Single-stage, electric
PSC
1.5-3
17” X 36’ X 21.5”
RW1P
Single-stage, hydronic
PSC
2-5
22” X 34” X 14”
RF1T
Single-stage, electric
Constant torque (ECM)
1.5-3
17” X 36’ X 21.5”
RBHP
Single-stage, electric
Constant torque (ECM)
N/A (blower unit)
22” X 35” X 21”
RH1P
Single-stage, electric
PSC
1.5-5
21.69” X 42.5” X 17.5”
RHAL
Single-stage, electric
PSC
1.5-3
21” X 36” X 24”
RHBL
Single-stage, electric
ECM
2-3
17” X 36” X 21.5”
RHWB
Electric
PSC or ECM options
3-5
26 3/16” X 34” X 28 1/16”
Looking for the right Rheem air handler for your home?
Find it today
Rheem air handler prices and installation
Rheem is considered a mid-range brand. Rheem air handlers and air conditioners generally cost less than premium brands like Trane, Lennox, or Carrier.
Rheem is generally pricier than value brands like Goodman or Coleman. Rheem pricing is generally on par with other mid-range brands like Heil and Maytag.
However, Rheem pricing varies greatly due to the wide range of air handler options. Some of the premium options are just as expensive, if not more, than offerings from Carrier or Trane.
Below are some estimates of Rheem air handler rates. The unit cost refers to a Rheem 3-ton air handler and does not include installation costs.
Air handler type
Model number
Cost (unit only)
Traditional
RHMV
$1,635-2,185
Traditional
RH2V
$1,535-2,000
Traditional
RH1V
$1,400-1,875
Traditional
RH2T
$1,485-2,000
Traditional
RH1T
$895-1,235
Traditional
RH1P
$650-995
Traditional
RBHP
$875-1,225
Front return/compact
RF1T
$735-985
Front return/compact
RF1P
$650-815
Front return/compact
RHAL
$700-865
Front return/compact
RHBL
$715-880
Hydronic
RWMV
$1,900-2,200
Hydronic
RW1T
$1,375-1,635
Hydronic
RW1P
$1,295-1,555
Hydronic
RHWB
$1,000-1,300
Rheem air handler installation
HomeAdvisor estimates that you’ll pay somewhere between $1,200 and $1,800 to install your Rheem air handler.
We strongly suggest hiring a contractor and avoiding DIY installation. An improper installation can tank your energy efficiency and leak refrigerant, causing a safety concern.
Plus, Rheem asks for your contractor’s contact information when you register the warranty. Trying to install a Rheem air handler yourself will risk voiding the warranty.
All traditional and front return Rheem air handlers have a 10-year conditional parts warranty. To claim the warranty, you must register your device online within 60 days of purchase.
Some air handler models have a shorter or less comprehensive warranty. The table below breaks down the policy for each series.
With any investment as big as an air handler, it’s important to compare brands. We explore some areas where Rheem triumphs over competing brands and some potential areas of improvement.
Plus, we stack Rheem up against top HVAC names. For more about what’s on the market, check out our reviews of Trane, Carrier, Goodman, and Lennox air handlers.
✅ Pros
❌ Cons
4-way installation (all traditional models)
Premium options get pricey
Communicating technology in multiple price tiers
Only one series for modulating/variable-speed ACs
Constant CFM blower motors in multiple price tiers
Lower energy efficiency ratings than some competitors
Rheem vs. Trane
Rheem and Trane have some of the widest air handler varieties on the market. Both make traditional, compact, and wall mount options for electric and hydronic heat.
Both brands were also early adopters of all-aluminum coils. The main difference between the two is that a Trane air handler will likely last longer, but a Rheem is more affordable and is still made well for the price.
Rheem vs. Goodman
Rheem and Goodman are both considered value to mid-range brands. Both offer PSC motors, whereas brands like Trane, Carrier, and Lennox have switched to more efficient motors.
Goodman offers fewer ECM motors than Rheem. Plus, Rheem has a more expansive selection of air handlers than Goodman.
While Rheem is slightly more expensive than Goodman, Rheem air handlers are built with better insulation and are more reliable.
Rheem vs. Ruud
The two companies were founded separately, but Rheem acquired Ruud back in 1960. Rheem and Ruud’s parent company is the Japan-based Paloma Industries.
Many Rheem and Ruud air handlers are manufactured at the same plant. Most are structurally identical, except they’re given a Ruud label rather than a Rheem.
Rheem and Ruud air handlers share many of the same model numbers. Both brands are comparable in terms of price, but Rheem air conditioners have a reputation for being slightly less noisy than Ruud outdoor units.
When it comes to variety and selection, it doesn’t get much better than Rheem. There is a Rheem air handler for virtually any motor type, heating, or cooling system you have.
Rheem’s hydronic and variable-speed models can get pricey, and it lacks the sky-high energy efficiency of brands like Lennox. Still, Rheem air handlers are great mid-range options for many homeowners.
Not sure which air handler is right for you? Our pros can help.
Estimating air conditioner repair costs in Dallas can be difficult when you don’t know the exact issue. HomeAdvisor says the average cost of AC repair in Dallas is $397, just slightly above the national average.
The cost of air conditioner repair depends on the severity of the issue. For example, a clogged drain pain costs much less to address than a total system overhaul. HomeAdvisor says prices in Dallas can range $65-2,000.
Below, we’ve outlined specific pricing for Dallas’s common air conditioner repair needs. This information should give you a clear picture of what you can expect to pay to get your AC back up and running.
Give me a price quote for AC repair now
Yes, please!
Common Dallas air conditioner repair costs
Refrigerant leak
Refrigerant (sometimes called freon) is vital to your AC’s operation. If there’s a leak somewhere, your system may freeze intermittently or stop working entirely.
HomeAdvisor says air conditioner repair involving a refrigerant leak costs $225-1,600 on average. The price includes detection and repair of the leak and a refrigerant recharge.
Compressor repair
If your compressor has trouble turning on and staying on, your air conditioner repair person may recommend a hard start kit. These typically cost $100-250.
The need for a hard start kit may indicate more serious problems with your AC. Though it can keep your system going for a short time, you may want to start budgeting for a new compressor.
Blower motor repair
Your AC’s blower motor pushes cold air from the condenser into your home. An air conditioner repair technician will charge about $150, or more, for a repair, based on the severity of damage.
Capacitor repair
Your AC capacitor resides in your condenser. It provides power to the motor that drives your system.
It costs $120-475 for an air conditioner repair person in Dallas to replace your capacitor.
Expansion valve
Your AC’s expansion valve drops the pressure of the refrigerant to cool it. It’s attached to the system’s evaporator.
An air conditioner repair person in Dallas will likely charge about $450 to repair your expansion valve.
AC maintenance visit
You can hire an air conditioner repair technician to perform routine maintenance on your system. It’s especially helpful to schedule maintenance before the Dallas weather starts heating up in the spring.
Generally, these maintenance visits cost $80-100. They may cost more if your air conditioner repair person has to replace or repair a part.
AC troubleshooting/diagnostic visit
Sometimes, you don’t know what’s wrong with your AC. You just know you need an air conditioner repair person!
For a diagnostic visit to identify an issue, most technicians will charge $75-180.
Hourly air conditioner repair costs in Dallas
While most air conditioner repair technicians charge by the job, some price their service based on the hours of labor required.
Nationwide, air conditioner repair ranges $35-200 an hour. The price varies based on your location, your AC system, and the time of year. For example, air conditioner repair technicians can charge a premium in the summer when people in Dallas are desperate to cool off.
Using HomeAdvisor’s numbers, the average air conditioner repair cost in Dallas works out to about $120 an hour.
Air conditioner replacement costs in Dallas
Sometimes, your air conditioner repair technician may determine you need to replace rather than repair a part of your AC. Following are some common replacement costs from HomeAdvisor.
Air conditioner part
Average estimated replacement cost in Dallas
Air handler
$2,200-3,800
Blower motor
$250-800
Circuit board
$120-600
Circuit breaker
$15-300
Compressor
$1,200+
Condenser
$1,750
Ducts
$1,180
Fuses
$15-300
Evaporator coil
$650-1,200
Fan motor
$100-700
Relays
$15-300
Thermostat
$115-200
Alternative air conditioner repairs
The above cost estimates reflect repairs on a traditional central AC system. However, some Dallas homes have other types of cooling systems.
Following are average air conditioner repair costs from HomeAdvisor for some different cooling units.
Air conditioner type
Average estimated repair cost in Dallas
Ductless mini split
$1,00-3,500
Geothermal air conditioner
$200-700
Standalone portable air conditioners
$80-250
Swamp cooler
$125-500
Window air conditioner
$50-125
Who to call for air conditioner repair in Dallas
Need a Dallas air conditioner repair pro? We can hook you up! Click below to connect with a local technician.